background image

Acer AT3720A/3720B/3720 LCD TV

Service Guide

   
                                                                                                                                     PRINTED IN TAIWAN

Service guide files and updates are available

on the ACER/CSD web; for more information, 

please refer to 

http://csd.acer.com.tw

Summary of Contents for AT3720

Page 1: ...Acer AT3720A 3720B 3720 LCD TV Service Guide PRINTED IN TAIWAN Service guide files and updates are available on the ACER CSD web for more information please refer to http csd acer com tw ...

Page 2: ...II Revision History Please refer to the table below for the updates made on Acer LCD TV AT3720A 3720B 3720 service guide Date Chapter Updates ...

Page 3: ...tations or warranties either expressed or implied with respect to the contents hereof and specifically disclaims any warranties of merchantability or fitness for any particular purpose Any Acer Incorporated software described in this manual is sold or licensed as is Should the programs prove defective following their purchase the buyer and not Acer Incorporated its distributor or its dealer assume...

Page 4: ... bits and pieces of additional information related to the current topic WARNING Alerts you to any damage that might result from doing or not doing specific actions CAUTION Gives precautionary measures to avoid possible hardware or software problems IMPORTANT Reminds you to do specific actions relevant to the accomplishment of procedures ...

Page 5: ... NOT be covered in this generic service guide In such cases please contact your regional offices or the responsible personnel channel to provide you with further technical details 2 Please note WHEN ORDERING FRU PARTS that you should check the most up to date information available on your regional web or channel If for whatever reason a part number change is made it will not be noted in the printe...

Page 6: ...VI ...

Page 7: ...for DVI D optional T 19 pin HDMI connector optional T DIN45325 IEC169 2 Terminal for TV CATV input T 3 5 mm Earphone jack for audio line input Video Functions T Support PAL NTSC SECAM video format for AT3720A T Support 480i 576i 480p 576p 1080i and 720p format T Build in Dynamic adaptive smoothing filter T Build in Dynamic temporal frame filtering Noise Reduction T Build in Dynamic motion and edge...

Page 8: ...2 Chapter 1 T Input current 2 2A T Standby consumption is under 5 Watts Speaker T Internal speaker 10 W 2 stereo volume adjustable T Amplimfier 10W 2 stereo volume adjustable ...

Page 9: ...er 1 3 System Block Diagram System Block and Wiring Diagram LCD Main Board Block Diagram MAIN Board SPEAKER IR Receiver Key Board Component2 Component1 AV 2 AV 1 I O Board A Tuner INVERTER PANEL Module POWER ...

Page 10: ...r Board Inverter Cable 2 CN903 Power Board CON15 Main Board Audio Cable Main board audio to power board 3 CN904 CON11 Power Cable 4 CON6 Main Board CN1 Button Board CN1 IR Board Button Board IR Board CN1 Main Board CN1 Cable 5 CON17 Main Board LVDS Cable 6 CON13 Main Board Speaker Cable ...

Page 11: ... off the LCD TV 2 Menu key Turn s the OSD menu On and OFF 3 Channel up down Channel up When the OSD is on functions the same as the Up arrow Channel down When the OSD is on functions the same as the Down arrow 4 Volume Volume up When the OSD is on functions the same as the Right arrow Volume down When the OSD is on functions the same as the Left arrow 5 Input key When is OSD is on press this butto...

Page 12: ...6 Chapter 1 T3720A Rear panel view Item Item 1 Power switch 6 PC Audio in 2 AC in 7 AV Audio L R COMPONENT 1 2 3 HDMI 8 AV Audio L R CVBS 1 2 4 VGA in 9 Analog antenna 5 DVI d 4 3 2 1 8 7 6 5 9 ...

Page 13: ... 7 AT3720B Rear panel view Item Item 1 Power switch 6 Audio L R CVBS COMPONENT 2 AC in 7 Audio L R CVBS COMPONENT 1 2 3 HDMI 8 Audio L R CVBS 1 2 S Video 4 VGA in 9 Analog antenna 5 PC Audio in 4 3 2 1 9 8 7 6 5 ...

Page 14: ...8 Chapter 1 AT3720 Rear panel view Item Item 1 Power switch 5 PC Audio in 2 AC in 6 AV Audio L R CVBS COMPONENT 3 HDMI 7 SCART 4 VGA in 8 Analog antenna 4 3 2 1 8 7 6 5 ...

Page 15: ...ource type 3 MUTE Press to toggle audio on and off 4 Input buttons TV AV COMPONENT PC Press to select correct input mode 5 SLEEP Press to set a time period after which the TV will switch itself to standby 15 30 45 60 90 or 120 minutes 6 Number keys Press to select the TV channel 7 RECALL Press to reture to the previous channel 1 7 11 2 10 6 3 9 8 4 5 12 13 15 16 17 14 18 19 20 21 ...

Page 16: ...tereo main and SAP Information is displayed in the top right hand corner 14 e Empowering Technology Press to activate Acer Empowering Technology 15 VOL Press to increase or decrease the volume 16 CH up down Press to sequentially select the TV channel 17 PIP PBP POP Switch between PIP PBP POP modes 18 SWAP For PIP PBP mode Toggle between the primary and subscreens 19 ACTIVE Tobble between primary a...

Page 17: ...source type 3 MUTE Press to toggle audio on and off 4 Input buttons TV AV COMPONENT PC Press to select correct input mode 5 SLEEP Press to set a time period after which the TV will switch itself to standby 15 30 45 60 90 or 120 minutes 6 Number keys Press to select the TV channel 7 RECALL Press to return to the previous channel 1 7 11 2 10 6 3 9 8 4 5 12 13 15 16 17 14 18 19 20 21 ...

Page 18: ...17 PIP PBP POP Switch between PIP PBP POP modes 18 SWAP For PIP PBP mode Toggle between the primary and subscreens 18 ACTIVE Toggle between primary and subscreens 20 POSITION When in PIP mode Change subscreen position 21 SIZE MODE When in PIP mode Change subscreen size When in POP mode Switch POP mode from 1 5 to 1 12 No Item Description 1 Colour buttons R G Y B Operates corresponding button on th...

Page 19: ...PC Press to select correct input mode 5 SLEEP Press to set a time period after which the TV will switch itself to standby 15 30 45 60 90 or 120 minutes 6 Number keys Press to select the TV channel 7 RECALL Press to return to the previous channel 8 ENTER Press to confirm channel number selection 9 MENU Press to open or close the Menu 10 TTX MIX TELETEXT MIX Press to return to the previous channel 1...

Page 20: ...equentially select the TV channel No Item Description 1 Colour buttons R G Y B Operates corresponding button on the teletext page 2 INDEX Press to go to the index page 3 SIZE Press once to zoom teletext page to 2X Press again to resume 4 SUBTITLE Press to view subtitles on the screen 5 SUBPAGE Press to access the teletext s subpages directly 6 HOLD Press to pause the current teletext page in multi...

Page 21: ...apter 1 15 Basic connection Connecting the power cord 1 Connect the AC cord into the AC input on the back of the set 2 Connect the male plug to the wall outlet as shown For AT3720A For AT3720B For AT3720 ...

Page 22: ...cable to the appropriate antenna terminal on the back of the TV set as shown below Getting started watching your TV 1 Select the setup language you prefer 2 Please select country 3 Ensure that your co axial cables connected correctly before proceeding 1 2 4 1 1 3 ...

Page 23: ...r button number keys or channel up down button on the remote control 2 Setup Wizard The first time you switch on the TV the Setup Wizard will guide you to complete the language selection and channel scanning Press OK key to begin the setup process 3 Changing channels a Press 0 9 on the remote control to select a channel The channel changes after 2 seconds Press ENTER to select the select the chann...

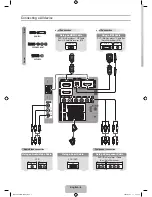
Page 24: ...nt Connect your DVD player VCR or audio video equipment using the SCART port located at the rear of your LCD TV as shown below For AT3720A NOTE Acer recommends the following priority for connection types HDMI DVI D Sub COMPONENT S Video Composite Source IN Y Yellow Red White Blue Green S video R W S ...

Page 25: ...Chapter 1 19 For AT3720B Y Yellow Red White Blue Green R W 6 YLGHR 6 ...

Page 26: ...nect your camera or camcorder to the video audio ports on the rear of the TV set as shown below Source IN Acer recommends the following priority for connection types HDMI COMPONENT SCART Composite TV OUT SCART out only works with analog broadcasts Y Yellow Red White Blue Green R W ...

Page 27: ... computer To display PC output on your TV connect your PC or notebook computer to the TV as shown below For AT3720A NOTE For VGA and DVI input Acer recommends setting your PC s external monitor resolution to 1360 x 768 pixel 60 Hz For AT3720B ...

Page 28: ...electing the input source Once you have connected your antenna or external equipment to the TV you need to select the correct input source Press the corresponding button on the remote control to select the correct input source ...

Page 29: ... COMPONENT 1 COMPONENT2 and AV3 COMPONENT between input sources 4 PC key Toggle VGA between input sources No Item Input Button Guide 1 TV key Toggle Analog TV ATV between input sources 2 AV key Toggle AV1 AV2 AV3 CVBS and HDMI between input sources 3 COMPONENT key Toggle COMPONENT 1 COMPONENT2 and AV3 COMPONENT between input sources 4 PC key Toggle VGA between input sources TV AV COMPONENT PC 1 2 ...

Page 30: ...anel view section for AT3220A No Icon or Display Description There are six main OSD menus These are Picture Audio Channel management Options Settings and Empowering Use the following method to navigate these menus 1 Press the MENU button on the remote control or the MENU button on the control panel 2 Select your desired menu by using the up and down directional keys to switch betwee the six menus ...

Page 31: ...e you wish to adjust 3 Use the left or right keys to adjust the sliding scale Press OK to save 4 The Audio menu can also be used to adjust the treble balance sound effects and other important sound related settings Adjusting the channel management 1 Press the MENU key to bring up the OSD 2 Using the directional keys select Channel management from the OSD 3 Use the directional keys to navigate the ...

Page 32: ...26 Chapter 1 NOTE The options available on the OSD may vary depending on the TV signal source ...

Page 33: ...ult setting Default setting in different mode Set up Empowering mode Less than 2 seconds More than 2 seconds 1 Press and hold the Empowering Key for more than two seconds to open the menu 2 Use the directional keys to navigate the menu and select the Empowering Technology icon 3 Press MENU to exit Now when you press the Empowering Key your chosen selection will be accessed TV mode Empowering Key s...

Page 34: ...e entertainment while protecting your eyesight by adjusting brightness and contrast What s more Game mode provides a heightened audio experience Sports Sports mode is suited for outdoor sports programs with accurate background depth and clear gradation between the bright outdoor playing field and darker auditoriums Sports mode also brilliantly enhances colors and presents swiftly moving pictures w...

Page 35: ...gating the OSD with Remote Control There are five main OSD menus These are Picture Audio Settings Options and Empowering Use the following method to easily navigate these menus 1 Press the Menu button on the remote control or the Menu button on the control panel 2 Select your desired menu by using the Left Right sides of the directional pad ot switch between the five menus 3 Use the directional pa...

Page 36: ...w Item Description INDEX Go to index page SUBTITLE Show subtitle on the screen TELETEXT Press to switch from TV AV to Teletext mode REVEAL Press to reveal hidden teletext information SIZE Press once to zoom teletext page to 2X press again to resume MIX Press to overlay teletext page on the TV image i e subtitle HOLD Press to pause the current teletext page in multi page viewing mode Color buttons ...

Page 37: ... PIP PBP POP Picture on Picture POP POP POP POP POP PIP 1a Press the ACTIVE key to toggle between PIP screens TV AV COMPONENT PC 1b Press the TV AV COMPONENT or PC keys number keys or CH up or down to change the content of the active screen 2 Press the SWAP key to change the content between the primary and the subscreen PIP PIP Swap 3 Press the POSITION key to select the location of the subscreens...

Page 38: ...1a Press the ACTIVE key to toggle between PBP screens TV AV COMPONENT PC 1b Press the TV AV COMPONENT or PC keys number keys or CH up or down to change the content of the active screen 2 Press the SWAP key to change the content between the primary and the PBP screen PBP PBP Swap POP 1a Press the ACTIVE key to toggle between POP screens 1b Press the number keys or CH up or down to change the TV cha...

Page 39: ...e Settings menu Then select Set PIN see note 3 Enter a four digit password Type it again and press OK to reconfirm 4 Press MENU to exit Locking your TV 1 Press the MENU key on the remote control to bring up the OSD 2 Use the directional keys to navigate to the Settings menu Then select Lock TV 3 Enter your PIN Type it again and press OK to reconfirm see page 16 note ...

Page 40: ...8 0 271 0 145 0 275 0 335 0 597 0 065 0 298 8 Color temperature Five models are adjustable Cold Middle cold Standard Middle warm Warm 16 000 degree K 14 000 degree K 12 000 degree K 10 000 degree K 8 000 degree K 9 White uniformity N A 10 White dispersion N A 11 Brightness 500 Cd m2 typical 12 Contrast Ration 1200 1 typical 13 Uniformity N A 14 Overscan N A 15 Vision angle Ultra wide viewing angle...

Page 41: ...0ms mains interrupt with max load min mains voltage No software reboot during the test No over voltage causing any damage during mains interrupt 0 to any time 5 Inverter The inverter which is used to light up backlight of LCD panel is well designed to meet requirement of panel specification 1 Audio input Level 500 mVrms Type Stereo R L Channels Impedance More than 22 K ohm Interface RCA Jack R Red...

Page 42: ...eristics 6 Scanning mode Automatic Multi standard frequency based Level range 55dBuV to 100dBuV Abort possible during scanning process Manual Frequency setting is available 7 Analog TV naming function Automatic Manual CNI recognition 5 characters 8 PIP POP PBP function PIP PIP multiple size PIP multiple position POP POP source POP main sub 20 30 4 corners video graphic main by ATV sub 1 5 1 12 Mul...

Page 43: ...ction Full screen Subtitle Hold Size 4 color keys R G Y B 11 Video standard supported PAL SECAM automatic detection PAL 4 43 M 50Hz B G D K SECAM L Main Sub TV AV1 AV2 HDMI Component 1 Component 2 VGA DVI TV X X X X X X O X AV1 X X X X X X O X AV2 X X X X X X O X HDMI X X X X X X O X Component 1 X X X X X X O X Component 2 X X X X X X O X VGA O O O O O O X O DVI X X X X X X O X Main Sub TV AV1 AV2...

Page 44: ... 16 9 panorama letterbox1 letterbox2 letterbox3 NOTE PC DVI only support 4 3 16 9 16 Scenario functions Settings Noise reduction Standard movie sport concert game user Off Low Middle High 17 Audio management User adjustment Volume Balance Bass Treble Mute Mono Stereo Sound1 Sound2 18 Audio enhancement Stereo SRS WOW BBE 19 AV sub format supported CVBS YC RGB YUV 20 Copy protection management HDCP ...

Page 45: ...pins HDMI signal link HDCP 8 PC D sub in Yes 9 PC Audio in Yes 1 Operating 25o 5o for purity white point mis convergence luminance measurements and white uniformity measurement Operating temperature Operating humidity 0oC to 35oC 10 to 90 non condensing 2 Storage and Shipping Storage temperature Shipping temperature Storage humidity Shipping temperature 20o C to 60o C 20oC to 60oC 10 to 90 non con...

Page 46: ...tation of any design or manufacturing change that might affect vibration performance a minimum of 2 units shall be demonstrated to meet the requirements of specification Drop Test The packaged display shall be capable of passing drop test as specified in following specification without any measurable degradation in performance or detectable mechanical or cosmetic damage Filter 330 Hz Dropping way ...

Page 47: ...at for preventing electrostatic discharge T small Philips screwdriver T flat head screwdriver T Philips screwdriver T tweezers NOTE The screws for the different components vary in size During the disassembly process group the screws with the corresponding components to avoid mismatch when putting back the components When you remove the stripe cover please be careful not to scrape the cover Chapter...

Page 48: ... Begin Before proceeding with the disassembly procedure make sure that you do the following 1 Turn off the power to the system and all peripherals 2 Unplug the AC adapter and all power and signal cables from the system 3 Remove the battery pack ...

Page 49: ...es you a graphic representation on the entire disassembly sequence and instructs you on the components that need to be removed during servicing For example if you want to remove the system board you must first remove the keyboard then disassemble the inside assembly frame in that order ...

Page 50: ... and remove the EMI shielding 8 Remove eight screws holding the power board and the screw fastening the power board ground cable Then disconnect the cables from the power board and remove the power board 9 Remove the four screws highlighted in red holding the main board and one screw highlighted in yellow fastening the cable on the main board Then disconnect the cables from the main board and remo...

Page 51: ...er 17 Remove the three screws fastening the button board then disconnect the cable and remove the board 18 Remove the two screws holding the IR board then disconnect the IR board cable and remove the IR board 19 Remove the three screws holding the main board keypad I R board cable and remove the cable 20 If you need to take out the entire LCD module from the front bezel please remove the four scre...

Page 52: ...hen you can hold the LCD brackets and lift the entire LCD module then take it away 25 If you need to detach the LCD brackets from the LCD module please remove two screws as shown 26 Remove two screws on as shown 27 Remove two screws as shown 28 Remove two screws as shown 29 Then remove four screws holding the LCD brackets to the LCD ...

Page 53: ... detach the LCD brackets from the LCD 32 Remove the three screws holding the inverter bracket 33 Detach the inverter bracket carefully 34 Disconnect the inverter cable and backlight cables from the inverter 35 Remove the three screws fastening the inverter and remove the inverter ...

Page 54: ...48 Chapter 3 ...

Page 55: ...attempting to re create the failure by running the diagnostic test or by repeating the same operation 3 Disassemble and assemble the unit without any power sources 4 If any problem occurs you can perform visual inspection before you fellow this chapter s instructions You can check the following power cords are properly connected and secured there are no obvious shorts or opens there are no obvious...

Page 56: ... board or Main board Or IO board or All cable LED Bright Replacement Panel A Replacement M B END no LED Bright Green color Check Remote control and keypad OK Replacement Remote control or IR board or Keypad board NG Replacement Cable Check M B no no no LCD Panel can Display no Check panel s all cable Replacement M B ...

Page 57: ... Inverter power Cable had Plug in Change Inverter Power Cable LCD Panel Backlight Bright Replacement Power B Replacement LCD Panel Inverter B END LCD Panel Backlight Bright LCD Panel Backlight Bight Replacement Main B B no no no no ...

Page 58: ...e function Remote Control have battery Change Battery IR Board Cable plug in Check IR B cable or Replacement IR B Cable Press Remote Menu Key OSD can Display Replacement IR B C Press Remote Menu Key OSD can Display Replacement M B END no no no no ...

Page 59: ...key does not have function Key Board Cable plug in Check K B cable or Replacement K B Cable Press Menu Key check have Function Replacement K B Cable End Press Menu Key check have Function Replacement K B Cable End D no no no ...

Page 60: ...54 Chapter 4 5 RF no display RF Cable plug in Check RF cable or Replacement RF Cable Replacement I O board RF Can Display END Replacement M B E no no ...

Page 61: ...Chapter 4 55 6 Component 1 2 no display Component Cable plug in Check Component cable or Replacement Component Cable Replacement I O Board Component can display END Replacement M B Board F no no ...

Page 62: ...56 Chapter 4 7 AV1 AV2 no display CVBS Cable plug in Check CVBS cable or Replacement CVBS Cable Replacement I O Board CVBS cat display END Replacement M B Board Can no G no ...

Page 63: ...rce cable Replacement IO B or Speaker Video can Display Check Video cable or Replacement Video Cable Speaker R L cable plug IN Check Speaker cable or Replacement Speaker cable END Mute turn off Volume set 50 H Speaker have Sound Output Speaker have Sound Output no Replacement M B no no no no ...

Page 64: ...58 Chapter 4 9 VGA no display DVI Cable plug in Check DVI cable or Replacement DVI Cable Read EDID DATA EDID Data Normal END Write EDID data DVI can display Replacement M B no J no no ...

Page 65: ...Chapter 4 59 10 DVI no display DVI Cable plug in Check DVI cable or Replacement DVI Cable Read EDID DATA EDID Data Normal END Write EDID data DVI can display Replacement M B no J no no ...

Page 66: ...60 Chapter 4 11 HDMI no display HDMI Cable plug in Check HDMI cable or Replacement HDMI Cable Read EDID DATA EDID Data Normal END Write EDID data HDMI can display Replacement M B no K no no ...

Page 67: ...Chapter 4 61 12 HDMI no sound HDMI Cable plug in Check HDMI cable or Replacement HDMI CABLE Read EDID DATA EDID Data normal Write EDID data Sound output Replacement Main B END no L no no ...

Page 68: ...Sound Normal Replacement Main B M Turn off Mute function Volume set to 50 PC DVI can Display Check Video cable or PC or Replacement VGA DVI cable no Audio Line in Cable Plug IN Check Line in cable or Replacement Line in Cable END no no ...

Page 69: ...in Check Component cable or Replacement Component Cable Component Sound Normal Replacement IO B END Component Sound Normal N L1 Mute turn off Volume 30 Component Source can Display Check Component cable or Replacement Component Cable no no no no Replace M B ...

Page 70: ...ck Video and R L cable or Replacement Video or R L Cable AV1 S Video Sound Normal Replacement IO B END AV1 S Video Sound Normal L1 Mute turn off Volume 30 AV1 S Video Source can Display Check Video and R L cable or Replacement Video or R L Cable no O Replace M B no no no ...

Page 71: ...hange is made it will not be noted on the Service Guide For ACER AUTHORIZED SERVICE PROVIDERS your Acer office may have a DIFFERENT part number code from those given in the FRU list of this printed Service Guide You MUST use the local FRU list provided by your regional Acer office to order FRU parts for repair and service of customer machines NOTE To scrap or to return the defective parts you shou...

Page 72: ...66 Chapter 4 AT3720A Exploded Diagram AT3720A AT3720B AT3720 FRU List is not ready as the service guide released We will add the FRU list as soon as possible ...

Page 73: ...Chapter 4 67 ...

Reviews: