


7
En
gli
sh
E
n
glish
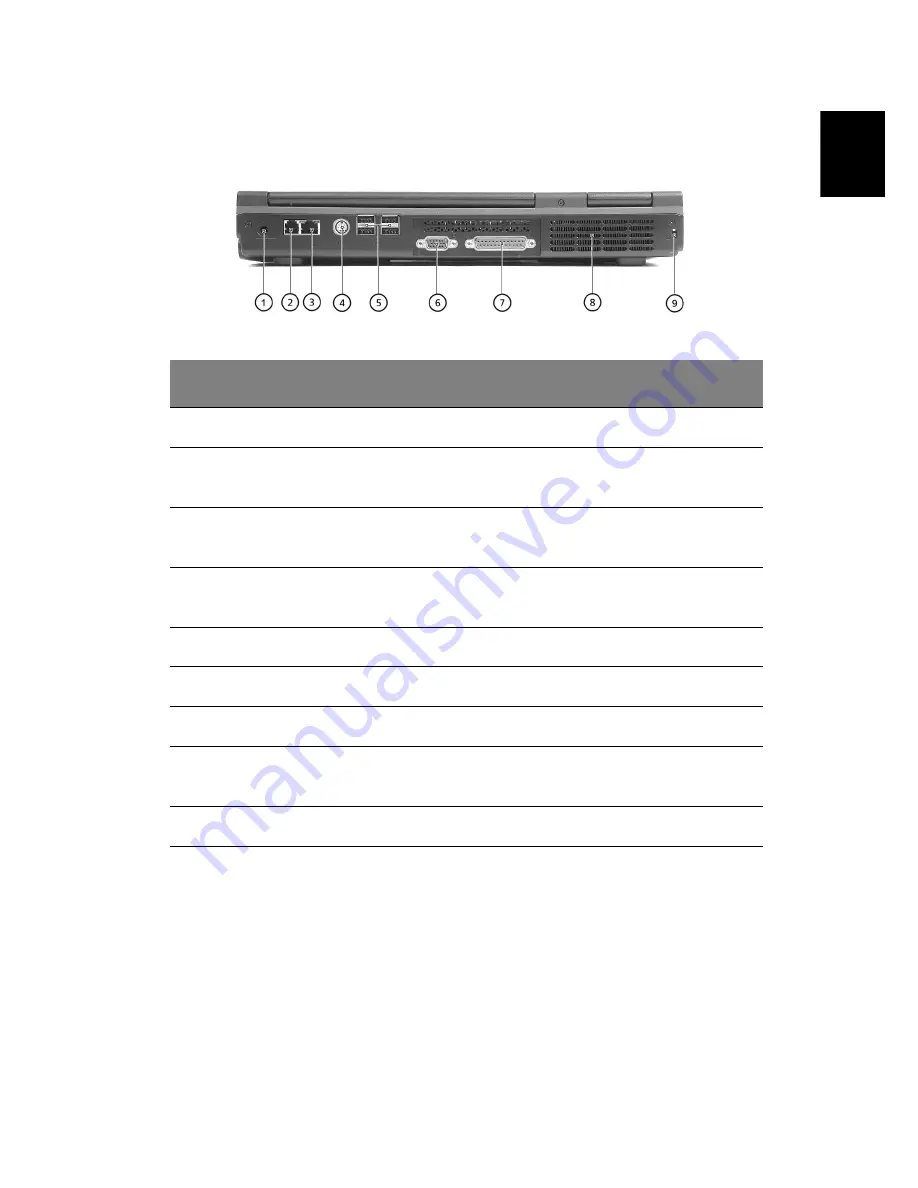
Rear view
#
Item
Description
1
DC-in jack
Connects the AC adapter.
2
Modem jack
Connects the built-in fax/data modem to a
phone line.
3
Network jack
Connects the computer to an Ethernet 10/
100-based network.
4
S-video
Connects to a television or display device
with S-video input.
5
USB ports
Four 2.0 ports for connecting USB devices.
6
External display port
Connects an external (VGA) display monitor.
7
Parallel port
Connects a parallel device, such as a printer.
8
Ventilation slots
Enables the computer to stay cool, even after
prolonged use.
9
Kensington lock slot
For attaching a security connector.
Summary of Contents for Aspire 1350
Page 1: ...Acer Aspire 1350 series User s guide...
Page 6: ...vi English...
Page 10: ...English...
Page 11: ...Getting familiar with your computer...
Page 37: ...Operating on battery power...
Page 44: ...Operating on battery power 34 English...
Page 45: ...Peripherals and options...
Page 56: ...Peripherals and options 46 English...
Page 57: ...Moving with your computer...
Page 65: ...Software...
Page 69: ...Troubleshooting...
Page 74: ...Troubleshooting 64 English...
Page 75: ...Appendix A Specifications...
Page 76: ...This appendix lists the general specifications of your computer...
Page 80: ...Appendix A Specifications 70 English...
Page 81: ...Appendix B Notices...
Page 82: ...This appendix lists the general notices for your computer...


