background image


7


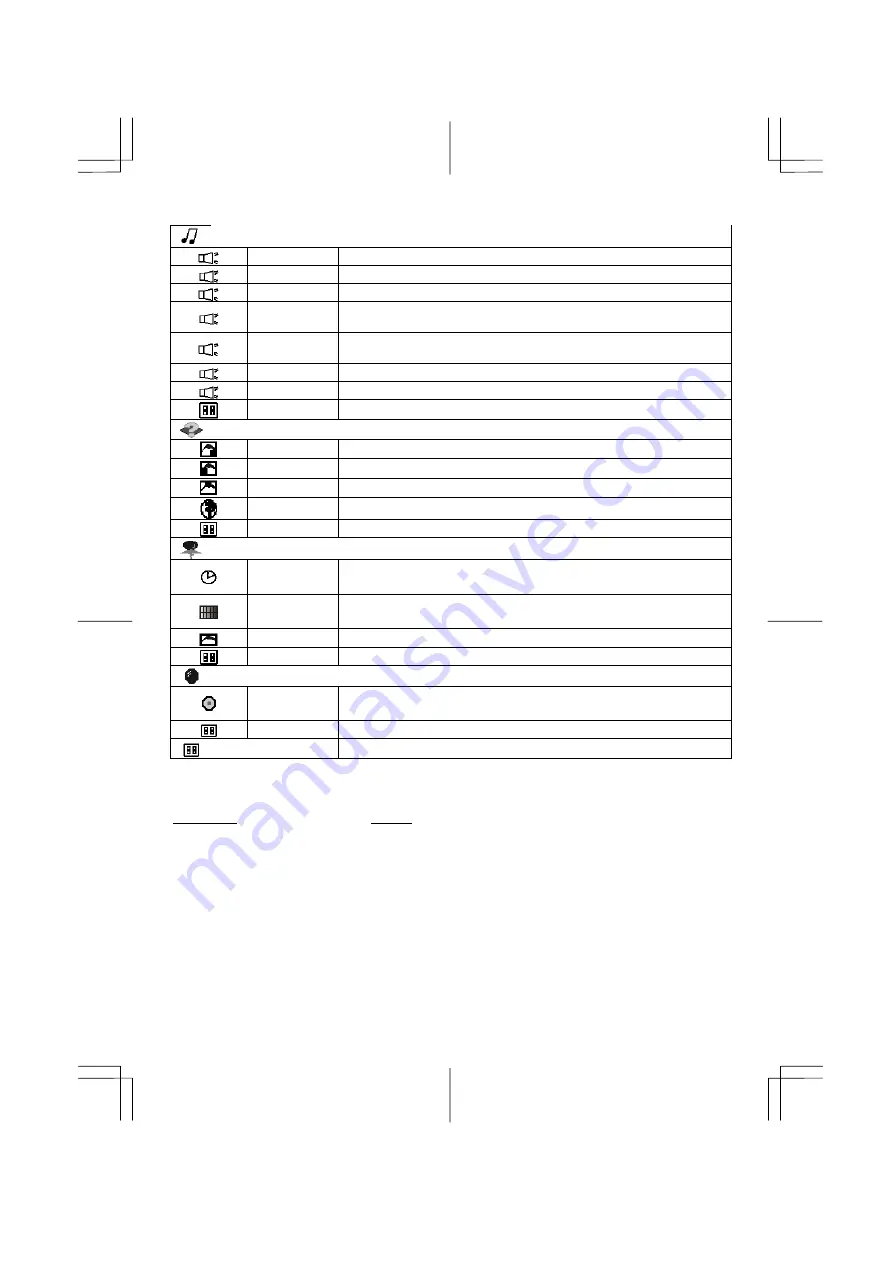
Audio


Volume 

This features adjusts < to decrease volume and > to increase volume. 


Base 

This features adjusts < to decrease base and > to increase base. 


Treble 

This features adjusts < to decrease treble and > to increase treble. 


ATTL 

This features adjusts < to decrease left speaker volume and > to increase 
left speaker volume. 


ATTR 

This features adjusts < to decrease right speaker volume and > to increase 
right speaker volume. 


Loudness 

This features choose on or off to get loudness. 


Mute 

This features choose on or off to mute the sound. 


Exit 

To exit the main menu. 


Options


OSD 

To move the OSD image. 


OSD H-position  To move the OSD image horizontally left or right. 


OSD V-position  To move the OSD image vertically up or down. 


Language 

You can choose one of the nine languages you need. 


Exit 

To exit the main menu. 


Utilities


OSD timeout 

You can select how long the monitor waits after the last adjust of the key to 
shut off the OSD menu. The time setting choices are from 5 to 60 seconds. 


OSD 

background 

You can select opaque or translucent to change OSD background. 


Source icon  You can select on or off to display OSD icon. 


Exit 

To exit the main menu. 


Reset 


Memory recall 

Reset the currently highlight control to the factory setting. User must be 
using factory preset video mode to use this function. 


Exit 

To exit the menu. 


Exit 

To exit the OSD menu. 

Chapter 3 Technical Information 

Specifications 

LCD Panel Fujitsu 

Size


19" (48 cm)


Display Type


Active matrix color TFT LCD


Resolution


1280 x 1024


Display Dot


1280 x (RGB) x 1024


Display Area (mm)


376.32 x 301.056 (H x V)


Display Color 

16.7M 

Brightness


300 cd/m

2

 (typical)


Contrast Ratio


700:1 (typical)


Response Time


Ta=25°C Tr=15ms Tf=10ms 

Lamp Voltage


700 Vrms (typical)


Lamp Current


7.0 mA rms. (typical)


Viewing Angle


Vertical: -85° ~ +85°


Horizontal: -85° ~ +85°


Summary of Contents for AL1931

Page 1: ...designed to provide reasonable protection against harmful interference in a residential installation This equipment generates uses and can radiate radio frequency energy and if not installed and used...

Page 2: ...than H05VV F 3G 0 75 mm2 must be used 8 For use only with power supply LINEARITY LAD6019AB5 and Li shin LSE9901B1260 Chapter 1 Installation Unpacking Before unpacking the LCD Monitor prepare a suitabl...

Page 3: ...der to comply with FCC regulations A ferrite core interface cable is included in the LCD Monitor package This device will not be in compliance with FCC regulations when a non ferrite core video cable...

Page 4: ...er switch to switch the monitor ON OFF 2 LED lights Blue color Power is ON 3 LED lights Yellow Monitor is in Power Saving Mode 4 LED is off Power is OFF 3 Auto 1 Press the Auto Buttons Monitor will Au...

Page 5: ...image Exit To exit the main menu Advanced Sharpness Adjusts the picture sharpness Color You have 4 kinds of options Cool This control adjusts the color temperature of the screen image this item are pr...

Page 6: ...tness Adjust the overall image and background screen brightness Contrast Adjust the image brightness in relation to the background Saturation Adjusts the color saturation of the screen image Hue Adjus...

Page 7: ...e main menu Utilities OSD timeout You can select how long the monitor waits after the last adjust of the key to shut off the OSD menu The time setting choices are from 5 to 60 seconds OSD background Y...

Page 8: ...rows Power Management Mode Power Consumption AC Input LED Color On 55W maximum 240 VAC Green Off 5W maximum 240 VAC Yellow Soft switch off 5W maximum 240 VAC Dark Disconnected 5W maximum 240 VAC Yello...

Page 9: ...D connector Signal13 Signal Signal PIN Descrip14tion PIN Description PIN Description 1 RX2 15 10 RX1 19 Shield for TMDS Channel 0 2 RX2 11 Shield for TMDS Channel 1 20 NC 3 Shield for TMDS Channel 2 1...

Page 10: ...while you re in MS Windows environment 2 Check the screen to see if there s any black vertical stripes appear If there are take advantage of the Clock function in OSD menu and adjust by increment or...

Reviews: