background image


5

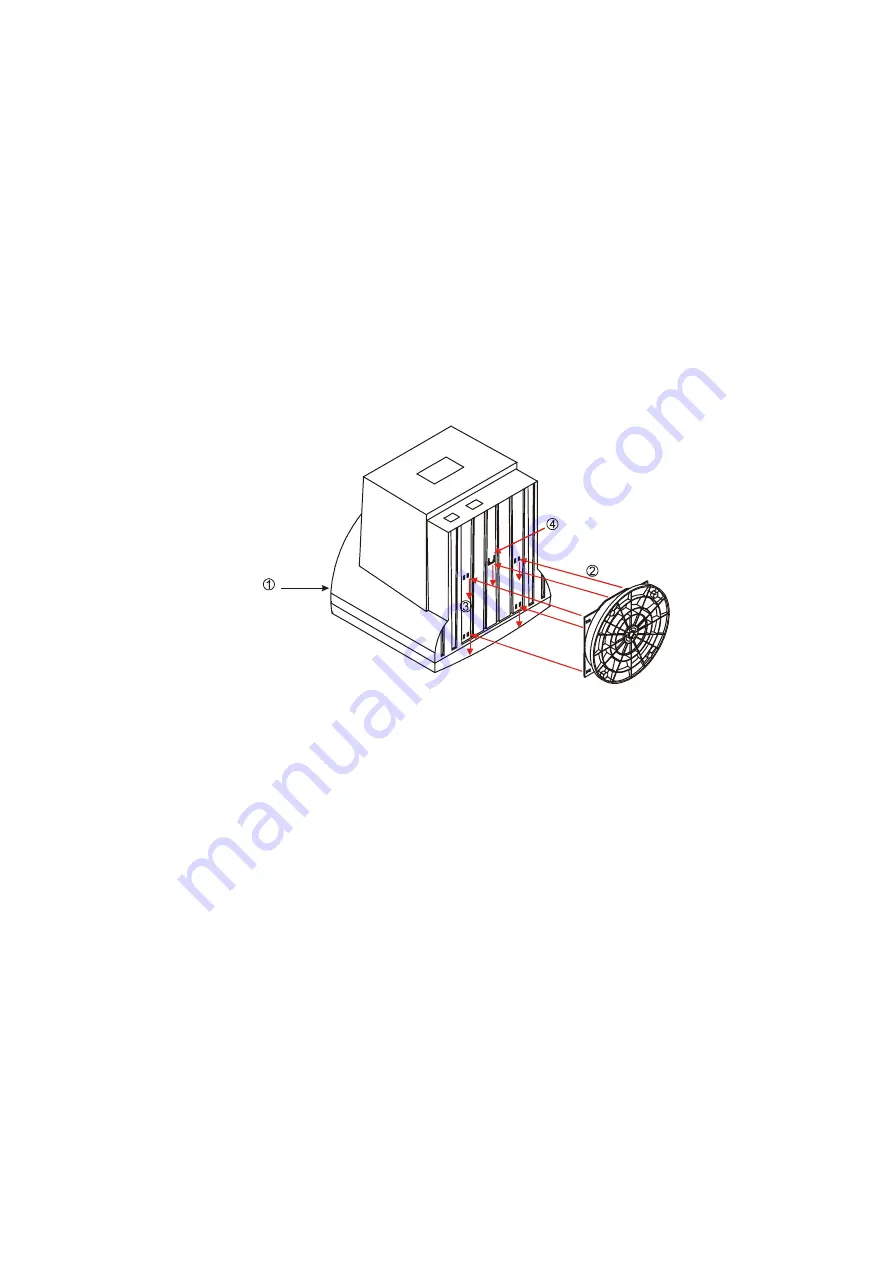
Connecting the Monitor and Swivel Base 

1. 

Place the monitor with its tube down on a stable surface. 

2. 

Align the four tabs of the swivel base with the slots in the bottom of the 
monitor. 

3. 

Insert the tabs into the slots of the monitor 

4. 

Now slowly slide the swivel base toward the front of the monitor till you hear 
the spring lock click into place. 


Removing the Monitor and Swivel Base 

If you need to remove the swivel base, push the spring lock and then pull the swivel 
base away from the monitor. 

NOTE:

  Special attention should be paid to the control knobs and LED indicators 

on the front panel when you place the monitor with its tube down. This will prevent 
damage to these control knobs and LED indicators from excessive pressure. 

Summary of Contents for AC501

Page 1: ......

Page 2: ...ations Commission 4 Connecting the Monitor and Swivel Base 5 Removing the Monitor and Swivel Base 5 Introduction 6 Installation 7 User Controls 8 Adjusting the Brightness and Contrast 9 OSD Function D...

Page 3: ...e will not be used for a long period of time please disconnect it from the main power supply to avoid power surge damage such as lightning 13 Make sure no sharp objects or liquids enter the device via...

Page 4: ...the following measures Reorientate or relocate the receiving antenna Increase the separation between the equipment and receiver Connect the equipment with a power socket on a circuit different from t...

Page 5: ...ase toward the front of the monitor till you hear the spring lock click into place Removing the Monitor and Swivel Base If you need to remove the swivel base push the spring lock and then pull the swi...

Page 6: ...inch monitor with a large viewable screen for comfortable viewing OSD user controls for easy and accurate adjustment of the screen image Energy Star compliant for reduced power consumption Package Ove...

Page 7: ...the power connector on the back panel of the monitor then plug the other end into an electrical outlet that is easily accessible and close to the monitor 3 First turn on the power of the computer the...

Page 8: ...Power LED Indicator Amber Sleep OSD ON OFF Control Turn the OSD Display ON or OFF Brightness Control OSD Function selection Adjust Brightness level or OSD Function selection Control Contrast Control...

Page 9: ...following on screen display OSD Function Description 1 Press the OSD On Off control button to display the OSD Menu 2 To select function press button until the function you want is highlighted 3 Use th...

Page 10: ...rease and decrease screen height V Position Shifts display image up or down Pincushion Adjusts concave and convex portion of pincushion effect Trapezoid Adjusts the top and bottom display widths Rotat...

Page 11: ...0 70 Vertical Hz 50 120 Max Resolution 1280 x 1024 Signal Cable 15 pin mini D sub Power Consumption Max 75 W Power Supply 100 240VAC 50 60Hz Power Management Complies with EPA Energy Star VESA Nutek D...

Page 12: ...pears on screen Make sure that the computer switch is in the On position Make sure that the video cable s D shaped connector is properly connected to the video adapter port on the back of the PC Check...

Page 13: ...13 note...

Reviews: