background image

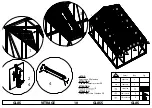
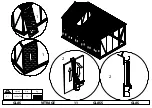
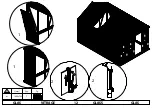
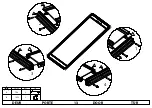
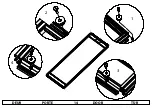
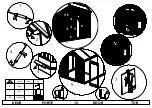
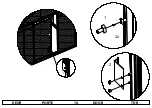
AFDEKPLAATJES

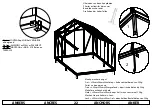
PLAQUETTES DE FINITION

COVER PLATES

ABDECKPLATTEN

23

Summary of Contents for R306 XH

Page 1: ...Manual R306 XH DBER13012020 Copyright A C D nv sa zwaaikomstraat 22 8800 Roeselare Belgium info acd eu www acd eu ...

Page 2: ......

Page 3: ...Sortieren Sie alle Teile nach der Anwendung die auf dem Inhalt der Boxen angegeben wird Die 7 Arten der Anwendung sind Façade Parois Toit Porte Lucarne Vitrage Finition E Open all the boxes and make sure the contents is correct Sort all parts according to the usage which is mentioned on the contents of the boxes The 7 types of usage are Facade Side panel Roof Door Skylight Glazing Finishing A NL O...

Page 4: ...baar in elke doe het zelf winkel kleurloze neutrale silicone sneldrogende beton om uw serre vast te ankeren Handeling voorafgaand aan de montage Pak alle dozen uit en sorteer de onderdelen volgens gebruik zie inhoudsblad per doos Weetjes Boutgleuven zijn gleuven waar de kop van een bout in past Bijna elk profiel in deze serre bezit 1 of meerdere boutgleuven Bij verbindingen met boutgleuven steeds ...

Page 5: ... werking van uw serre Reinig met regelmaat de goten Reinig met regelmaat de condensgoten Reinig de onderloopregel van de deur voor een vrije loop van uw deur Voor de goeie werking van uw deur olie de wielen regelmatig in Reinig uw glas Bij het gebruik van silicone raden wij aan silirub PC te gebruiken De aangebrachte silicone heeft een levensduur van 1 jaar en wordt best regelmatig vervangen hierv...

Page 6: ...ncolore béton à prise rapide pour ancrer solidement votre serre Action avant le montage Ouvrez toutes les boites et triez les parties conformément à l utilisation comme indiquée sur le contenu des boîtes Bon à savoir Les rainures à boulon sont des rainures dans lesquelles s adapte la tête d un boulon Quasiment tous les profils de cette serre possèdent 1 ou plusieurs rainure s à boulon En cas de ra...

Page 7: ...oyez régulièrement les gouttières Nettoyez régulièrement les rainures de condensation Nettoyez la rainure d évacuation de la porte pour permettre une ouverture aisée Pour un actionnement optimal de la porte lubriez régulièrement les roulettes Nettoyez les vitres Nous vous recommandons d utiliser silicone silirub PC Le silicone appliqué sur les parties a une durée de vie de 1 an et il est préférabl...

Page 8: ...standing Tools available in all D I Y shops Colourless neutral silicone kit Quick drying concrete to solidly anchor your greenhouse Actions prior to assembly Open all the boxes and sort all parts according tot he usage which is mentioned on the contents of boxes Petty Facts Bolt slots are slots in which fits a bolt head Nearly all profiles in this greenhouse have 1 or more bolt slots In the event ...

Page 9: ... your greenhouse Regularly clean the gutters Regularly clean the condensation water gutters Clean the door threshold profile for smooth functioning of the door Regularly oil the wheels of the door for a smooth functioning Clean the glass In case of usage of silicone we recommend using silirub PC The silicone applied on the parts has a lifespan of 1 year and is best replaced regularly you can use s...

Page 10: ...oses neutrales Silikon schnellhärtender Beton für die Verankerung Ihres Gewächshauses Aktionen vor der Montage Öffnen Sie alle Boxen und sortieren Sie alle Teile entsprechend der Verwendung die auf dem Inhalt der Boxen angegeben ist Petty Facts Schraubennuten sind Nuten in die der Kopf einer Schraube passt Nahezu jedes Profil dieses Gewächshauses hat 1 oder mehrere Schraubennuten Bei Nutverbindung...

Page 11: ...dfreien Funktion Ihres Gewächshauses Reinigen Sie regelmäßig die Rinnen Reinigen Sie regelmäßig die Kondensrinnen Reinigen Sie die untere Türführung damit die Tür sich problemlos öffnen und schließen lässt Damit sich die Tür problemlos öffnen und schließen lässt sollten die Räder regelmäßig geölt werden Reinigen Sie die Scheiben Verwending von Silikon Wir empfehlen die Verwendung von silirub PC Da...

Page 12: ...on Nokplaatje RAL9005 Gevel Ridge plate RAL9005 Facade Nockenleisten RAL9005 Fassade 801344 2 Barre verticale TOP2 R3XH RAL9005 Gauche 392 Pignon Glasregel TOP R3XH RAL9005 Links Gevel Glas line TOP R3XH RAL9005 Facade Glasslinie Top R3XH RAL9005 Fassade 801345 2 Barre verticale TOP2 R3XH RAL9005 Droite 392 Pignon Glasregel TOP R3XH RAL9005 Rechts Gevel Glas line TOP R3XH RAL9005 Facade Glasslinie...

Page 13: ...n nok Afwerking Set Cover plates foundation and ridge Finishing Set Abdeckplatten Fundament und First Finish 800215 1 Viserie R306H RAL9005 Beslagzak R306H RAL9005 Screw bag R306H RAL9005 Beschlägetasche R306H RAL9005 800298 1 Viserie luncarne RAL9005 Lucarne Onderdelenzakje dakraam RAL9005 Dakraam Screw bag roof window RAL9005 Skylight Beschlägetasche Dach Fenster RAL9005 Dachfenster 800288 1 set...

Page 14: ... Tirand de la parois RAL9005 2006 Parois Treklat zijwand RAL9005 Zijwand Pull bar side panel RAL9005 Side Panel Ziehlatte Seitenwand RAL9005 Seitenwand 801341 4 Tirand du pignon RAL9005 1982 Pignon Treklat gevel RAL9005 Gevel Pull bar facade RAL9005 Facade Ziehlatte Fassade RAL9005 Fassade 801336 2 Profilé en T du pignon RAL9005 2917 Pignon T profiel Gevel RAL9005 Gevel T profile facade RAL9005 Fa...

Page 15: ...profil RAL9005 mit Aufkleber Tür 800175 4 Profilé horizontale de la lucarne RAL9005 757 Lucarne Horizontaal dakraamprofiel RAL9005 Dakraam Horizontal skylight profile RAL9005 Skylight horizontale Dachprofil RAL9005 Dachfenster 800179 4 Profilé verticale de la lucarne RAL9005 770 Lucarne Verticaal dakraamprofiel RAL9005 Dakraam Vertical skylight profile RAL9005 Skylight Vertikale Dachprofil RAL9005...

Page 16: ...Gebruik Number E Description Section Length Usage Anzahl D Beschreibung Abschnitt Länge Anwendung 800194 2 Supports de pignon RAL9005 927 Pignon Gevelsteunen RAL9005 Gevel Facade supports RAL9005 Facade Giebelwandstützen RAL9005 Fassade 801343 2 Barre verticale TOP R3XH RAL9005 738 Pignon Glasregel TOP R3XH RAL9005 Gevel Glas line TOP R3XH RAL9005 Facade Glasslinie Top R3XH RAL9005 Fassade ...

Page 17: ... pignon côté GAUCHE RAL9005 1635 Pignon Hoekprofiel Gevel Dak LINKS RAL9005 Gevel Angle profile side wall LEFT RAL9005 Facade Winkelprofil Seitenwand LINKS RAL9005 Fassade 800081 10 Barre verticale du toit RAL9005 1635 Toit Glasregel dak RAL9005 Dak Glas line roof RAL9005 Roof Glasslinie Dach RAL9005 Dach 800280 1 Profilé clique de la porte coullisante RAL9005 1485 La porte Clickprofiel deur RAL90...

Page 18: ... RAL9005 1895 Pignon Hoekprofiel Gevel zijkant LINKS RAL9005 Gevel Angle profile side wall LEFT RAL9005 Facade Winkelprofil Seitenwand LINKS RAL9005 Fassade 801340 2 Profilé du pignon côté DROITE RAL9005 1895 Pignon Hoekprofiel Gevel zijkant RECHTS RAL9005 Gevel Angle profile side wall RIGHT RAL9005 Facade Winkelprofil Seitenwand RECHTS RAL9005 Fassade 800083 10 Barre verticale de la parois RAL900...

Page 19: ...hl D Beschreibung Abschnitt Länge Anwendung 800196 1 Faîtière RAL9005 4458 Toit Nok RAL9005 Dak Ridge RAL9005 Roof Kamm RAL9005 Dach 800202 2 Fondation de parois RAL9005 4458 Parois Fundering van de zijwand RAL9005 Zijwand Foundation for side wall RAL9005 Side panel Gründung für Seitenwand RAL9005 Seitenwand 800327 2 Gauttière RAL9005 4458 Parois Goot MET RAIL RAL9005 Zijwand Gutter RAL9005 Side p...

Page 20: ... GABLE GIEBEL 1 Qty Fig Nr L mm A 1895 2 B 1635 2 C 2986 1 D 1982 2 E 1883 3 G 738 1 H 392 1 J 2 K 1 1 2 3 4 5 8 7 6 9 10 I L 1 2917 392 1 1 2 3 4 5 6 7 8 9 8 8 9 10 A B C D C C D C A H I B B J A D A B J B G G J E ...

Page 21: ...ie pag 8 F Assemblez les deux sommets des angles des cornières l un à l autre C est important pour le montage des vitres triangulaires EA voir le pag 8 E Mount the two angular points of the angle sections against each other It s important see page 8 to mount the windows EA D Montieren Sie die zwei Scheitelpunkte der Winkel zueinander Wichtig für die Befestigung des Dreieckfenstern Siehe Seite 8 ...

Page 22: ...GEVEL PIGNON GABLE GIEBEL 3 1 2 4 3 5 10 Wachtbouten 10 Boulons d attente 10 Stop Bolts 10 Warteschrauben 1 2 3 5 4 ...

Page 23: ...WAND 4 Qty Fig Nr L mm B D A C B D A D C A A B C D A C 4 3 3 Wachtbouten 1 5 4 3 Boulons d attente 1 5 4 3 Stop Bolts 1 5 4 3 Warteschrauben 1 5 4 A 4458 1 B 4458 1 C 1883 5 D 2006 2 2 1 7 6 5 2 4 5 7 3 6 8 1 1 8 3 3 7 7 7 7 A B C C C C C D D ...

Page 24: ...KADER CADRE FRAME RAHMEN 5 1a ...

Page 25: ...6 ...

Page 26: ...DAK TOIT ROOF DACH 7 A A M6x16 A B A C C C B C B Qty Fig Nr L mm 5 7 6 3 1 2 4 A 1635 10 B 2170 4 C 4458 1 1 3 4 6 7 5 8 2 5 5 5 6 6 6 6 7 7 7 7 8 8 8 8 8 8 A A A A A A A A A A B B B B ...

Page 27: ...STEUNEN SUPPORTS SUPPORTS STÜTZEN 8 Qty Fig Nr L mm A A A XXXX 2 2 1 1 2 1 2 A A ...

Page 28: ...VOORBEREIDING PRÉPARATION PREPARATION VORBEREITING 9 1 2 A B 3 A B 3 3 3 2 2 2 2 ...

Page 29: ...T OP Eerst ruiten ER plaatsen ATTENTION D abord monter les vitres ER ATTENTION ATTENTION Setzen sie erst die Scheiben ER 4 1 1 2 2 2 3 3 3 3 3 3 3 3 3 3 3 3 DA BA DA CA ES ER ER ES CA CA 870x730 2 780x730 1650x730 390 15x730 775 395x730 DA 2 BA BA BA BA BA BA BA BA BA R ...

Page 30: ...GLAS VITRAGE GLASS GLAS 11 b c a d a b c Qty Fig Nr L mm AI 1890x730 12 2 1 1 2 AI 1 1 1 2 2 2 2 1 1 1 2 2 2 AI AI AI AI AI AI ...

Page 31: ...GLAS VITRAGE GLASS GLAS 12 d a b c Qty Fig Nr L mm 1 1 2 2 1 2 1 1 2 2 2 2 AI 1890x730 7 AI AI AI ...

Page 32: ...DEUR PORTE DOOR TÜR 13 Qty Fig Nr L mm A 708 2 B 1852 2 1 2 4 3 1 2 3 4 ...

Page 33: ...DEUR PORTE DOOR TÜR 14 2 3 1 4 1 2 3 4 ...

Page 34: ...DEUR PORTE DOOR TÜR 15 a b a b a b c a a b c d b Qty Fig Nr L mm B C AA 1485 1475 1650x730 1 1 1 AA AA 1 2 3 4 5 7 6 6 1 2 3 4 5 6 7 7 7 7 B B B C C C ...

Page 35: ...DEUR PORTE DOOR TÜR 16 1 2 b a 1 2x 2 ...

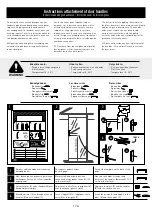
Page 36: ...urface cleaner 2x adhesive strip 1x template cut out WARNING 1 2 3 4 Knip het sjabloon op de achterkant van deze pagina uit Découpez le gabarit au dos de cette page Cut out the template on the back of this page Meet de hoogte van gewenste positie van het handvat tussen 80 100 cm vanaf de ondergrond Mesurer la hauteur de la position souhaitée de la poignées entre 80 100 cm de la surface Measure the...

Page 37: ...me côté de la bande adhésive Remove the paper from the second side of the adhesive strip Kleef het handvat op het raam Druk stevig aan gedurende minstens één minuut Collez la poignée sur la fenêtre Appuyez fermement pendant au moins une minute Stick the handle on the window Press firmly for at least one minute Herhaal deze stappen aan de andere kant van het raam Répétez ces étapes de l autre côté ...

Page 38: ...DWARSLIGGER TRAVERSE CROSS BAR QUERBALKEN 18 B A A M6x25 C Qty Fig Nr L mm B A C A 3 2 1 B 4 A B C A 707 1 B C 70 30 1 2 1 2 3 4 ...

Page 39: ...DAKRAAM LUCARNE ROOF WINDOW DACH FENSTER 19 Qty Fig Nr L mm A 758 1 B DA 770 780x730 2 2 1 2 5 4 6 7 3 DA DA DA DA A A A A A A A A B B B B B B B B 1 2 3 4 5 6 7 7 7 7 ...

Page 40: ...F WINDOW DACH FENSTER 20 a b a 2 5 3 4 8 4 5 7 7 6 4 1 b a d c Qty Fig Nr L mm A CA 30 1 1 CA CA CA CA CA Cx A Stukje Rubber 5cm Morceau de caoutchouc 5cm Piece of caoutchouc 5cm Stück Gummi 5cm 870x730 1 5 4 4 2 8 6 3 7 ...

Page 41: ...WATERAFVOER ÉVACUATION D EAU WATER DRAINAGE WASSERABFUHR 21 Qty Fig Nr L mm A B C D 6 1000 2 2 2 2 A A D C B D B C 1 2 3 4 5 6 1 1 2 3 4 6 5 6 5 2 3 4 ...

Page 42: ...mités des ancres Bend the anchor ends Die Enden der Anker falten Maak per anker een gat Gat 20cmx20cmx40cm diep halve zak snelbeton van 25kg Faites un trou par ancre Trou 20cmx20cmx40cm profond demi sac de béton de 25kg Make for each anchor a hole Hole 20cmx20cmx40cm deep half a sack concrete of 25kg Machen Sie pro Anker ein Loch Loch 20cmx20cmx40cm tief einen halben Beutel beton von 25kg 1 2 1 2 ...

Page 43: ...AFDEKPLAATJES PLAQUETTES DE FINITION COVER PLATES ABDECKPLATTEN 23 ...

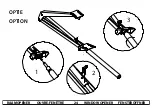
Page 44: ...RAAMOPENER OUVRE FENÊTRE 24 WINDOW OPENER FENSTERÖFFNER 3 2 1 2 1 3 OPTIE OPTION ...

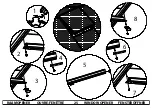
Page 45: ...RAAMOPENER OUVRE FENÊTRE 25 WINDOW OPENER FENSTERÖFFNER 6 7 1 2 3 4 5 8 a b 2 4 1 6 3 7 5 8 ...

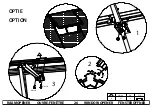
Page 46: ...RAAMOPENER OUVRE FENÊTRE 26 WINDOW OPENER FENSTERÖFFNER Nr L mm Fig A 1 Qty 37 b a 1 2 1 3 M4x10 3 2 A M4x10 OPTIE OPTION ...

Page 47: ...DBER13012020 ACD R306XH ...

Reviews: