background image

©2008 Johnson Level & Tool

7

6. Operating Instructions

IMPORTANT: 

It is the responsibility of the user to verify the 

calibration of the instrument before each use.

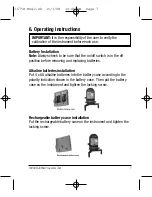
Battery Installation
Note:

Always check to be sure that the on/off switch is in the off

position before removing and replacing batteries.

Alkaline batteries installation

Put 4 x AA alkaline batteries into the battery case according to the
polarity indication shown in the battery case. Then put the battery
case on the instrument and tighten the locking screw.

Rechargeable battery case installation

Put the rechargeable battery case on the instrument and tighten the
locking screw.

1675H-English  10/3/08  10:25 AM  Page 7

Summary of Contents for 40-6662

Page 1: ...tion manual thoroughly before using the instrument Save this instruction manual for future use This tool emits four cross line laser beams and one down plumb beam Beam visibility depends upon lighting...

Page 2: ...cal Specifications 10 Application Demonstrations 11 Care and Handling 12 Product Warranty 13 Product Registration 14 Accessories 1 Kit Contents Description Qty Quad Line Self Leveling Line Generator 1...

Page 3: ...ith visual and audible alarms when beyond level ing range Emits continuously both a solid and pulse beam pulse beam for use with detector Manual mode allows unit to tilt to extreme angles 3 Safety Ins...

Page 4: ...rate the tool in explosive environments i e in the presence of gases or flammable liquids Keep the laser tool out of the reach of children and other untrained persons Do not attempt to view the laser...

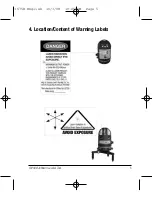
Page 5: ...2008 Johnson Level Tool 5 4 Location Content of Warning Labels 1675H English 10 3 08 10 25 AM Page 5...

Page 6: ...mponents Laser Output Windows Tripodic Base Bubble Locking Knob Fine adjustment knob 5 8 Screw Thread Plumb down Point Battery Door Keypad Horizontal Circle Indication Horizontal Circle Adjustable Foo...

Page 7: ...the off position before removing and replacing batteries Alkaline batteries installation Put 4 x AA alkaline batteries into the battery case according to the polarity indication shown in the battery...

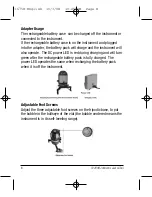
Page 8: ...will also operate The DC power LED is red during charging and will turn green after the rechargeable battery pack is fully charged The power LED operates the same when recharging the battery pack whe...

Page 9: ...justment knob Connecting to the Tripod This instrument can be connected to a tripod using the 5 8 screw thread hole located either on the tripodic base or on the bottom of the instrument 360 rotation...

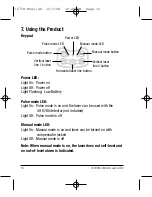
Page 10: ...f Pulse mode is off Manual mode LED Light On Manual mode is on and laser can be turned on with compensator locked Light Off Manual mode is off Note When manual mode is on the laser does not self level...

Page 11: ...e bubble will illuminate and the power LED will be on When the locking knob is in the Lock Off position the bubble will not be illuminated and power LED will be off Output of the laser line Set the lo...

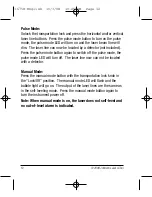
Page 12: ...pulse mode LED will turn off The laser line now can not be located with a detector Manual Mode Press the manual mode button with the transportation lock knob in the Lock Off position The manual mode L...

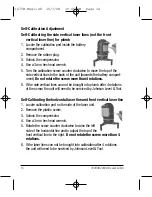
Page 13: ...unit counter clockwise until the laser cross line is 8 feet away from point A to the left of point A Mark the laser line at point A as point B 7 Rotate the laser unit clockwise until the cross line is...

Page 14: ...cal lines can not be brought into plumb after 4 rotations of the screw the unit will need to be serviced by Johnson Level Tool Self Calibrating the horizontal laser line and front vertical laser line...

Page 15: ...ditions Exterior Range Up to 300 ft 90m with detector Self leveling Range 3 Power Supply 4 AA rechargeable battery pack included or 4 AA alkaline batteries not included Battery Life Approx battery lif...

Page 16: ...s line on ceiling and plumb down point Simultaneously supply four laser crosslines on the front left right and top Front vertical and plumb point Vertical line Front laser cross line Operate with dete...

Page 17: ...ohnson Level Tool product by contacting Johnson Level Tool s Customer Service Department as provided below or by visiting us online at www johnsonlevel com The limited warranty for each product contai...

Page 18: ...ation Enclosed with this instruction manual you will find a warranty card to be completed for product warranty registration Product warranty registration can also be completed online at our web site w...

Page 19: ...void any applicable limited warranty and there will be NO WARRANTY If you need any assistance in locating any accessories please contact our Customer Service Department In the U S contact Johnson Lev...

Page 20: ...20 2008 Johnson Level Tool 1675H English 10 3 08 10 25 AM Page 20...

Reviews: