background image

10

Assembly instructions

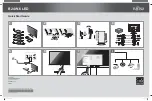
Please pay attention to the screw’s torque value, damaged caused by excessive torque
is not within the scope of the warranty.

Clamps suit for 3 sizes of handlebar, 31.8mm, 25.4mm, 22.2mm, there are transfer rings
for 25.4mm and 22.2mm, transfer ring must be assembled with the special directions.

11

Connector descriptions

1

Red wire :

Anode(24v/36v/48v/52v)

Summary of Contents for 860C

Page 1: ...Product Specification 05 2021 Product TFT LCD Display Mode Abbreviation 860C Client Customer audit...

Page 2: ...Max operating current 100mA 36V battery with USB equipment changed USB changing port 5V 500mA Off leakage current 1uA Max output current to controller 100mA Operating temperature 20 70 Storage temper...

Page 3: ...mart battery indicator Provide a reliable battery indicator Brightness Set the backlight brightness according to customers usage habits is darkness is brightness 9 level Assist 3 level 5 level 9 level...

Page 4: ...2 seconds can turn on off the display The Display can automatically shut down when there is no operate ride for X minutes X could be 1 10 If the display has been set password power on you need to inp...

Page 5: ...and hold UP button for 2 seconds can turn on off the headlight and the screen will switch to the corresponding mode Automatically turn on off meter backlight and headlight when external light changes...

Page 6: ...mA 8 Parameter setting Double press MENU button press interval less than 0 3 second can get into setting menus press UP DOWN button to change the parameter setting press MENU button can switch to next...

Page 7: ...of the backlight is darkness is brightness default value is Note You can set brightness independently between Daytime mode and Night mode 8 4 Auto off Press UP DOWN button to change the auto power off...

Page 8: ...og Un adjustable 8 6 Battery Ind Press UP DOWN button to change the battery indicator Voltage Percentage OFF OFF Indicates that the battery display is off 8 7 Pow Ind Press UP DOWN button to change th...

Page 9: ...ff This data represent power output of the battery not motor 8 8 Clock Press MENU button get into the clock setting menu press UP DOWN button to set Year Month Day Hour Min Sec Press MENU button get i...

Page 10: ...after winter or transportation you need to recharge the battery as below Set Menu Auto off OFF make display can t power off automatically Keep the display power on for 72 hours it can charge the batte...

Page 11: ...row to press MENU button can show all items of the Basic Setting 8 10 Wheel Press UP DOWN can change the wheel setting optional wheel diameter is 12 14 16 18 20 22 24 26 27 27 5 28 29 30 31inch 51 to...

Page 12: ...OFF ON will be no Voltage Current output after switching off 8 13 Light sensor Press MENU Button enter into Light sensor interface Press UP DOWN button select OFF ON Select Sensitivity press UP Down s...

Page 13: ...cts shown below Speed limit Assist levels 8 15 Speed limit Press UP DOWN will change speed limit range 10km h 60km h 99 km h Default value is 25km h Speed limit and current limit are restricted by con...

Page 14: ...U button enter Restore Factory settings item set YES will restore all parameter to factory settings 8 18 Informations Show information of the E bike 8 19 Product infor Get into this item can show hard...

Page 15: ...Display 08H on speed position 0x09 Phase line of motor error Display 09H on speed position 0x10 Controller over temperature Display 10H on speed position 0x11 Motor over temperature Display 11H on sp...

Page 16: ...ed by excessive torque is not within the scope of the warranty Clamps suit for 3 sizes of handlebar 31 8mm 25 4mm 22 2mm there are transfer rings for 25 4mm and 22 2mm transfer ring must be assembled...

Page 17: ...2 Blue wire Power cord to the controller 3 Black wire GND 4 Green wire RxD controller display 5 Yellow wire TxD display controller 12 Certification CE IP65 water proof ROHS...

Reviews: