background image

9.


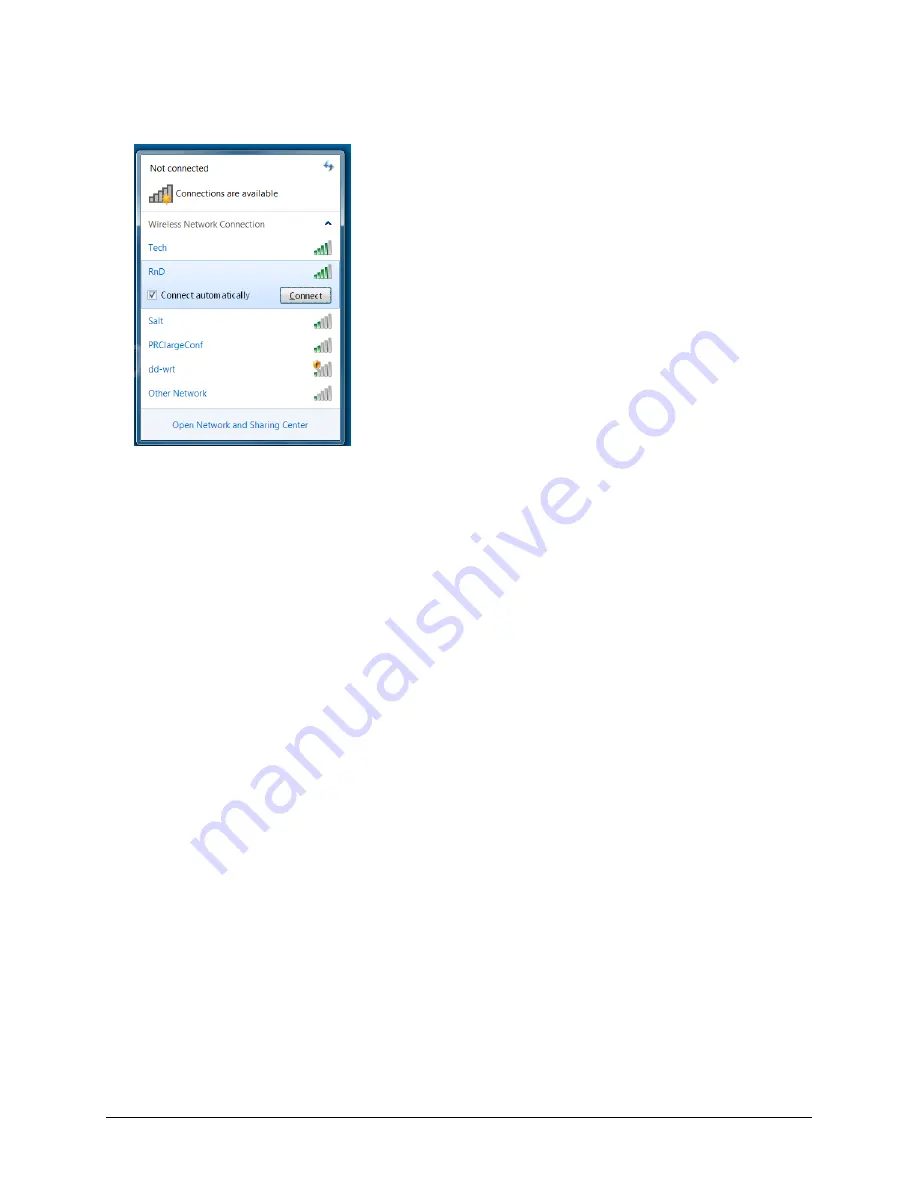
Select the network you want to connect to. 


10.


Select 

Connect

11.


Follow the directions on your display.  

12.


You may need to enter a network key or password. 

13.


When you are connected, the Wi-Fi icon in the task bar changes to  bright white 

14.


Exit the menu and go to the Internet to test the connection. 

Accent 1000 Hardware Manual 


23 

Summary of Contents for 1000

Page 1: ...Hardware Manual Prentke Romich Company 16958v1 2...

Page 2: ...orrect the interference by using one or more of the following measures Turn the television or radio antenna until the interference stops Move this product to one side or the other of the television or...

Page 3: ...ended for use or resale as online control equipment in hazardous environments requiring fail safe performance such as in the operation of nuclear facilities aircraft navigation or communication system...

Page 4: ...This page intentionally left blank Accent 1000 Hardware Manual 4...

Page 5: ...Carry Handle and Wire Stand Options 12 Option 1 Carry Handle plus Wire Stand 12 Option 2 Non Adjustable Handle 12 Option 3 Four Position Handle Stand 13 Attaching the Carry Strap 14 Charging the Batte...

Page 6: ...Updating via USB Flash Drive 27 Storing Your Device 28 Disposing of the Device or Battery 29 Cleaning and Disinfecting 30 Routine Cleaning and Disinfecting 30 Disinfecting a Device and Accessories fo...

Page 7: ...airments This manual describes how to use and maintain your device To learn about the NuVoice software that comes with your device use the Help button to the right of the text display area when the de...

Page 8: ...Carry Strap Holders USB Ports Mini USB Port Switch Jacks A and B Charging Port Camera Flash IR Transmitter IR Sender Connector Module Headphone Jack Camera Camera Indicator Light Tools Key Power Butto...

Page 9: ...plugged in the graph is gray If you are using Windows and the charger is plugged in a small battery charging icon will appear at the top left edge of the display screen Touch Screen Do not use sharp...

Page 10: ...e store at www prentrom com store Using the Virtual Keyboard NuVoice provides the flexibility to hide or show the Windows Virtual Keyboard To enable or disable the keyboard 1 Open the NuVoice Toolbox...

Page 11: ...plastic bag If you ordered a separate NuEye Tracking System a different mounting plate will be needed Instructions are included with your NuEye unit Place the device face down on a flat surface Be ca...

Page 12: ...d that can be moved with one hand The handle can also be used as a stand and moved to various positions Moving the handle is described in Option 3 Option 2 Non Adjustable Handle If you prefer to lock...

Page 13: ...rom the holes If you have installed the cup washers in Option 2 you will need to remove them to allow the handle stand to be adjusted To Change the Handle Stand Position Place the device face down Pul...

Page 14: ...strap there is a loop connector and on the strap side a quick release connector Detach the loop connector from the strap by pressing in on the sides of the quick release connector Thread the loop thro...

Page 15: ...ull it securely to the strap holder post Insert the loop connector into the strap connector until the two pieces click and hold together Repeat these directions to connect the other end of the strap t...

Page 16: ...ge the batteries varies depending on the charge level when the charge begins When your battery needs to be charged a warning will be displayed on the screen telling you to plug in the charger You will...

Page 17: ...Notice that the wireless adapter has a PRC label on one side and a label with a white circle and an arrow pointing down on the other The circle label covers a small switch called the pair button You w...

Page 18: ...ter that you can type into 13 Begin typing on your spelling keyboard Your information should appear on your computer screen Once the adapter is paired with your computer it should always be paired You...

Page 19: ...USB port on your computer 3 If your device and your computer are not already turned on turn them on now On your Device 1 Select the Tools key on the front of the case or select the Tools key to the ri...

Page 20: ...elete and test IR functions Adding a Device Several devices are already set up in the Accent You only need to teach the signals to your device To add additional devices select Add a Device and follow...

Page 21: ...Appliance 1 Make sure the IR area on the Accent is facing toward the appliance that will receive the signal 2 Select the device remote from the vocabulary screen 3 Select the desired function Accent...

Page 22: ...evice on 2 Select the Tools key on the right side of the front of the case or select the Tools key to the right of the text display area 3 Select the Toolbox key from the Tools menu 4 Select Maintenan...

Page 23: ...Follow the directions on your display 12 You may need to enter a network key or password 13 When you are connected the Wi Fi icon in the task bar changes to bright white 14 Exit the menu and go to th...

Page 24: ...s away from the lens and take a picture of the photo and use it as an icon or visual scene Camera applications such as Skype Windows Movie Maker etc can be used Follow the directions provided with eac...

Page 25: ...state your device uses almost no energy It also will take your device longer to come back up when you turn it back on Disable When you select Disable the power button is disabled If you select this op...

Page 26: ...ly press the power button 2 The device will wake up and return to the Windows Start screen 3 If NuVoice does not open on its own open NuVoice by selecting the NuVoice tile on the Start screen Or selec...

Page 27: ...lug a USB flash drive into your computer 2 Go to www prentrom com downloads updates 3 Find the latest Accent update and download it to your computer desktop You can also download update instructions 4...

Page 28: ...use your device again 1 Plug in the battery charger 2 Press the power button on your device Your device will start up Leave the charger plugged in until the batteries are fully charged You can always...

Page 29: ...evice in accordance with your local state and or federal electronic recycling laws Battery Disposal If the batteries in your device need to be replaced dispose of the old batteries in accordance with...

Page 30: ...ce The best practice for regular cleaning is to dry accessories by hand lay them on a dry towel and let them air dry for about 5 minutes before placing them back on the device Disinfecting To disinfec...

Page 31: ...o use a toothbrush or similar brush 3 Blow the device off with an air hose or wipe it dry Important Make sure all soil is removed from the device and accessories This is vital before proceeding to dis...

Page 32: ...ing the device If the charger is not plugged in NuVoice and or Windows will shut down and the device will turn off To restart your device plug in the battery charger and press the power button If the...

Page 33: ...the Reset button A beep will sound to indicate the device has reset Note The Reset button is located in a small hole between switch jack A and switch jack B on the standard connector module The Device...

Page 34: ...on in the lower left corner 4 Select Enter 5 Select Restart As a Last Resort Press and hold the device power button until the device shuts down about 10 seconds Press the power button again to restart...

Page 35: ...ibutor The Restore process generally takes anywhere from 30 minutes to an hour You need to be available when the restore is complete 1 Plug in the battery charger 2 Pull the Windows Charms menu from t...

Page 36: ...e will automatically install and generate the icon sets This process will take several minutes 4 When NuVoice is set up the system will restart and open NuVoice automatically 5 Select I Agree on the S...

Page 37: ...menu that appears make sure the date and time are set correctly If they are not set them to the correct date and time Tap the menu or the display to exit 3 Select Activate from the Windows Activation...

Reviews: