background image

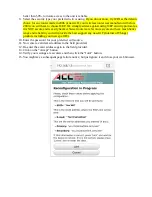
better than 50%, to insure access to the unit is reliable.

9. Select the security type your preferred wifi is using. If you do not know, try WPA as the default 

choice for any router made in 2006 or newer. If your wireless router was manufactured before 
2003, you will have to choose WEP. We strongly advise against using WEP security protocol as 
it is NOT secure and is easily hacked. Newer routers are far more secure and have much better 
range and reliability and will provide the best support any new IOT (Internet of Things) 
products including your new spa WiFi.

10. Enter the password for your preferred wifi source.
11. Now enter a valid email address in the field provided.
12. Re-enter the email address again in the field provided.
13. Click on the “Accept” button
14. Verify your settings are accurate and then click the “Join!” button.
15. You might see a subsequent page failure notice, but just ignore it and close your web browser.

Summary of Contents for WF-100 Smartouch Wifi

Page 1: ...WF 100 Smartouch Wifi Installation and Operational Guide Now you can monitor and control your spa from anywhere you have internet access Remote access is compatible with ALL smart devices and computers ...

Page 2: ...THIS PAGE INTENTIONALLY LEFT BLANK ...

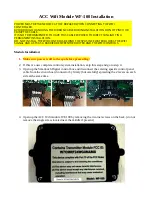
Page 3: ... each side at the same time 4 Open up the ACC Wifi module WF 100 by removing the 4 corner screws on the back do not remove the single screw located near the middle if present POWER MUST BE TURNED OFF AT THE BREAKER WHEN CONNECTING THE WIFI CONTROLLER AVOID ROUGH HANDLING THE RIBBON CABLE DURING INSTALLATION DO NOT PINCH OR CRIMP THE CABLE IT IS NOT RECOMMENDED TO HAVE THIS CABLE EXPOSED TO DIRECT ...

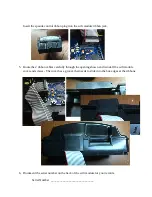
Page 4: ...bon cables carefully through the opening shown and reinstall the wifi module cover and screws The cover has a groove that needs to slide into the box edges at the ribbons 6 Document the serial number on the back of the wifi module for your records Serial Number _____________________________ ...

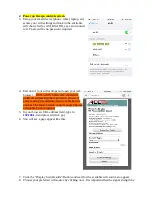
Page 5: ...etworks or devices like your new wifi module as they will adversely affect and even disrupt wifi connectivity If you do have 2 4gHZ cordless phones consider replacing them with ones featured with 900Mhz Dect 6 0 or 1 9Ghz You can skip the mounting step until the end if moving the module around for best wifi reception is required during the setup process Configuring Wifi settings 1 It is very impor...

Page 6: ... Safari may experience problems completing the registration process if you are using an outdated version so make sure you have the latest version or use Google Chrome or Mozilla Firefox instead 5 In your browser URL address field type in 192 168 1 3 and proceed click go 6 You will see a page appear like this 7 Click the Display Scan Results Button and wait for the available wifi sources to appear ...

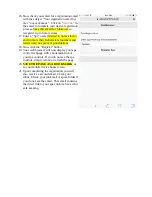
Page 7: ... is easily hacked Newer routers are far more secure and have much better range and reliability and will provide the best support any new IOT Internet of Things products including your new spa WiFi 10 Enter the password for your preferred wifi source 11 Now enter a valid email address in the field provided 12 Re enter the email address again in the field provided 13 Click on the Accept button 14 Ve...

Page 8: ...ters only no spaces or punctuation 18 Now click the Register button 19 Your web browser will now display your spa control webpage with a bookmark link or your spa controls If you do not see the spa controls simply reload or refresh the page 20 SAVE THE PAGE AS A BOOKMARK or to your mobile device home screen 21 Upon completing the registration you will also receive a second email Check your inbox C...

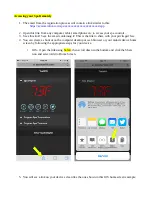
Page 9: ... this link Save the email containing it This is the link to share with your privileged few 4 You can create a shortcut on the computer desktop or web browser or your mobile device home screen by following the appropriate steps for your device IOS Open the link using Safari then scroll down to the bottom and click the Share icon and select Add to Home Screen 5 You will see a link on your device scr...

Page 10: ...For Android Windows or other mobile platforms refer to your device documentation for creating home screen links ...

Page 11: ... 2 Unmount the WF 100 wifi enclosure and remove the 4 corner screws on the back 3 Carefully remove the front cover and locate the 2 white reset buttons along the edge of the board The reset button right next to 3 green LEDs is the factory reset The other button does a partial reset 4 Press and hold the reset button closest to the 3 LED lights for 5 seconds or until all three LEDS light up then go ...

Page 12: ...NOTES ...

Page 13: ...a CA 91702 626 969 9655 Fax 626 334 4809 2016 Applied Computer Controls SmarTouch SmarTouch Digital are trademarks of Applied Computer Controls This manual may not be copied or reproduced without permission in part or in total ...

Reviews: