background image

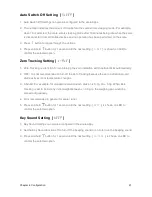
Auto Start Mode


 Setting[


NodE_4


]

1. The default Auto Start Mode with Droplet and Square Setting is set to ON, which means this 

mode is enabled.

2. ON: The Auto Start Mode with Droplet and Square is enabled.

3. OFF: The Auto Start Mode with Droplet and Square is disabled.

4. Press and hold 

button for 1 second until [ 

NodE_5

] is shown on LED to confirm the selected 

option.

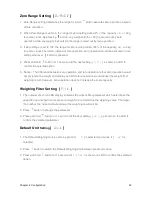
Auto Start Mode         Setting[


NodE_5

]

1. The default Auto Start Mode with Triangle and Square Setting is set to ON, which means this 

mode is enabled.

2. ON: The Auto Start Mode with Triangle and Square is enabled.

3. OFF: The Auto Start Mode with Triangle and Square is disabled.

4. Press and hold 

button for 1 second until [ 

rESEt

.

d


] is shown on LED to confirm the 

selected option.

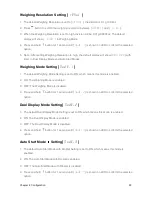
Reset Password Setting [  

rESEt

.

d


]

1. Select [   

YES


] to clear the bluetooth connection password.

2. Press and hold 

button for 1 second until [ 

bt_SEt


] is shown on LED to clear the password.

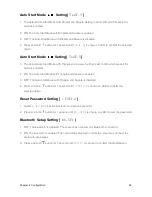
Bluetooth Setup Setting [ 

bt_SEt

 ]

1. OFF: The bluetooth is disabled. The scale does not allow any bluetooth connection.

2. ON: The bluetooth is enabled. The scale allows bluetooth connection. User may connect the 

scale with acaia Apps.

3. Press and hold 

button for 1 second until [ 

SLEEP


] is shown to confirm the modification.

Chapter 4: Configuration                                                                                                                                 24

Summary of Contents for lunar

Page 1: ...ctions in this operation manual apply to the acaia lunar You have purchased a quality precision weighing scale that requires handling with care Make sure to read through this operation manual prior to...

Page 2: ...dification made without the consent of the manufacturer will result in the warranty being voided 2 Risk of explosion if battery is replaced by an incorrect type Dispose of used batteries according to...

Page 3: ...4 Configuration 19 Operations for Setup Mode 20 Diagram of Setup Mode Settings 21 Auto Switch Off Setting 21 Zero Tracking Setting 21 Key Sound Setting 22 Zero Range Setting 22 Weighing Filter Settin...

Page 4: ...operation manual containing step by step procedures examples and other information 6 Warning Incorrect handling of this product could possibly result in personal injury or physical damage Specificati...

Page 5: ...Scale Overview Chapter 1 Scale at a Glance 5 Tare Key Scale Front Power Key LED Display Scale Back Micro B USB port Weighing Pan...

Page 6: ...mer while the timer is paused Back While in Setup Mode press to go back to Weighing Mode Default Setting Tare Button Tare While in Weighing Mode Dual Display Mode Auto Start Modes press to perform tar...

Page 7: ...ro USB connector An automotive cell phone charger with a USB port or a Micro USB cable It takes 1 2 hours to fully charge the battery You can charge the battery more frequently so that it will never r...

Page 8: ...e vibration free and if possible a horizontal location for the weighing platform Do not locate the scale near any equipment instrument which contains magnets Avoid places where room temperatures are u...

Page 9: ...up To use AC adapter instead of the built in battery plug the USB cable into the Micro B USB port located on the back panel of the scale Press button for 0 5 seconds to turn on the scale Chapter 1 Sca...

Page 10: ...Chapter 3 Basics An Overview of Operation Structure Chapter 3 Basics 10...

Page 11: ...n Press and hold button for 0 5 seconds to turn on the scale Turn Off Double click button to turn off the scale Switch Modes Press and hold button for 1 second each time to toggle through different mo...

Page 12: ...ion Operation 1 Press button for tare zero operation 2 Press and hold button for 1 second to switch to Dual Display Mode Dual Display Mode Display The LED display shows 0 00 0 0 with timer on the left...

Page 13: ...on the right side if the status icon lights on the scale is under Auto Start Mode 1 Droplet When the scale detects the water flow the timer starts The timer will stop when the water flow stops 2 Tria...

Page 14: ...Mode Description 1 Droplet The scale detects the espresso flow then the timer starts When the espresso flow stops with the timer running the timer stops Chapter 3 Basics 14...

Page 15: ...f the shot starting from the first few drops of espresso in a busy environment When placing a stable weight on the scale the scale will perform auto tare operation After the scale detects the espresso...

Page 16: ...s mode the barista would like to measure the total time of a shot including the pre infusion time After placing a stable weight such as a cup on the scale it performs auto tare operation then the time...

Page 17: ...erate the scale for 30 seconds it will reset timer and perform tare operation 3 In all Auto Start Modes the timer will stop when a negative weight i e removal of cup is detected 4 The scale will also...

Page 18: ...tare zero operation 3 Press button twice to reset timer and tare weight 4 Press and hold button for 1 second to switch to Auto Start Modes If the Triangle and Square icon indicator are light on press...

Page 19: ...Press and hold button for 1 second to move the flashing digit to the right Repeat this step for 3 times 3 Press and hold button for 1 second to confirm the password and to enter the first setting in S...

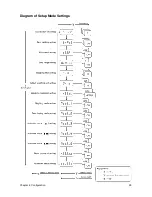
Page 20: ...Diagram of Setup Mode Settings Chapter 4 Configuration 20...

Page 21: ...tain limits automatically 2 OFF It is not recommended to turn off the Zero Tracking because the zero indication would draft easily as room temperature changes 3 0 5d 3d For example for standard resolu...

Page 22: ...nd tare operation is that zero operation would simply ignore the weight and display as 0 while tare operation would deduct the weight from weighing result However zero operation does not increase the...

Page 23: ...means this mode is enabled 2 ON The Weighing Mode is enabled 3 OFF The Weighing Mode is disabled 4 Press and hold button for 1 second until NoDE_2 is shown on LED to confirm the selected option Dual D...

Page 24: ...t Mode with Triangle and Square is enabled 3 OFF The Auto Start Mode with Triangle and Square is disabled 4 Press and hold button for 1 second until rESEt d is shown on LED to confirm the selected opt...

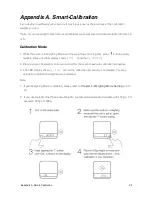
Page 25: ...tton quickly multiple times until LED display shows CAL and then 500 00 2 Place a acaia 100 weights on scale and wait for the scale to execute calibration procedure 3 The LED display shows _End_ when...

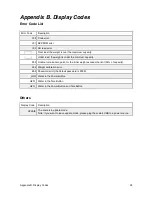
Page 26: ...to make zero point for the initial weight exceeds the limit 50 of capacity 304 Weight calibration error 904 Password error the default password is 0000 _H2O Water in the Power Button H2O_ Water in th...

Page 27: ...ghts reserved No part of the operation manual may be reproduced processed duplicated or published in any form by photocopying microfilming reprinting or any other method in particular electronic means...

Reviews: