background image


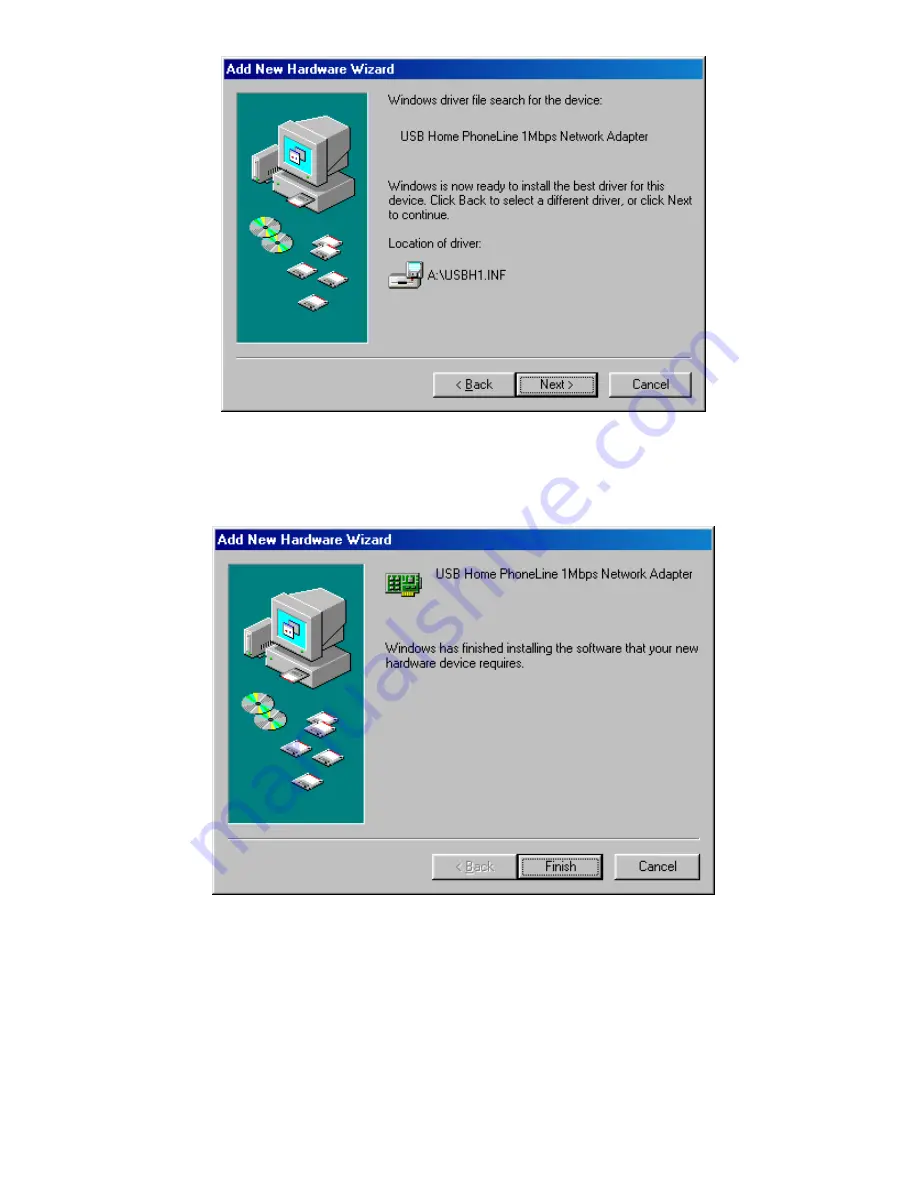
5.  Windows will finish copying all the necessary 

files to your system. When the following 
window appears, click 

Finish

.  


6.  When asked if you want to restart your computer, 

click 

No


7.  Once you are back at the Windows 98 desktop, 

click the 

Start

 button. Click 

Settings

, then 

Control Panel

.  

- 7 - 

Summary of Contents for USB Home PhoneLine 1Mbps Network Adapter

Page 1: ...USB Home PhoneLine 1Mbps Network Adapter User s Guide M73 APO08 250 ...

Page 2: ...cy energy and if not installed and used in accordance with the instructions may cause harmful interference to radio communications However there is no guarantee that interference will not occur in a particular installation If this equipment does cause harmful interference to radio or television reception which can be determined by turning off and on the user is encouraged to try to correct the int...

Page 3: ...hone network the Telephone Company may discontinue your service temporarily If possible they will notify you in advance But if advance notice isn t practical you will be informed of your right to file a complaint with the FCC Your telephone company may changes in its facilities equipment operations or procedures that could affect the proper functioning of your equipment If they do you will be noti...

Page 4: ...use everyday Plus it doesn t interfere with your normal phone use Features Connects to a network using your existing telephone line No additional hubs or network cables needed Working with any PC with a USB port Microsoft Windows 98 2000 Millennium supported 1Mbps transfer rate over telephone lines External USB network adapter with 1 RJ 11 modular telephone port USB cable included true plug play H...

Page 5: ...igh speed modem xDSL and ISDN connections will perform at full speed on a home network Note Because of the limitations of standard telephone cables Home Phone Networking devices require that your cabling does not exceed a total length of 500 feet for your entire network System Requirements A Pentium processor based personal computer 166MMX or above At least 16 MB of RAM One USB port well installed...

Page 6: ... 5 USB B Port USB device port USB Home PhoneLine 1Mbps Network Adapter Rx Tx LED indicator blinks amber when the USB Home PhoneLine 1Mbps Network Adapter is transmitting receiving data Link LED indicator glows green when the USB Home PhoneLine 1Mbps Network Adapter is well connected RJ 11 port connects the USB Home PhoneLine Network Adapter with telephone wire 3 ...

Page 7: ...ans your USB port is installed and enabled If not either no USB port is installed or the USB bios is not properly enabled In this case consult your computer dealer for USB support Getting Hooked Up 1 Locate the USB host port of your system Align the USB connector toward the USB host port push evenly and steadily until it is seated 2 Connect another end of the USB connection cable to the device por...

Page 8: ...tically detect the new hardware device Perform the following procedures to install the device driver Connecting Telephone Cabling 1 Attach one end of the telephone wire to the USB Home PhoneLine 1Mbps Network Adapter s RJ 11 telephone port 2 Connect the other end of the wire into a telephone jack in your wall 5 ...

Page 9: ...etect the new hardware device as shown below Click Next 2 Insert the device driver diskette into your floppy drive When Windows prompts you What do you want Windows to do Select Search for the best driver for your device Recommended Click Next 3 Follow the on screen instruction to proceed 4 The installation program will proceed automatically 6 ...

Page 10: ...ecessary files to your system When the following window appears click Finish 6 When asked if you want to restart your computer click No 7 Once you are back at the Windows 98 desktop click the Start button Click Settings then Control Panel 7 ...

Page 11: ...Client for Microsoft Networks USB Home PhoneLine 1Mbps Network Adapter NetBEUI TCP IP 10 If you are missing required components you ll need to install them manually If you need to install the TCP IP Protocol contact your system administrator or refer to the Windows 98 documentation 11 In the Primary Network Logon box select Client for Microsoft Networks 8 ...

Page 12: ...o activate the new device Once the computer has restarted and Windows 98 has booted up the Link light will be on And a Logon window will appear requiring you to enter a username and password Make up a username and password enter them and click OK When you are at the Windows 98 desktop double click the Network Neighborhood icon You should see the name of the network and or the names of the other PC...

Page 13: ... computer to be used with any file servers that may be on the network Connecting to a NetWare File Server 1 Click My Computer Control Panel and Network 2 Change the Network Logon to Client for NetWare Network 3 Double click the Client for NetWare networks Put your server s name in the Preferred Server box Click in the Enable Logon Script Processing box 10 ...

Page 14: ...l and Network Change the Primary Network Logon to Client for Microsoft Network 2 Double click the Client for Microsoft networks 3 Select the Log on to Windows NT domain box Put your NT domain name in the Windows NT domain area 4 Click OK and restart your PC 5 When finished restart your computer 11 ...

Page 15: ...e others access to my files If you d like to share your printer with other users on the network select I want to be able to allow others to print to my printer 3 Click the OK button File and Printer Sharing for Microsoft Networks should now appear in the list of installed components Click OK When asked to restart your PC choose to do so Enabling File Sharing 1 Double click My Computer A window of ...

Page 16: ...re sharing Next decide on the type of access that you want to give other users Read Only access lets other users view the files on your PC Full access lets users create change or delete files on your PC Depends on Password lets users have Read Only and or Full access depending on the password that you decide to give them 13 ...

Page 17: ...ds When finished click Apply followed by OK Enabling Printers Sharing Click Start Setting Printers A window of available printers will appear Right click the printer that you want to share with other users Click Sharing followed by the Sharing tab Click Share As In the Share Name box give a name to the printer you re about to share Jack s HP4 for example If you want to assign a password to the pri...

Reviews: