background image


3 -


INSTALLATION 

Caution:


Do not insert the 

Wireless LAN Card

 into your computer 

until the procedures in “

Install the Driver & Utility

” has been 

performed. 

Install the Driver & Utility 

1.  Exit all Windows programs. Insert the CD-ROM into the CD-ROM 

drive of your computer. 

If the CD-ROM is not launched automatically, go to your CD-ROM drive 
(e.g. drive D) and double-click on 

Setup.exe. 

2.  The main screen of the CD-ROM opens. Click 

Install


Driver & Utility


to 

start the installation. 


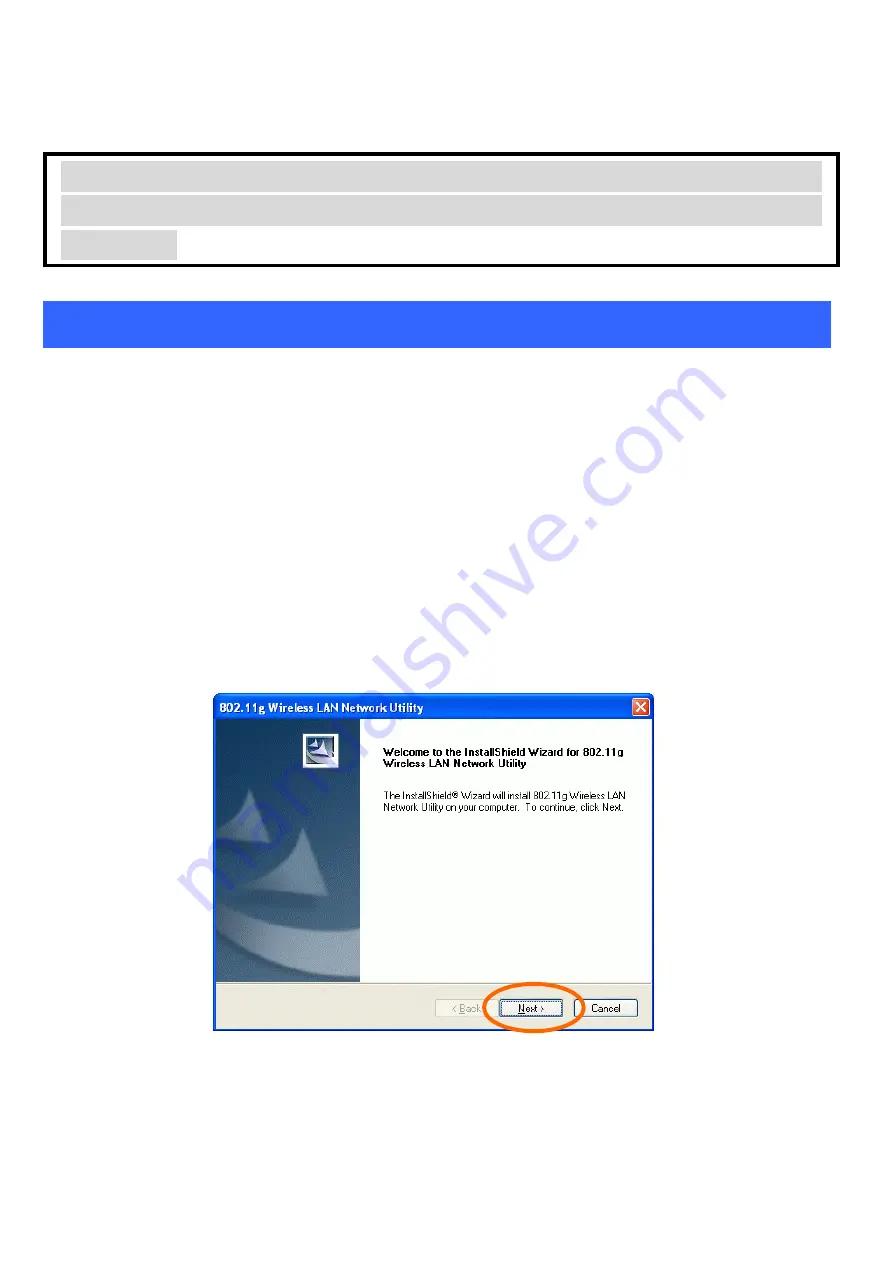
3.  When the Welcome screen appears, click 

Next

 to continue. 


4.  Select a country domain in the list and then click 

Next 

to continue. 

Summary of Contents for 802.11b/g Wireless LAN PCI Card WPG2500

Page 1: ...802 11g Wireless PCI Adapter User s Manual...

Page 2: ...armful interference in a residential installation This equipment generates uses and can radiate radio frequency energy and if not installed and used in accordance with the instructions may cause harmf...

Page 3: ...INSTALLATION 3 INSTALL THE DRIVER UTILITY 3 INSTALL THE DEVICE 6 Verify Device Installation 6 NETWORK CONNECTION 8 IN WINDOWS 98 ME 8 IN WINDOWS 2000 XP 11 CONFIGURATION 14 ACCESSING THE CONFIGURATIO...

Page 4: ...s card also allows you to take full advantage of your computer s mobility with access to real time information and online services anytime and anywhere In addition this device eliminates the bother of...

Page 5: ...share files and information with other computers via a wireless LAN The Access Point Network The network installation allows you to share files printers and Internet access much more conveniently Wit...

Page 6: ...programs Insert the CD ROM into the CD ROM drive of your computer If the CD ROM is not launched automatically go to your CD ROM drive e g drive D and double click on Setup exe 2 The main screen of the...

Page 7: ...rompt to warn you to confirm the country domain click Yes if you are selecting the correct country domain if not click No to fix it 6 When the following screen prompts please ignore and click Continue...

Page 8: ...5 7 Select Yes I want to restart my computer now and click Finish to complete the software installation...

Page 9: ...our computer Windows will detect the new hardware and then automatically copy all of the files needed for networking Note for Windows 98 users Before installation of the device make sure you have your...

Page 10: ...7...

Page 11: ...eed to make adjustments to your network settings In Windows 98 ME 1 Go to Start Settings Control Panel Network 2 Make sure that you have all the following components installed RealTek RTL8185 54M Wire...

Page 12: ...need click Add 4 Highlight Microsoft and then double click on the item you want to add Click OK After returning to the Network screen you can make your computer is visible on the network by enabling t...

Page 13: ...10 6 Click the Access Control tab Make sure that Share level access control is selected If connecting to a Netware server share level can be set to User level access control...

Page 14: ...button or you won t be able to log onto the network 9 Double click the Network Neighborhood icon on the windows desktop and you should see the names of the other PCs on the network In Windows 2000 XP...

Page 15: ...r Microsoft Networks NWLink NetBIOS NWLink IPX SPX NetBIOS Compatible Transport Protocol Internet Protocol TCP IP If any components are missing click on the Install button to select the Client Service...

Page 16: ...l return you to the Local Area Connections Properties window To allow your computer to be visible on the network make sure you have checked off the File and Printer Sharing for Microsoft Networks When...

Page 17: ...Configuration Utility through the Network Status icon If the icon doesn t appear automatically go to Start Programs 802 11g Wireless LAN Driver and Utility Wireless Network Configuration Utility it w...

Page 18: ...15 Easy Config 1 In the Main tab click Easy Config on the right down corner to start quick configuration 2 Select the wireless connection type either Infrastructure or Ad Hoc Click Next to continue...

Page 19: ...a wireless station on the list and click Next to configure its settings The following screen will appear for you to configure for detailed configuration please refer to Profile Manager tab in the lat...

Page 20: ...CP to obtain an IP address automatically or select Manual to set an IP address Click Next to continue 5 Select DNS Auto to obtain DNS automatically or select Manual to set the primary and secondary DN...

Page 21: ...connect modify the settings for the current connection or set up your station for Ad Hoc connection Status Shows the current connection status Speed Shows the connection speed Type Shows the wireless...

Page 22: ...ughput TX The actual instantaneous transmitting rates Throughput RX The actual instantaneous receiving rates Network Address MAC Address The MAC address of this wireless adapter IP Address The IP addr...

Page 23: ...sable Adapter Place a check in the check box to disable this wireless adapter OK Click OK to save your settings Cancel Click Cancel to discard changes Apply Click Apply to save any changes to profiles...

Page 24: ...k Rescan to refresh the wireless device list Configure Click Configure to set up the detailed configuration Add Click Add to add a wireless device into the Available Profile s field below Remove Selec...

Page 25: ...ck Connect Configure or Add buttons Profile Name You may enter the preferred profile name in this column Network Name SSID The SSID for the current profile Ad Hoc Ad Hoc Place a check in the check box...

Page 26: ...entication from the pull down list Open system If the Access Point is using Open System authentication then the wireless adapter will need to be set to the same authentication type Shared Key Shared K...

Page 27: ...e phrase in Encryption field Note You must use the same Key and Encryption settings for the both sides of the wireless network to connect KEY1 KEY 4 You can specify up to 4 different keys to decrypt w...

Page 28: ...Cancel Click Cancel to exit the configuration screen Information Tab The Information tab displays information maintained by the driver such as the number of packet errors and the total number of bytes...

Page 29: ...26 About Tab Click on the About tab to view basic version information about the OS Version Utility Version Driver Version Firmware Version and EEPROM Version...

Page 30: ...and driver please refer to below steps As you uninstall the utility the driver will be uninstalled as well 1 Go to Start All Programs 802 11g Wireless LAN Driver and Utility Uninstall 2 Click OK to c...

Reviews: