2-8
Chapter 2
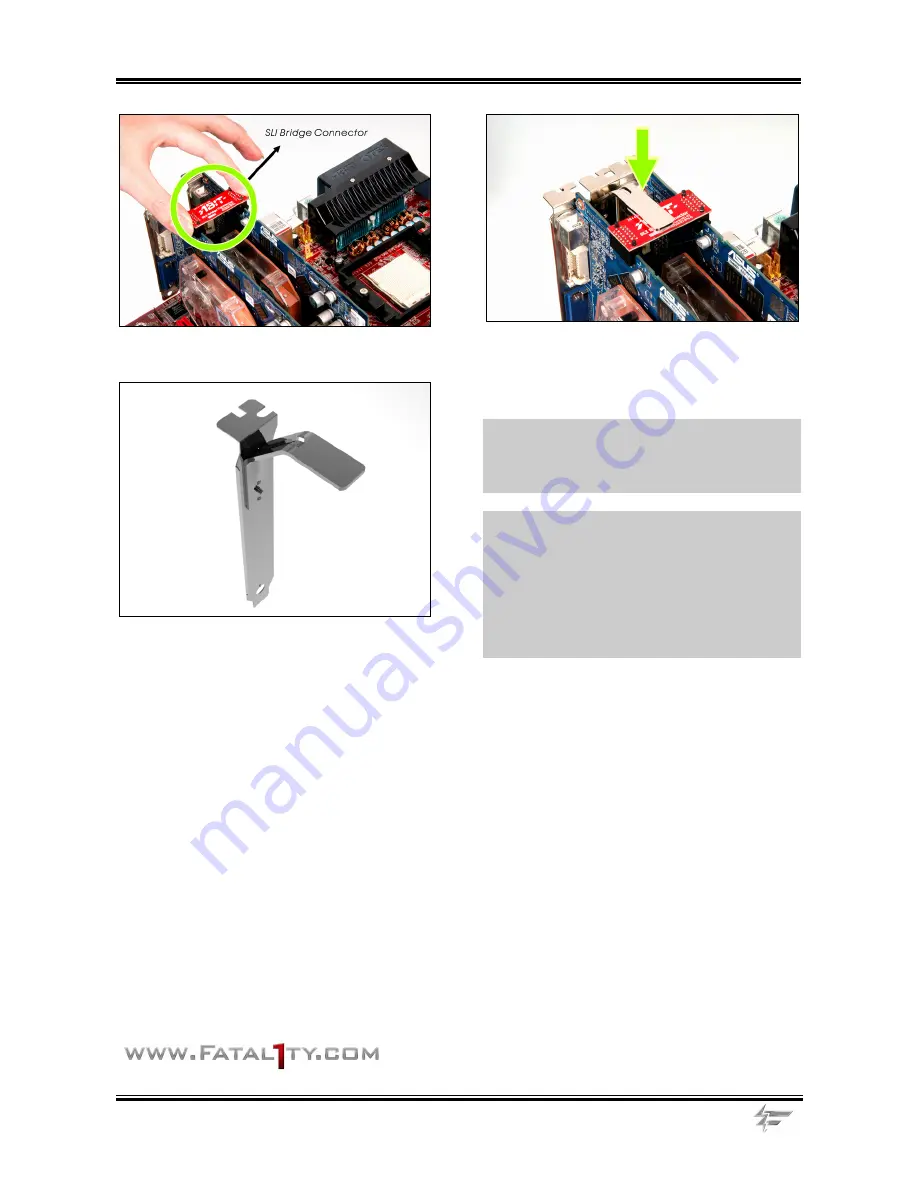
6.
Insert the SLI Bridge Connector into the
SLI goldfingers on each graphics card.
7.
The SLI bracket included in the package is
used for supporting the SLI bridge connector
and the two SLI graphics cards.
8.
Insert the SLI bracket into the bracket slot
between the graphics cards. Secure the SLI
bracket and the graphics cards to the chassis
with screws.
NOTE:
The OTES SLIpstream that packed in
the package is optional. Please refer to the
Quick Installation Guide of the OTES
SLIpstream if you wish to install it.
IMPORTANT:
Please disable the following
items in BIOS setup while running under SLI
mode: All the
“FanEQ controls”
(CPU, NB,
SYS, OTES1, OTES2 and AUX FanEQ Control)
and
“Cool ’n’ Quiet Technology”.
The system
may be unstable without doing so. Detail
information about these items will be described
in
“Chapter 3. BIOS Setup”
.
For more information:
www.abit.com.tw
Fatal1ty AN8 SLI
Summary of Contents for Fatal1ty AN8 SLI
Page 9: ...Introduction 1 5 1 3 Layout Diagram User s Manual ...
Page 10: ...1 6 Chapter 1 For more information www abit com tw Fatal1ty AN8 SLI ...
Page 42: ...2 32 Chapter 2 For more information www abit com tw Fatal1ty AN8 SLI ...
Page 70: ...3 28 Chapter 3 For more information www abit com tw Fatal1ty AN8 SLI ...
Page 74: ...B 2 Appendix B For more information www abit com tw Fatal1ty AN8 SLI ...
Page 76: ...C 2 Appendix C For more information www abit com tw Fatal1ty AN8 SLI ...
Page 80: ...E 2 Appendix E For more information www abit com tw Fatal1ty AN8 SLI ...
Page 82: ...F 2 Appendix F For more information www abit com tw Fatal1ty AN8 SLI ...
Page 88: ...G 6 Appendix G For more information www abit com tw Fatal1ty AN8 SLI ...


