EN - 9
SR/ABITIG
®
GRIP
5 Operating elements
5 Operating elements
Using a standard welding torch, the two-cycle mode of the trigger can be
activated. Further operating modes and handle modules depend on the
corresponding welding power supply and must be ordered separately.
5.1 Trigger with two-cycle function
1
Press the trigger on the handle and keep it pressed = welding is started.
2
Release the trigger = welding is stopped.
6 Operation
1
Open the shielding gas cylinder and start the welding process.
2
After ignition, hold the welding arc near the surface of the material to be
welded until a molten pool is formed.
3
Move the torch uniformly over the entire seam length.
4
Stop the welding process.
5
After switching off, hold the torch over the end position for a few seconds.
This allows the molten pool to solidify without atmospheric interference
under the protection of the gas which is continuing to flow.
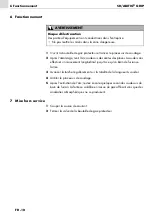
7 Putting out of operation
1
Switch off power supply.
2
Close the valve of the shielding gas cylinder.
NOTICE
• As the TIG welding torches are integrated into a welding system, the
operating instructions of the welding components, such as power supply,
must be observed during operation.
WARNING
Electric shock
Equipment parts are energized in the enterprise.
• Do not reach into the danger zone.
Summary of Contents for ABITIG GRIP 12-1
Page 33: ...FR 13 SR ABITIG GRIP 8 Entretien et nettoyage ...
Page 45: ...ES 13 SR ABITIG GRIP Notizen Notes Notes Notas Notizen Notes Notes Notas ...
Page 46: ...ES 14 Notizen Notes Notes Notas SR ABITIG GRIP Notizen Notes Notes Notas ...
Page 47: ...ES 15 SR ABITIG GRIP Notizen Notes Notes Notas ...


