User Operations Guide—Mira Instant Replay Server
44
Copyright ©2014, Abekas Incorporated
Revised: 5 September 2014
Transport Controls in Mira Explorer
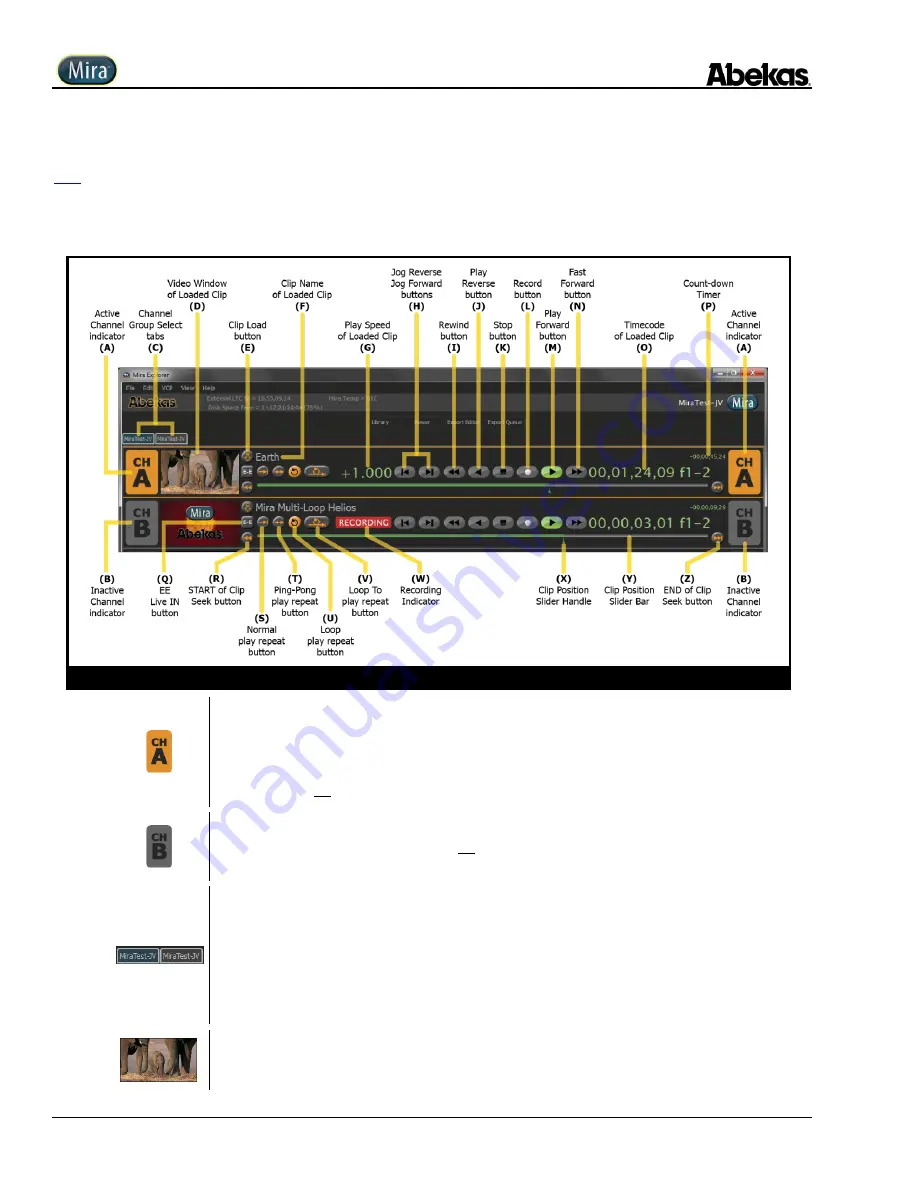
A brief explanation of the transport controls available within Mira Explorer is provided below, with reference to the illustration in
below. Be sure to first select a video channel and load a clip in that channel to help illustrate these concepts on the Mira server; this
procedure is provided on page 36 above.
Figure 7
Mira Explorer Transport Controls
(A)
Active Channel Indicator (Orange)
When a set of transport controls are active, the channel label for that video channel will illuminate with an
orange color. To activate the transport controls for a given video channel, click the mouse anywhere
within the horizontal transport control area.
NOTE:
Only
one
video channel can be selected and controlled at any given time within Mira Explorer.
(B)
Inactive Channel Indicator (Gray)
When a given set of transport controls are not active, the channel label for that video channel will turn
gray in color.
(C)
Channel Group Select tab
Click the LEFT tab to display transport controls for the first set of four video channels (ChA-ChD).
Click the RIGHT tab to display transport controls for the second set of four video channels (ChE-ChH).
NOTE:
In a Mira 4-Channel server, only ONE tab will be visible.
NOTE:
The label inside each tab will reflect the name of the server, which is set as the “Computer Name”
in Windows.
The factory default setting for the Computer Name is the serial number of the Mira Chassis.
(D)
Video Window of Loaded Clip
These small low-resolution windows display the full-motion video during clip playback, or the live input
video during clip recording and when “EE” mode is ON
Summary of Contents for Mira
Page 382: ......


