User Operations Guide—Mira Instant Replay Server
Revised: 5 September 2014
Copyright ©2014, Abekas Incorporated
35
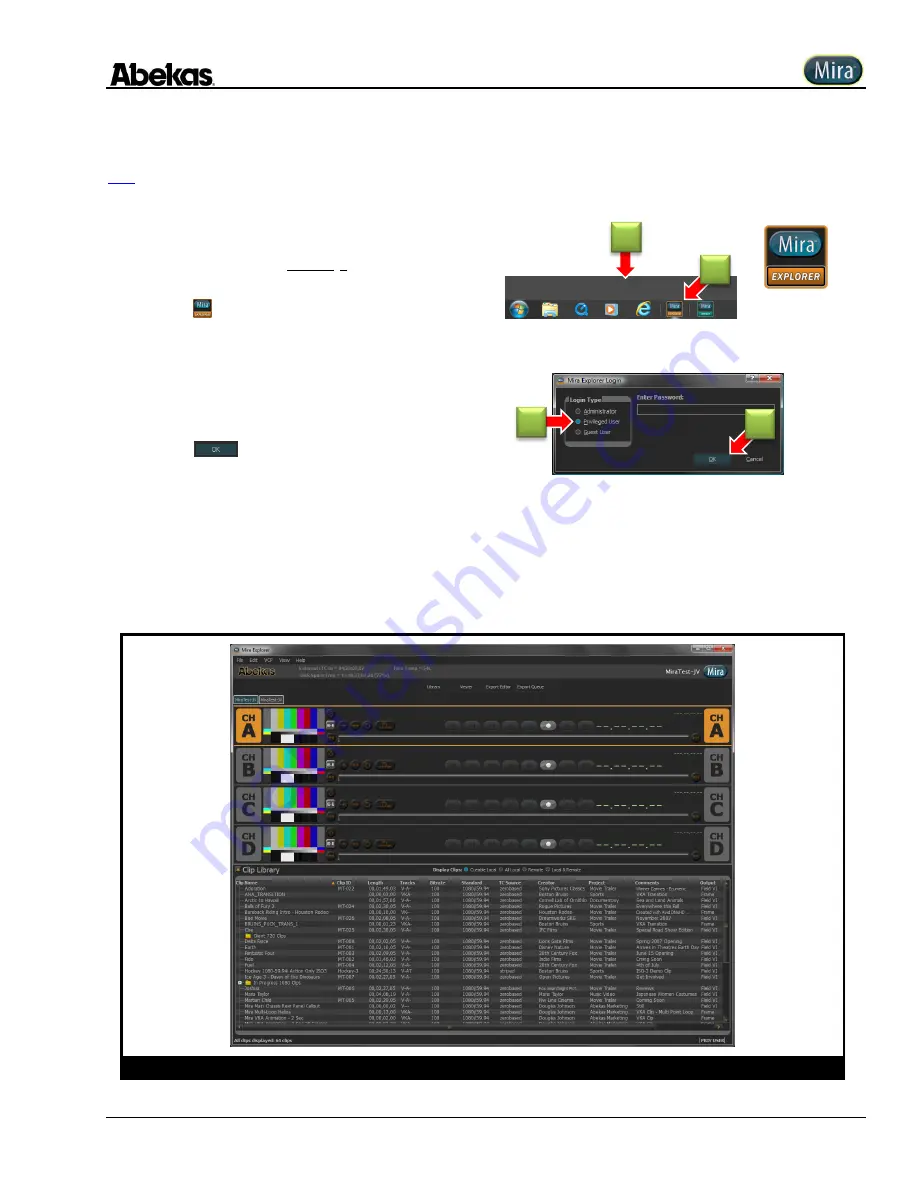
After a successful Windows log-in to Mira Server, the log-in dialog for the “
Mira Explorer
” application will automatically appear.
If Mira Explorer does not launch (or it was closed and needs to be run
again), start here. Otherwise, skip ahead to step (3) below.
1.
Move mouse cursor to lower edge of screen, to reveal
Windows taskbar.
2.
Click
(Mira Explorer) icon.
The “
Mira Explorer Login
” dialog window appears, as shown below.
3.
Click “
Privileged User
” radio button.
The factory default requires NO password.
4.
Click
.
The “
Mira Explorer
” window appears, as shown
below. If your Mira Server is new, there may be only one Clip Name listed.
NOTE:
When logging in as
“
Privileged User
” or “
Guest
”, you have limited access to all of the features of Mira Explorer. The
number of features available
to these two user levels is dictated by settings available to the System Administrator.
NOTE:
To use the “
System Administrator
”
login and the features of the Mira Server available to the system administrator, please refer to the section titled
“
Administrator Options
” starting
NOTE:
To ingest media files into the
Mira Server, refer to the section titled “
Mira Media File Import
” starting
Figure 6
Mira Explorer Graphical User Interface (GUI)
1
2
4
3
Summary of Contents for Mira
Page 382: ......


