background image


Abbott & Ashby Linisher Installation Manual 


  5


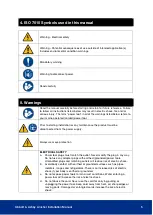
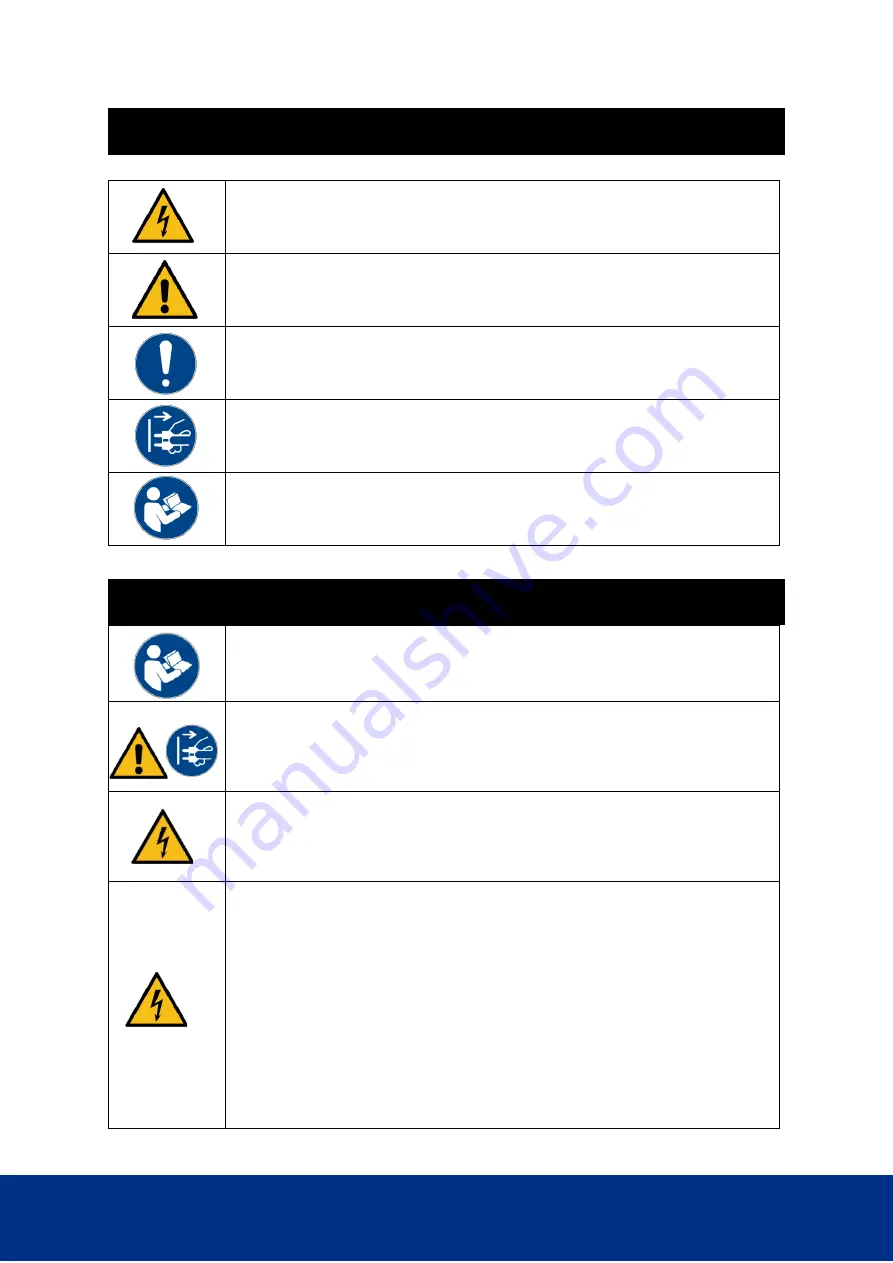
4. ISO 7010 Symbols used in this manual 


Warning - Electrical safety 


Warning – Potential consequences of use outside of intended application(s). 
Includes environmental condition warnings. 


Mandatory warning 


Warning to disconnect power 


Read carefully 


5. Warnings 


Read the manual carefully before starting and retain for future reference. Failure 
to follow all instructions listed below may result in electric shock, fire and/or 
serious injury. The term “power tool” in all of the warnings listed below refers to 
your mains-operated (corded) power tool. 


Prior to starting installation or any maintenance the product must be 
disconnected from the power supply. 


Always wear eye protection 


ELECTRICAL SAFETY 

a.


Power tool plugs must match the outlet. Never modify the plug in any way. 
Do not use any adapter plugs with earthed (grounded) power tools. 
Unmodified plugs and matching outlets will reduce risk of electric shock. 

b.


Avoid body contact with earthed or grounded surfaces such as pipes, 
radiators, ranges and refrigerators. There is an increased risk of electric 
shock if your body is earthed or grounded.  

c.


Do not expose power tools to rain or wet conditions. Water entering a 
power tool will increase the risk of electric shock. 

d.


Do not abuse the cord. Never use the cord for carrying, pulling or 
unplugging the power tool. Keep cord away from heat, oil, sharp edges or 
moving parts. Damaged or entangled cords increase the risk of electric 
shock. 

Summary of Contents for 808438

Page 1: ...al 1 Linisher Installation Manual 808438 AA362 808439 AA362W6 808440 AA362W8 AA362W6 362 Linishing Attachment with 6 Bench Grinder AA362 362 Linishing Attachment 3 Year Limited Warranty AA362W8 362 Li...

Page 2: ...Abbott Ashby Linisher Installation Manual 2 THIS PAGE HAS BEEN LEFT INTENTIONALLY BLANK...

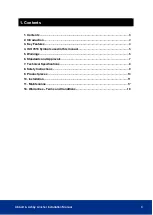
Page 3: ...3 2 Introduction 4 3 Key Features 4 4 ISO 7010 Symbols used in this manual 5 5 Warnings 5 6 Standards and Approvals 7 7 Technical Specifications 8 8 Safety Instructions 9 9 Product pieces 10 10 Instal...

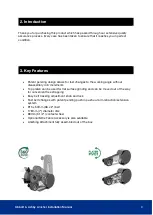
Page 4: ...to the working angle without disassembly in 6 increments Top platen can be used for flat surface grinding and can be moved out of the way for convenient free strapping Easy belt tracking adjustment kn...

Page 5: ...e product must be disconnected from the power supply Always wear eye protection ELECTRICAL SAFETY a Power tool plugs must match the outlet Never modify the plug in any way Do not use any adapter plugs...

Page 6: ...off position before plugging in Carrying power tools with your finger on the switch or plugging in power tools that have the switch on invites accidents d Remove any adjusting key or wrench before tur...

Page 7: ...our power tool serviced by a qualified repair person using only identical replacement parts This will ensure that the safety of the power tool is maintained Any changes or modification to the wiring m...

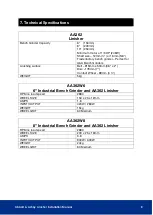
Page 8: ...ch Grinders Linishing surface Belt 915mm x 50mm 36 x 2 Disc 178mm 7 Contact Wheel 89mm 3 WEIGHT 5kg AA362W6 6 Industrial Bench Grinder and AA362 Linisher RPM no load speed 2880 WHEEL SIZE 150 x 25 x 1...

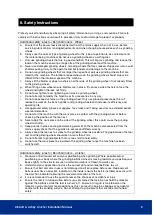
Page 9: ...nd increase its efficiency and operating life k Use approved safety glasses or goggles face mask and if being used for an extended period wear ear defenders l Do not start the machine with the work pi...

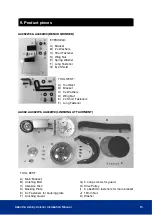
Page 10: ...Short Fastener D Wing Nut E Spring Washer F Long Fastener G Eye Shield TOOL REST A Tool Rest B Bracket C 3 x Washers D Wing Nut E 2 x Short Fasteners F Long Fastener TOOL REST A Main Bracket B Linishi...

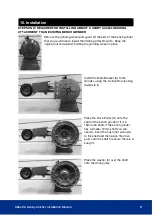
Page 11: ...hment to Keep the original nut and washer holding the grinding wheel in place Install the Main Bracket A to the Grinder using the 3 x 6x20mm locking fasteners I Place the Drive Pulley H onto the shaft...

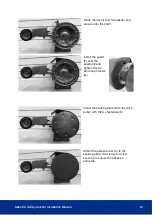
Page 12: ...secure onto the shaft Install the guard F over the assembly and tighten the 3 x 6mm cap screws G Install the backing plate D to the drive pulley with the 6 x fasteners E Attach the abrasive disc C to...

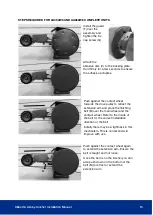
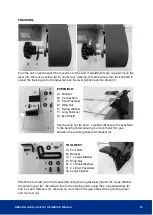
Page 13: ...drive pulley to retract the extension arm and place the linishing belt B over the main wheel and the contact wheel Refer to the inside of the belt for the correct installation direction of the belt I...

Page 14: ...llowing no more than 2mm gap between the grinding wheel and bracket A Attach the tool rest A to the bracket B using the long fastener G and the Large Washer C and wing nut D then attach this to the be...

Page 15: ...itch to the OFF position O We also recommend the use of the E Stop switch ATPED ESTOP sold separately REPLACING GRINDING WHEEL Remove guard by untightening 3 x 6 x 10mm cap screws Remove 16mm nut and...

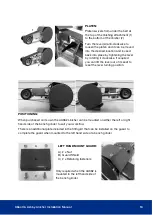
Page 16: ...lift the lever out of its seat to reset the lever turning position POSITIONING When purchased on its own the AA362 Linisher can be mounted on either the left or right hand side of the bench grinder to...

Page 17: ...when clean c Check condition of the wheel belt and disc if cracked torn worn down or damaged replace immediately d Check the condition of the cord to ensure it is not damaged or frayed As this could c...

Page 18: ...e on 1300 783 601 If you make an invalid claim under this warranty the original product will be sent back to you unrepaired 3 This warranty refers only to products sold after the 1st January 2012 and...

Page 19: ...Abbott Ashby Linisher Installation Manual 19 THIS PAGE HAS BEEN LEFT INTENTIONALLY BLANK HIS PAGE HAS BEEN LEFT INTENTIONALLY BLANK...

Page 20: ...in product specifications 2020 Copyright White International Pty Ltd TM WARNING Please be aware that various brands products depicted within this document are subject to trademark patent or design re...

Reviews: