45
– Clean with a dry cloth.
– Grease with Isoflex Topas NB 52.
8.4.4
Circuit-breaker in general:
• Check that the bolt connections at the contact
points in the busbar system are tight, and that
the isolating contact system functions correctly.
• Regrease the contact points and mechanism of
the withdrawable part insertion system as
necessary, or, when lubrication is inadequate or
missing, thoroughly clean the areas concerned
and regrease with Isoflex Topas NB 52 lubricant.
• Where required, regrease or thoroughly clean
slide plates and bearings in the panel and
regrease them with Isoflex NB 52 lubricant.
8.4.5
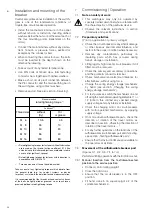
Replacement of contact systems
(Cover illustration of „Maintenance“ section)
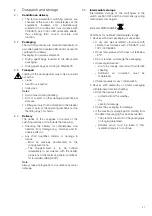
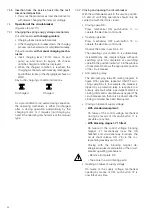
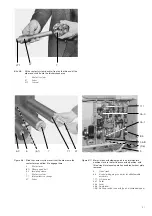
Remove the contact system for thoroughly
cleaning as described below (Figures)
– Slide the two inner annular tension springs
facing the breaker pole to a position beside the
other two outer annual tension springs, thus
releasing contact system, and remove the
contact system from contact arm.
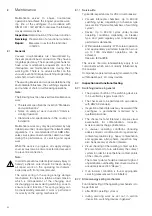
– Fit a new contact system back to front on the
thin end of arbor, and slide it forwards onto the
thicker part of the shank.
– Fit arbor onto the relevant contact arm, slide the
contact system over onto the contact arm, and
withdraw the arbor.
– Check all contact fingers and annular tension
springs for perfect fit.
Note:
The set installation position of contact arms must
not be changed by the improper use of force.
8.4.6
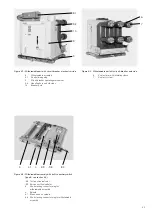
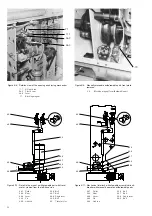
Replacement of the withdrawable assembly
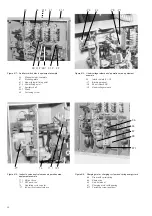
(Figures 8/7, 8/10 and 8/11)
• Disconnect plug connector 8.3 (only for
withdrawable assembly of type B)
• Remove interlock rod 46.5 with pin 46.4 from
the withdrawable assembly
• For motorized withdrawable assemblies,
remove the two socket head bolts which are
accessible from below the assembly
• Unbolt the circuit-breaker from the withdrawable
assembly (4 x M12 bolts)
• Mount the circuit-breaker on a new with-
drawable assembly in the reverse order, using
new circlip and special pliers for pin 46.4
• Check the setting of interlocking rod 46.5:
– Turn spindlel 4 anti-clockwise to the stop for
the disconnected position:
The distance between lever 46.3 and cam
46.2 must be 2
+1
mm.
The distance between roller 46.1 and
blocking bracket 46.8 must be 0.2-0.5 mm.
– Turn spindle 4 clockwise to the stop for the
service position:
The distance between lever 46.3 and cam
46.2 must be 2
+1
mm.
The distance between roller 46.1 and
blocking bracket 46.8 must be 0.2-0.5 mm.
– Loosen bolts 46.7 or 46.9 for any necessary
adjustment.
8.5
Testing withdrawable parts with a VD4 type
circuit-breaker
When functional tests are carried out on
withdrawable parts, compliance
with
the con-
ditions listed below should also be checked. In
this context, a distinction should be made
between two types of the devices for the VD4
withdrawable part:
•
Type A:
Withdrawable assembly
without
inte-
grated auxiliary switches (manual operation
only).
•
Type B:
Withdrawable assembly
with
integrated
auxiliary switches (manual or motorized
operation).
8.5.1
Motor-driven withdrawable parts
(non-standard)
Carry out testing of motor-driven withdrawable
parts in the same way as for manually operated
withdrawable part:
• Turn off the supply voltage (m.c.b.), since the
motor could otherwise be braked electrically.
• Turn hand crank 5 in the required direction.
Note:
When the withdrawable part moves, the motor
turns. The motor functions in such a case like a
generator, i.e. it can lead to reverse voltages in the
terminals.
8.5.2
Checking the correctness of dimensional settings
(Figures 8/7 to 8/11)
1. The distance between lever 46.3 operated by
link rod 46.5 and plastic cam 46.2 should be
2
+1
mm
. If adjustment is required, release the
two bolts 46.6 and 46.7. Deviations from the
specified value can have the following effects:
• Dimensions too large: blocking system for the
drive spindle deactivated.
• Dimensions too small: proper action of the
electrical interlock no longer guaranteed.

