1YSA160003-EN - Rev. 5
10 / 19
D.4.3.2.
Opening of the Unit
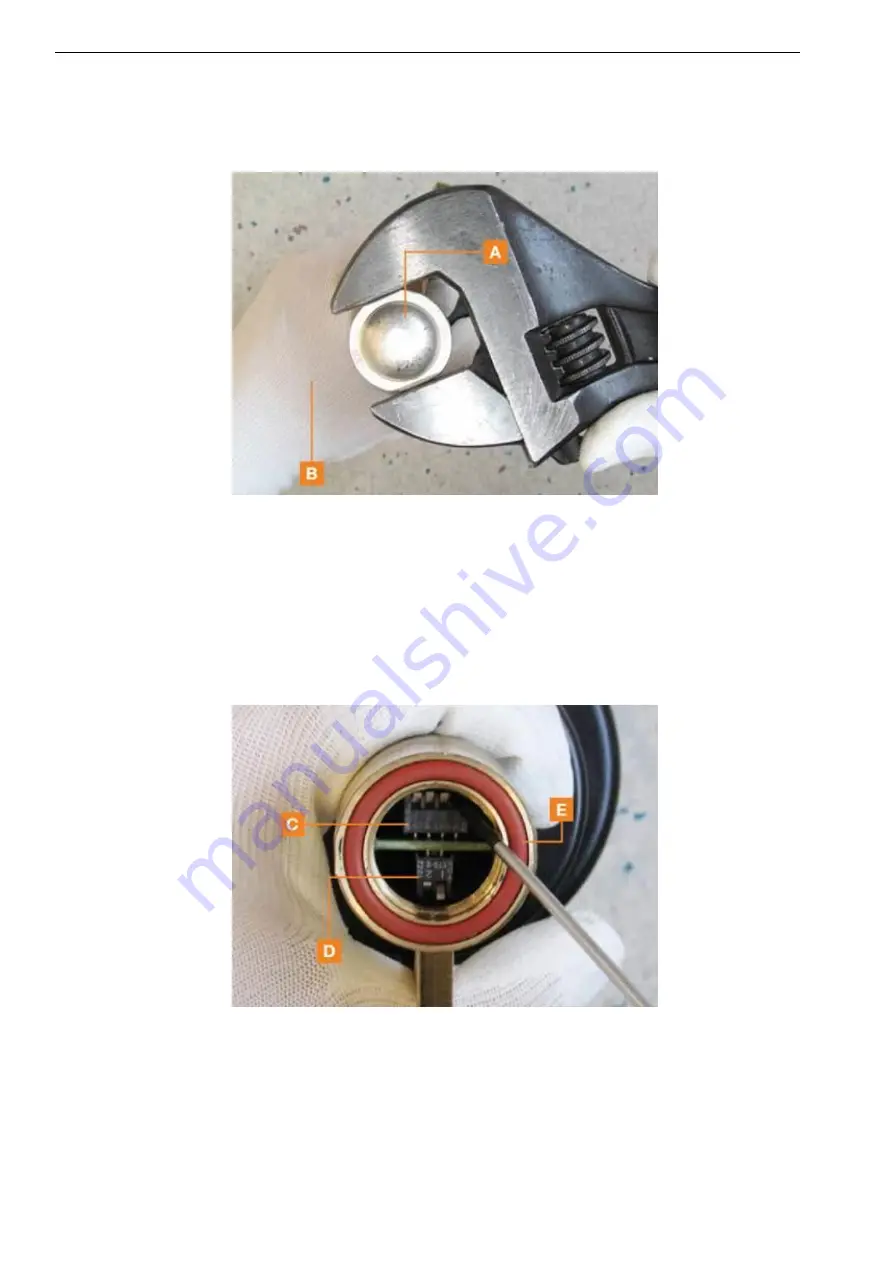
Remove the top cap (See Figure 1-A) using a 34mm fork spanner holding the tube with the hand (See Figure 1-B). Check condition
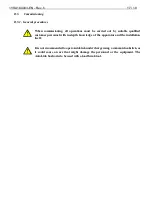
of O-ring (See Figure 2-E), and replace it if necessary, applying grease on it.
Figure 7.
D.4.3.3.
Dip-Switch Configuration
Set the dip-switches to calibrate the current (See Figure 2-C, 4 switches) and set counting operations (See Figure 2-D, 2 switches)
using a small screwdriver according to the settings in the Table 1 and 2.
Note: handle with care without applying excessive force that could damage the switches. Settings must be made in a clean and dry
environment.
Figure 8.


