conductor shall be determined in a manner which produces a conductance equivalent to
that which results from the application of this table.
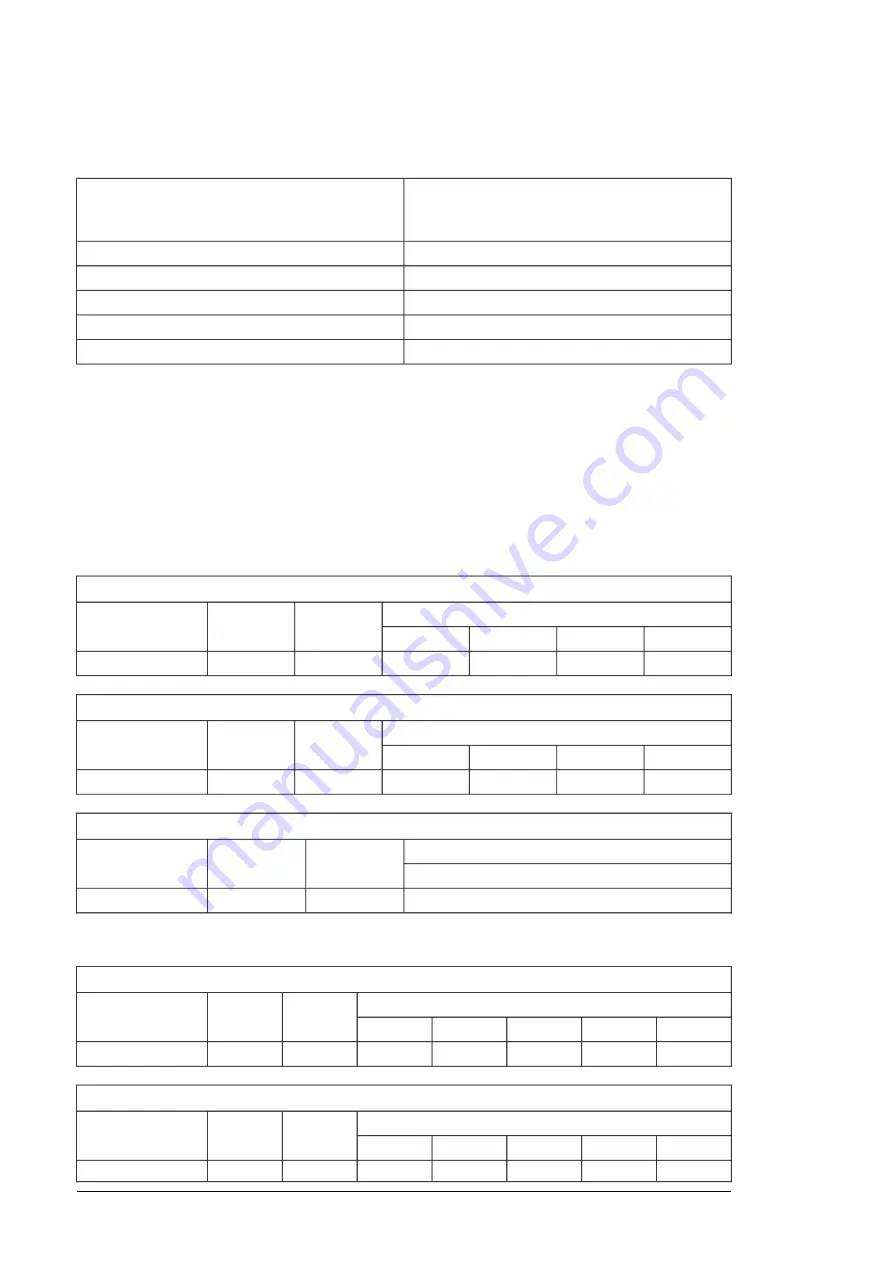
Minimum cross-sectional area of the corresponding
protective conductor
S
p
(mm
2
)
Cross-sectional area of the phase conductors
S (mm
2
)
S
S ≤ 16
16
16 < S ≤ 35
S/2
35 < S ≤ 400
200
400 < S ≤ 800
S/4
800 < S
Compared to a four-conductor system, the use of symmetrical shielded cable reduces
electromagnetic emission of the whole converter system as well as generator bearing
currents and wear.
The generator cable and its PE pigtail (twisted screen) should be kept as short as possible
in order to reduce electromagnetic emission as well as capacitive current.
■
Typical power cable sizes
CE cables
Generator cables
Total quantity of parallel conductors per phase
Conductor
type
Cable type
Converter type
ACS880-87LC-
95 mm
2
120 mm
2
185 mm
2
240 mm
2
2×12
2×12
2×9
2×8
Copper
EPR
3200A/3200A-7
Grid cables
Total quantity of parallel conductors per phase
Conductor
type
Cable type
Converter type
ACS880-87LC-
95 mm
2
120 mm
2
185 mm
2
240 mm
2
2×12
2×11
2×8
2×7
Copper
EPR
3200A/3200A-7
DC resistor cables
Number of conductor pairs per DC chopper module
Conductor
type
Cable type
Converter type
ACS880-87LC-
35 mm
2
2×1
Copper
EPR
3200A/3200A-7
UL cables
Generator cables
Total quantity of parallel conductors per phase
Conductor
type
Cable type
Converter type
ACS880-87LC-
250 kcmil
300 kcmil
350 kcmil
400 kcmil
500 kcmil
2×25
2×23
2×21
2×19
2×17
Copper
EPR
3200A/3200A-7
Grid cables
Total quantity of parallel conductors per phase
Conductor
type
Cable type
Converter type
ACS880-87LC-
250 kcmil
300 kcmil
350 kcmil
400 kcmil
500 kcmil
2×24
2×21
2×18
2×16
2×14
Copper
EPR
3200A/3200A-7
52 Planning the electrical installation
Summary of Contents for ACS880-87LC-3200A
Page 2: ......
Page 4: ......
Page 10: ...10 ...
Page 18: ...5 1 3 4 6 8 7 2 18 Safety instructions ...
Page 48: ...48 ...
Page 68: ...68 ...
Page 75: ...b 3 a 2 6 c 4 Air flow direction is towards the converter module Maintenance 75 ...
Page 85: ...14 Open the installation stand optional and place it in front of the module 14 Maintenance 85 ...
Page 108: ...108 ...
Page 112: ...Description CAN bus connection XCAN XCAN 112 BCU x5 control unit ...
Page 116: ...116 Dimension drawings ...
Page 117: ...Dimension drawings 117 ...
Page 118: ...118 Dimension drawings ...
Page 130: ...130 ...


