background image

12

     VersaView Industrial Non-display Computers

Publication 6155R-IN001I-EN-P - July 2007

VESA Mount the Computer

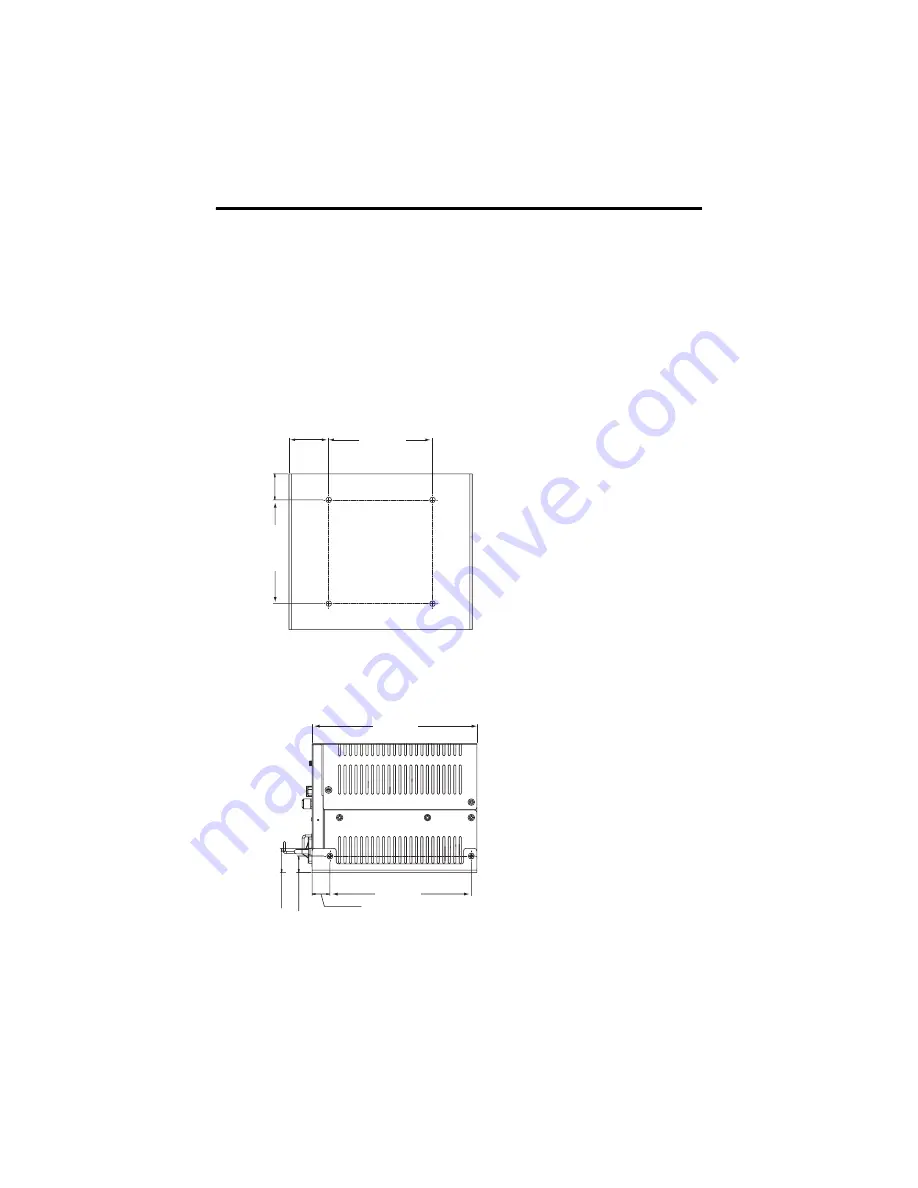
You can VESA mount the VersaView 200R computer to any of the VersaView 
industrial monitors or other surface by using the VESA mounting bracket provided. 

1.

Orient and attach the VESA mounting bracket to the four, 100 mm VESA 
holes that will be used to mount the computer. 

Use four, M4 x 8 mm flathead screws with four, M4 x 3 mm nuts. If attaching 
the bracket to the back of a VersaView monitor, the nuts are not needed. 

Dimensions are in mm (in.).

2.

Attach the computer to the VESA mounting bracket by using four, M3 x 6 
mm screws.
Dimensions are in mm (in.).

100 [3.94]

38 [1.51]

10

0 [

3.

94]

25

 [0

.9

8]

150 [5.91]

15 [

0.

60]

22

 [0

.8

7

129 [5.07]

16 [0.64]

Summary of Contents for 6155R-NSXPH

Page 1: ...rs It also describes how to make peripheral power and network connections For information on operating and troubleshooting the non display computers refer to the user manual listed under Additional Re...

Page 2: ...allation Rockwell Automation Inc cannot assume responsibility or liability for actual use based on the examples and diagrams No patent liability is assumed by Rockwell Automation Inc with respect to u...

Page 3: ...uipment is supplied as open type equipment UL recognized equipment must be mounted within an enclosure that is suitably designed for those specific environmental conditions that will be present and ap...

Page 4: ...rol room environment which utilizes some form of power isolation from the public low voltage mains Some computer configurations may not comply with the EN 61000 3 2 Harmonic Emissions standard as spec...

Page 5: ...1 for instructions You can view or download publications at http literature rockwellautomation com Computers with solid state drives have been customized to accommodate the unique properties of the so...

Page 6: ...e items VersaView System Accessories Cloning CD VersaView System Support CD Microsoft Multilingual User Interface MUI CD Pack This CD pack is not included with VersaView computers containing the Windo...

Page 7: ...in an enclosure or high temperature area the ambient temperature around the computer must not exceed the operating temperature range Install the Computer The computers support various mounting option...

Page 8: ...oles Dimensions are in mm in 3 Place the computer on the shelf and align the holes in the mounting brackets with the holes in the shelf 4 Insert the remaining screws through the mounting bracket into...

Page 9: ...torque to 0 678 Nm 6 lb in 2 Drill four holes in the wall that correspond to the holes in the mounting bracket Dimensions are in mm in 3 Position the computer against the wall aligning the holes in th...

Page 10: ...ottom or back of the computer by using four M3 x 5 mm panhead screws torque to 0 678 Nm 6 lb in Dimensions are in mm in 2 Mount the computer on a DIN rail and secure it by hand tightening the fastener...

Page 11: ...g rails of the rack cabinet To locate the catalog number for the VersaView approved rack slide go to the website http www ab com industrialcomputers 1 Review the product dimensions to confirm that the...

Page 12: ...Orient and attach the VESA mounting bracket to the four 100 mm VESA holes that will be used to mount the computer Use four M4 x 8 mm flathead screws with four M4 x 3 mm nuts If attaching the bracket t...

Page 13: ...VersaView Industrial Non display Computers 13 Publication 6155R IN001I EN P July 2007 The illustration shows the VersaView 200R computer VESA mounted to the back of a VersaView 1700M monitor...

Page 14: ...ion 6155R IN001I EN P July 2007 Product Dimensions Product dimensions for each model of the computer are given in mm in VersaView 200R Computer VersaView 700R Computer 172 20 6 78 150 00 5 91 115 40 4...

Page 15: ...dustrial Non display Computers 15 Publication 6155R IN001I EN P July 2007 VersaView 1400R Computer 465 00 18 31 431 00 16 97 481 80 18 97 176 00 6 93 165 10 6 50 101 60 4 00 560 00 22 05 517 00 20 34...

Page 16: ...6155R IN001I EN P July 2007 Connect the Keyboard and Mouse You can plug either a keyboard or mouse into the PS 2 port on the computer You can connect both devices by using the PS 2 adapter cable that...

Page 17: ...240V ac and is autoranging Operate the computer in an industrial or control room environment which uses some form of power isolation from the public low voltage mains ATTENTION Connect the ac power co...

Page 18: ...nal block 3 Tighten the screw terminals to provide a good connection 4 Secure the terminal block connector to the computer by using the two side screws 5 Restore power ATTENTION Connect the dc ground...

Page 19: ...ts original packing material IMPORTANT To prevent performance degradation of Ethernet communication do not subject the computer or cables to extreme radiated or conducted high frequency noise Proper c...

Page 20: ...5 6 lb 10 8 kg 23 7 lb 17 4 kg 38 3 lb Dimensions HxWxD approx 200R 700R 1400R 115 x 172 x 150 mm 4 54 x 6 78 x 5 91 in 258 x 192 x 431 mm 10 16 x 7 56 x 16 98 in 176 x 482 x 560 mm 6 93 x 18 97 x 22...

Page 21: ...ed component or UL c UL listed when marked CE Marked for all applicable directives EMC 89 336 EEC LVD 73 23 EEC RoHS compliant C Tick Australian Radiocommunications Act compliant with AS NZS CISPR 11...

Page 22: ...22 VersaView Industrial Non display Computers Publication 6155R IN001I EN P July 2007...

Page 23: ...VersaView Industrial Non display Computers 23 Publication 6155R IN001I EN P July 2007...

Page 24: ...th a hardware module within the first 24 hours of installation please review the information that s contained in this manual You can also contact a special Customer Support number for initial help in...

Reviews: