

AastraLink Pro 160 User’s Quick Start Guide -
Account Registration
For User Guides, Regulatory information, and Conformance Statements regarding this product, refer to the online documentation at http://www.aastratelecom.com/support.
41-001134-04 Rev 00
User
Password:
AastraLink Pro 160
IP Address:
2
Your system administrator has
installed an AastraLink Pro 160 on your
IP phone network.
This quick-start procedure describes
how to register your IP phone with the
AastraLink Pro 160. When you complete
this procedure, your phone will
operate on your network,
ready to make and receive calls.
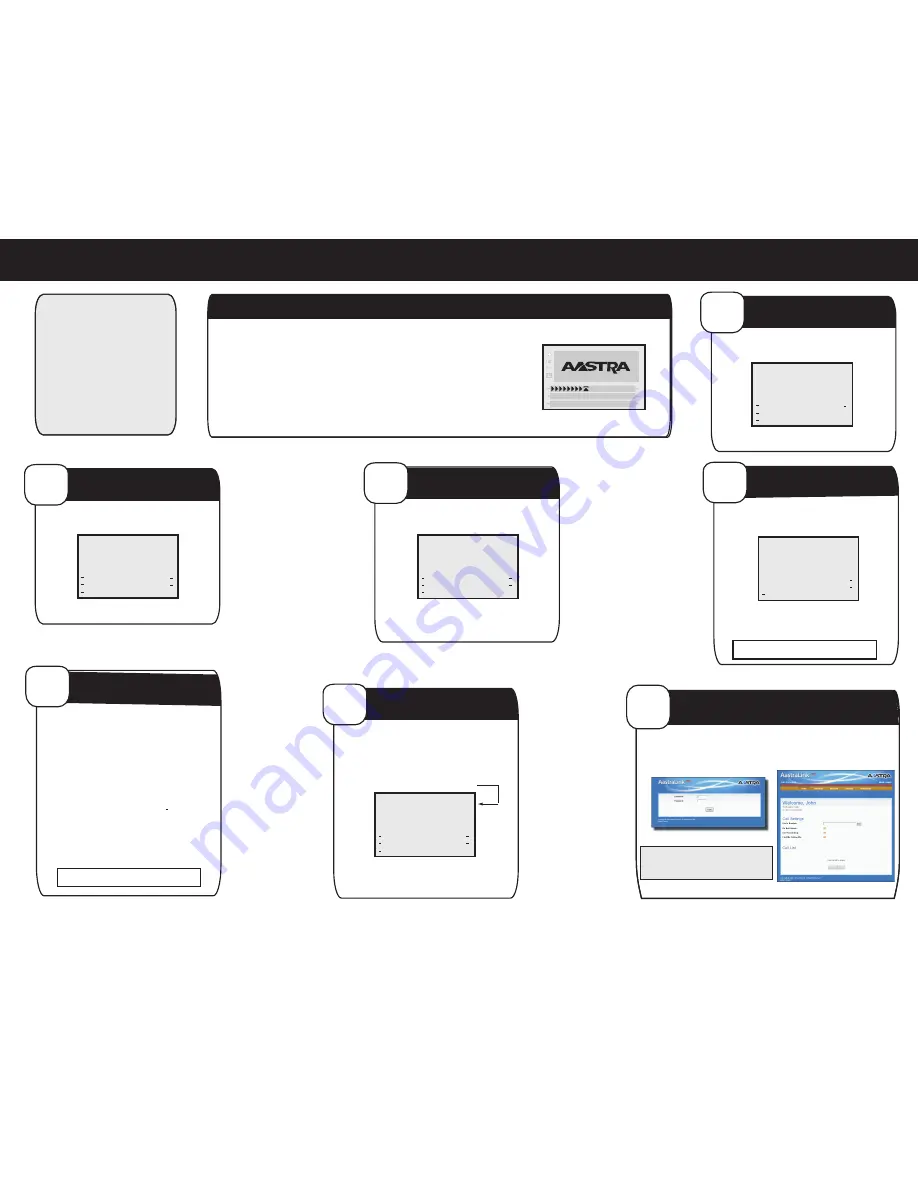
Checking for Firmware
Do not unplug phone!
60%
Register User Name
ABC
Dot
Backspace
Enter
Bob
Enter First Name
Register User
ABC
Dot
Backspace
Jones
Enter Last Name
Enter
Back
Register User
Enter
Back
Enter Email Address
ABC
Dot
Backspace
Register User
Enter
*****
Back
Enter Password
Backspace
Visit
Exit
http://10.20.50.135
for more options
May 1 10:15 am
Vmail
L1
ParkCall
201 - B Jones
DND
Forward
Directory
More
1
Enter First Name
Enter your first name and press <Enter>.
Register Your Phone on the AastraLink Pro 160 Network
When power is first connected, the phone begins a startup sequence and registration process.
The phone checks for new configuration and firmware updates from the AastraLink Pro 160.
If a new update is found, the phone displays the update it is installing (either “Updating Config” or “New Firmware”).
This may take a few moments while the configuration server downloads the latest updates.
WARNING: Do not unplug or remove power from the phone while it is checking and installing firmware.
Proceed to the following steps to complete the registration process.
2
Enter Last Name
Enter your last name and press <Enter>.
3
Enter Email Address (Optional)
Enter your email address and press <Enter>.
4
Enter Password
Enter a password and press <Enter>.
5
AastraLink Pro 160 IP Address
Your IP phone reboots. When startup is
complete, your Phone UI displays the
IP address of the AastraLink Pro 160 device.
6
Idle Screen
To complete the registration process, press <Exit>.
The IP phone idle screen appears. This screen
displays the user name, date, and the set of
default softkeys configured for your phone.
Your phone’s registered extension number
appears in the upper right hand corner.
NOTE: You can skip this step and enter the
email address later using the AastraLink Web UI.
NOTE: Record your password below for
future reference.
NOTE: Record the IP address below for
future reference. You will need to enter it
into your Web browser for accessing the
AastraLink Web UI.
NOTE: For more information about
configuring the softkeys on your phone,
see the AastraLink Pro 160 User Guide.
7
1. Enter the IP address of the AastraLink Pro 160 in your Web browser. For example, http://10.20.50.135.
2. In the Login window, enter your User extension and the password chosen during registration (in Step 4).
3. Select <Login> to view the AastraLink Pro 160 Web UI Main Menu. The current AastraLink Pro 160 status displays
in the lower left corner of the Main Menu window.
Access the AastraLink Pro 160 Web UI
To access the AastraLink Pro 160 Web UI:
AastraLink Pro Login Screen
AastraLink Pro Web UI Main Menu
Refer to the AastraLink 160 User’s Guide
for more information about operating your
IP phone.


