© 2018 AAMP Global. All rights reserved. PAC is a Power Brand of AAMP Global.
PAC-audio.com
Pacific Accessory Corporation
Page 3
Rev: V3
Date:072618
Advanced Amplifier Interface for
General Motors
AP4-GM61
Installation (cont.)
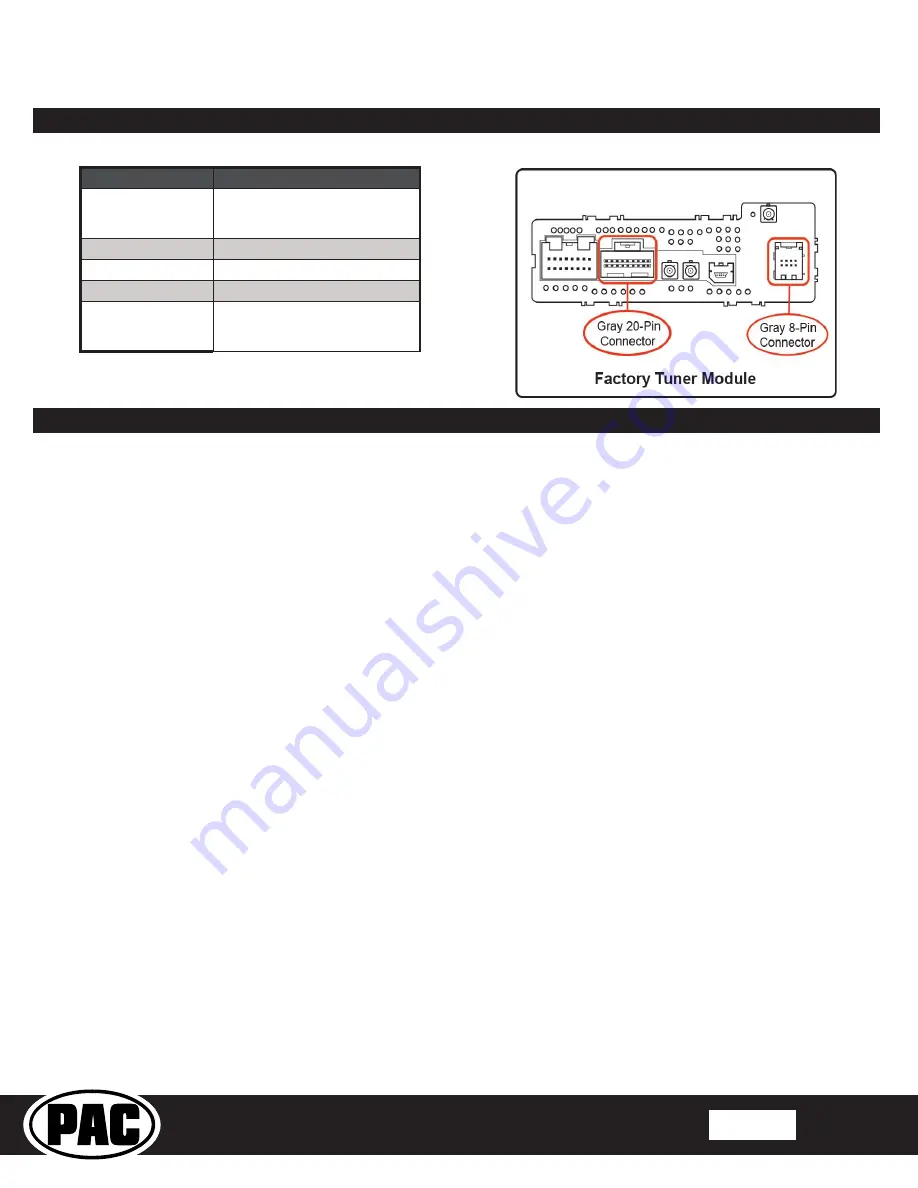
Vehicle
Radio Module Location
Full Size Trucks and
SUVs, Colorado,
Canyon
Behind Radio Display
CT6, Cruze
Back Passenger Sidewall of Trunk
Cadillac (others)
Above Passenger Kick Panel
Chevrolet Corvette
Passenger Footwell on Firewall
Camaro, Equinox,
Impala, Malibu,
Traverse
Above Passenger Kick Panel
1. Turn the ignition on. Adjust the volume on the radio control panel. The red LED should flicker while the volume is changing.
2. Set the amp gain(s) to the desired level. We recommend using an oscilliscope and test tones to set the amp gain(s). Please
refer to the MECP Advanced study guide (p. 360) if you are unfamiliar with this process.
3. Check volume, balance, fade and EQ settings.
4. If you would like to adjust the chime volume, center channel volume, or minimum volume, do so using one of the methods
outlined on the next page. If you are happy with the default levels, no adjustments are necessary.
Manually Setting the Chime Volume (optional)
You can manually set the level of the factory chime using the programming button on the side of the interface, or the radio dash
panel controls. If you would like to set the chime volume using the AmpPRO PC app please proceed to the AmpPRO PC app
section.
PLEASE NOTE: Knob must be connected to module for either of the following methods.
Setting the chime volume using the programming button
1. Start with the level control knob turned all the way down (counter-clockwise).
2. Press the programming button on the side of the interface.
3. LED 1 will turn green and the chimes will begin continuously sounding.
4. Turn the level control knob clockwise until the desired chime level is reached.
5. You can now either press the programming button twice, or wait ten seconds to exit the settings.
Setting the chime volume using the radio dash panel controls
1. Start with the level control knob turned all the way down (counter-clockwise).
2. Press and hold the track down button on the radio dash panel for approximately ten seconds.
PLEASE NOTE:
The radio
will respond to the track down commands during this process, this is normal and has no effect on the AP4 operation.
3. LED 1 will turn green and the chimes will begin continuously sounding.
4. Turn the level control knob clockwise until the desired chime level is reached.
5. You can now wait ten seconds to exit the settings.
Manually Setting the Minimum Volume (optional)
If the minimum volume of the radio (factory radio volume level 1) is too loud, you can manually set the level of the minimum
volume using either the programming button on the side of the interface, or the radio dash panel controls. If you would like to set
the minimum volume using the AmpPRO PC app, please proceed to the AmpPRO PC app section.
PLEASE NOTE: Level control knob must be connected to module for either of the following methods.
Setting the minimum volume using the programming button
1. Start with the level control knob turned all the way down (counter-clockwise).
2. Set the amp gains to the desired level.
3. Set the volume on the factory radio to 1.
4. Press the programming button on the side of the interface twice.
5. LED 1 will turn amber and the chimes will begin sounding every five seconds.
6. Turn the level control knob clockwise until the desired minimum volume level is reached.
7. You can now either press the programming button once, or wait ten seconds to exit the settings.
Fig. 1
Fig. 2
Setup and Configuration


