background image

W a l l m o u n t   C h a s s i s   

A E C - 2 0 6


Chapter 2  Quick Installation Guide


2 - 8 

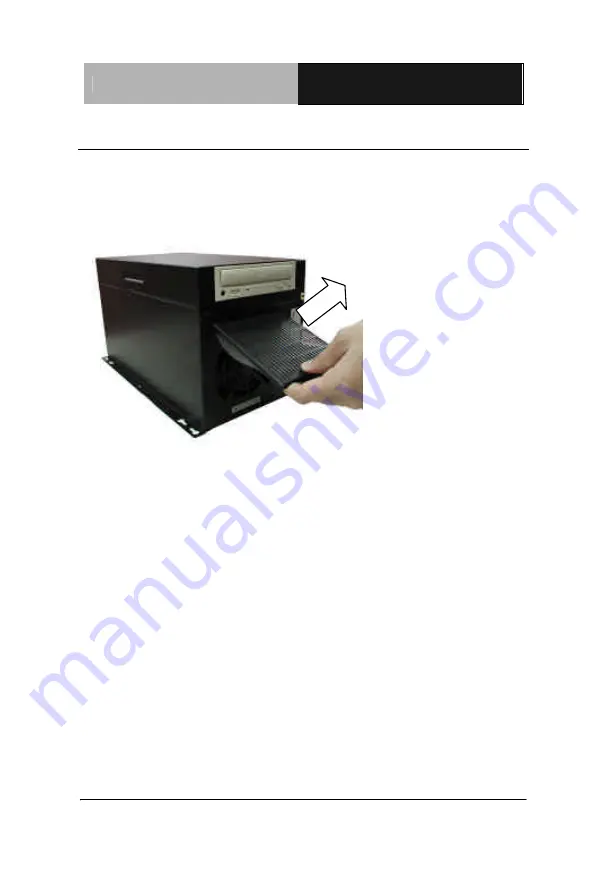
2.6 Replacing the filter 

You may need to replace the used filter after a period of time. Please refer 

to the following charts and procedures. 


Remove the two 

screws located at the 

bottom of the filter cover 

then pull the cover free 

from the chassis 

Remove the filter 

and replace it with a new 

one. 

Insert the filter and 

the cover back to the 

chassis and screw the 

cover through the hole at 

the bottom. 


Summary of Contents for AEC-206

Page 1: ...AEC 206 Wallmount Chassis Part No 2007206010 V 1 Printed in Taiwan 1 2003 ...

Page 2: ...is manual is intended to be accurate and reliable However the original manufacturer assumes no responsibility for its use nor for any in fringements upon the rights of third parties which may result from its use The material in this document is for product information only and is subject to change without notice While reasonable efforts have been made in the preparation of this document to assure ...

Page 3: ...2 Quick Installation Guide 2 1 Removing the cover 2 2 2 2 Adding a floppy drive 2 3 2 3 Adding a CD ROM drive 2 5 2 4 Adding a Hard Disk drive 2 6 2 5 Adding the hold down bar 2 7 2 6 Replacing the filter 2 8 2 7 Adding the wallmount kit 2 9 Appendix Front panel daughter board and Backplanes A 1 Front panel daughter board mechanical drawing A 2 A 2 Front panel daughter board Jumpers Connectors A 2...

Page 4: ...Wallmount Chassis A E C 2 0 6 Chapter 1 General Information 1 1 General Information Chapter 1 ...

Page 5: ...dicated to Pentium 4 CPU Card Inside this chassis you can attach one 5 25 CD ROM one Floppy and TWO 3 5 Hard disk drives for high data storage capacity Despite of the high density inside you never worry about the overheat of the chassis because we attach one 12x12 system fan in the chassis front cover for excellent heat dissipation On the front panel of AEC 206 two LED indicators indicate the powe...

Page 6: ...orts one card hold down bar Special modular design allows users to maintain the system with minimum down time 1 3 Specifications System Construction Heavy duty steel chassis Disk drive bay External one 3 5 FDD or 5 25 CD ROM Internal two 3 5 HDD System cooling fan one 12 x 12 cm ball bearing fan with filter Flow in Controls Power ON OFF switch reset switch Indicator HDD LED Power ON LED I O Port o...

Page 7: ...s per Segment PISA PCI ISA PICMG Segment Systems BP206SI V60 0 0 6 0 Single BP206SG P3 V61 0 4 1 2 Single Power Supply Options Specification Model Number Watt Type LxWxH mm Input Output 1757215001 150W AT 180x100x40 5 115 230V 5 12 5 12 1757215002 150W ATX 180x100x40 5 115 230V 3 3 5 12 5 12 5Vsb 1757220001 200W ATX12V 200x100x40 5 115 230V 3 3 5 12 5 12 5Vsb 1757215004 300W ATX12V 200x100x40 5 11...

Page 8: ...Wallmount Chassis A E C 2 0 6 Chapter 1 General Information 1 5 1 4 Dimension Diagram ...

Page 9: ...nformation 1 6 1 5 Connectors and Drive Bay Location Diagram 1 Two internal 3 5 hard disk bay 2 5 25 CD ROM drive 3 Floppy drive 4 Two USB ports 5 Power ON OFF Switch and LED HDD LED Reset Switch 6 12cm cooling fan with filter flow in 7 Hold down bar ...

Page 10: ...Wallmount Chassis A E C 2 0 6 Chapter 1 General Information 1 7 8 COM port 9 Parallel port 10 LVDS Interface 11 Hot Air outlet 12 Power supply ...

Page 11: ...Wallmount Chassis A E C 2 0 6 Chapter 2 Quick Installation Guide Quick Installation Guide Chapter 2 ...

Page 12: ...de 2 2 2 1 Removing the cover Before you install any drives or plug in cards into AEC 206 you have to open the cover and remove the hold down bar first l Unscrew the cover lift the lid and keep the top of the chassis open l Unscrew the hold down bar and remove it ...

Page 13: ...rive please refer to the following charts and procedures l Unscrew the mounting bracket from the chassis l Remove the black front bracket and insert the FDD into the mounting bracket with its base facing inward l Connect a 34 pin flat cable and power cable to the FDD and attach the FDD to the bracket with four screws ...

Page 14: ...Wallmount Chassis A E C 2 0 6 Chapter 2 Quick Installation Guide 2 4 l Attach the mounting bracket with the FDD inside to the chassis with four screws ...

Page 15: ...ures l Unscrew the mounting bracket from the chassis l Unscrew the black front bracket and insert the CD ROM drive into the mounting bracket with its base facing inward Connect a 40 pin flat cable and power cable to the CD ROM drive and attach it to the bracket with four screws l Attach the mounting bracket with the CD ROM drive inside to the chassis with four screws ...

Page 16: ...k drive please refer to the following charts and procedures l Unscrew the mounting bracket from the chassis l Insert the hard disk drive to the mounting bracket and get it screwed in the four holes on the side of the hard disk l Attach the mounting bracket with the hard disk drive inside to the chassis with four screws ...

Page 17: ...fter you assemble all the drives plug in cards and cables inside the chassis be sure to put the hold down bar back to strength its anti vibration ability l Screw the hold down bar to the same location from where it was removed in the first step l Then close the cover of the chassis and get it screwed ...

Page 18: ...fter a period of time Please refer to the following charts and procedures l Remove the two screws located at the bottom of the filter cover then pull the cover free from the chassis l Remove the filter and replace it with a new one l Insert the filter and the cover back to the chassis and screw the cover through the hole at the bottom ...

Page 19: ...Chapter 2 Quick Installation Guide 2 9 2 7 Adding the wallmount kit You can easily mount AEC 206 onto wall with the supplied wallmount kit l Turn over the chassis to expose its bottom upward l Fasten the two brackets with six screws ...

Page 20: ...Wallmount Chassis A E C 2 0 6 Appendix A Front panel daughter board and Backplane A 1 Front panel daughter board and Backplane Appendix ...

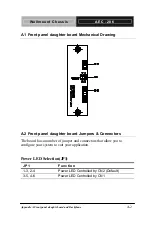
Page 21: ...ter board Mechanical Drawing A 2 Front panel daughter board Jumpers Connectors The board has a number of jumper and connectors that allow you to configure your system to suit your application Power LED Selection JP1 JP1 Function 1 3 2 4 Power LED Controlled by CN2 Default 3 5 4 6 Power LED Controlled by CN1 ...

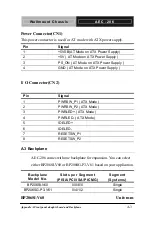
Page 22: ...Supply 4 GND AT Mode on ATX Power Supply I O Connector CN2 Pin Signal 1 PWRSW_P1 ATX Mode 2 PWRSW_P2 ATX Mode 3 PWRLED ATX Mode 4 PWRLED ATX Mode 5 IDELED 6 IDELED 7 RESETSW_P1 8 RESETSW_P2 A 3 Backplane AEC 206 comes with one backplane for expansion You can select either BP206SI V60 or BP206SG P3 V61 based on your application Backplane Model No Slots per Segment PISA PCI ISA PICMG Segment Systems...

Page 23: ...Wallmount Chassis A E C 2 0 6 Appendix A Front panel daughtr board and Backplane A 4 BP206SG P3 V61 Unit mm ...

Reviews: