background image


- 5 - 

B. The USB receiver will automatically be recognized by your computer. 

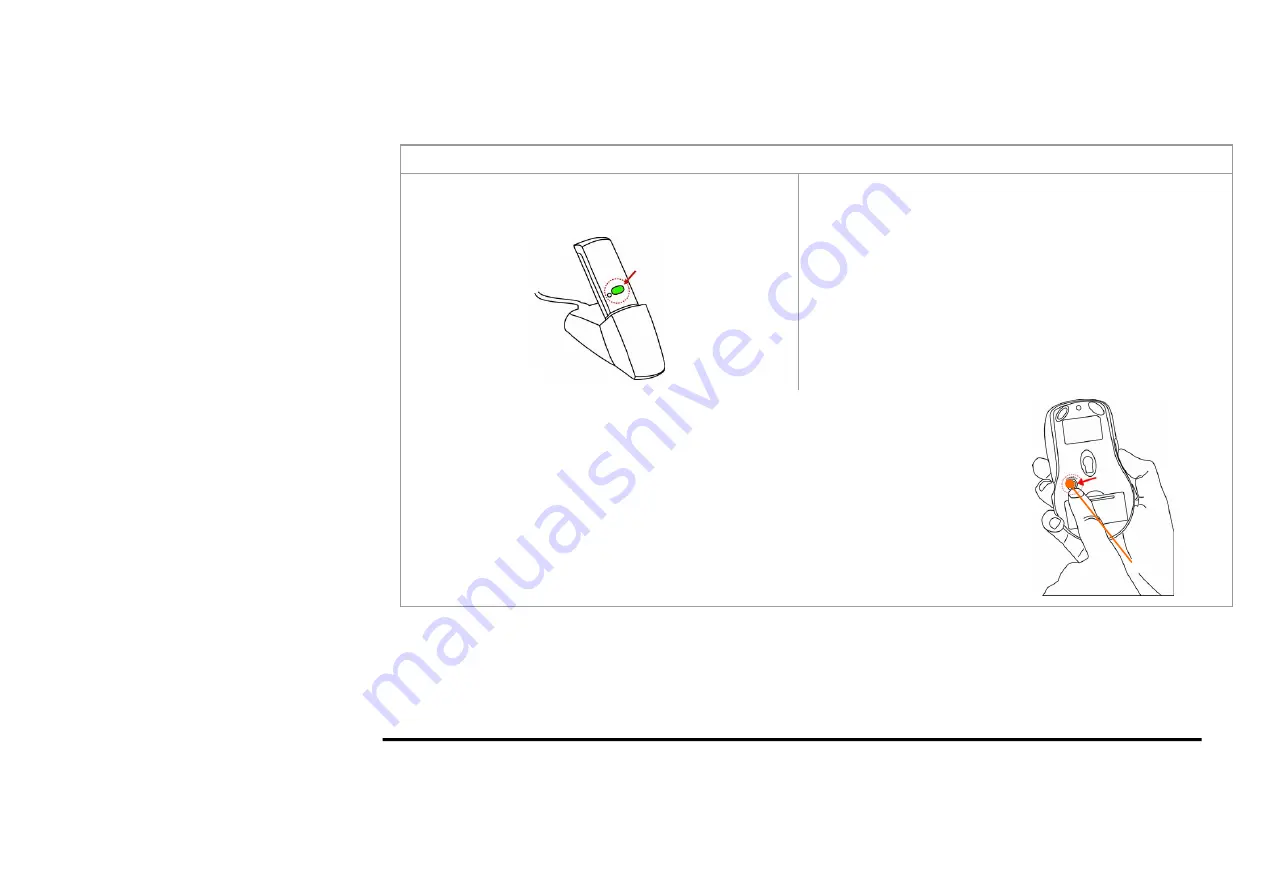
C. 

Press the “connect” button on the USB receiver as shown, 

the Green Power LED will light up, and starts “Blinking”.


D. Immediately Press the “connect” button on the bottom of the 

mouse, If you can’t find or see your cursor on the screen, follow 

the steps below: 

1. 

Unplug and re-plug the receiver


2.Test the device on another USB port or computer. 

3. 

Some 

surfaces

 may “trick” the optical sensor, such as reflective 

surfaces like glass or mirrors. The Optical sensor should perform 

well on all other surfaces.


Power Management 

1. 

To power on the mouse, press the connect button on the bottom of the mouse once. 

2.

 To turn off the mouse, 

press

 and hold the connect button on the bottom of the mouse 

until its optical light (RED) 

turns

 off. 

Note: 

Removing the batteries will require you to synchronize it with the receiver again 

the next time you turn it back on.


Power on/off


Summary of Contents for G6-70D

Page 1: ...G6 Saver Wireless Optical Mouse User s Guide Mouse Model G6 70D Dongle Model RG 20M www a4tech com...

Page 2: ...rference will not occur in a particular installation If this equipment does cause harmful interference to radio or television reception which can be determined by turning the equipment off and on the...

Page 3: ...with Auto Channel Hopping Technology Ultra Low Battery Power Consumption Only 6mA Auto Channel Hopping technology automatically detects and secures available channels in the busy public 2 4GHz univers...

Page 4: ...n 4 meters range please replace the batteries with a fresh set perform the synchronization procedure for the mouse and test the range again If the range is still below 4 feet please test your device o...

Page 5: ...t the positive and negative ends of the battery match the polarity indicators inside the battery housing C Slide the batter cover back into its position until it clicks firmly into place Step 2 Connec...

Page 6: ...Test the device on another USB port or computer 3 Some surfaces may trick the optical sensor such as reflective surfaces like glass or mirrors The Optical sensor should perform well on all other surfa...

Page 7: ...stalled the 2X Office driver OR Go to START and then select PROGRAMS If you see A4 TECH Hardware Mouse 2X Office in the program list then you have successfully installed the driver Otherwise installat...

Page 8: ...ammable Button 2 has been assigned as Right Button which works as right click for your mouse Button 3 has been assigned as Pan function by default It s a vertical scrolling wheel if you scroll it Also...

Page 9: ...Click the Office Button Option in the Mouse Properties Mouse Properties B Click 6th Button located on the mouse and it will bring you the Office Jump menu as below figure click the A4 logo on Office J...

Page 10: ...a second with such a handful function When you are in Photoshop Illustrator Pro E or other applications After selected Office Command Set No 15 Zoom In Zoom out you can enlarge or shrink the image si...

Page 11: ...w Hardware IBM or Compatible PC CD User Manual on CD Hard Disk Driver USB Port Operating System Windows 2000 XP MCE2005 XP x64 2003 x64 and VISTA x86 Package Includes 2 4GHz RF Mouse USB RF Receiver 2...

Reviews: