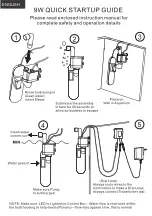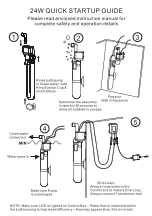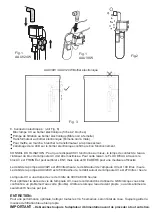
Fig. 4
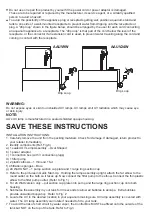
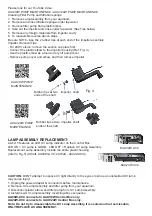
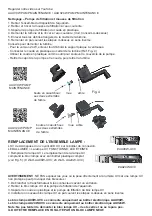
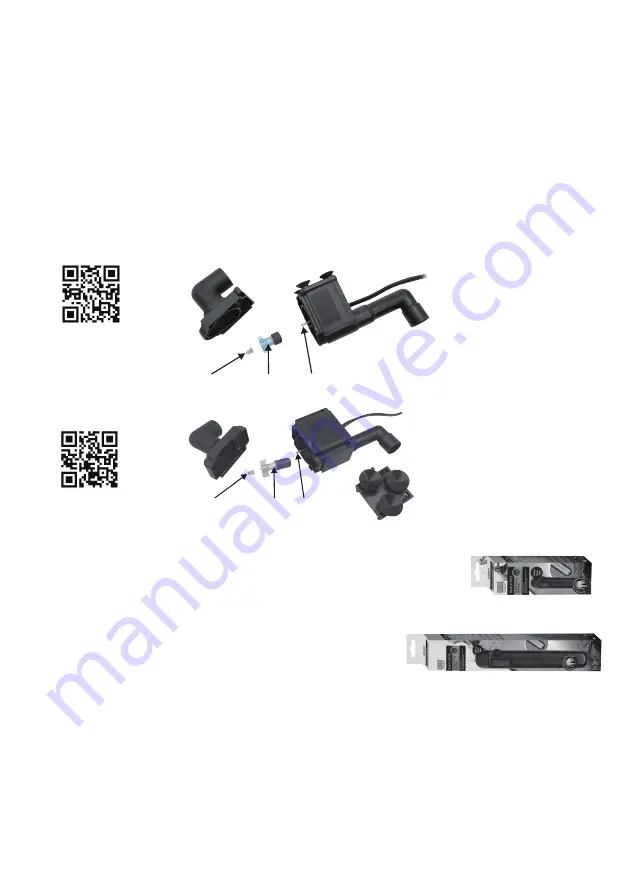
Rubber tips at two
ends of the shaft
Rubber tips at two
ends of the shaft
impeller
impeller
shaft
shaft
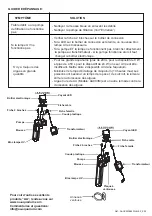
LAMP ASSEMBLY REPLACEMENT:
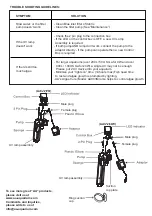
AA's UV features an LED UV Lamp indicator on the Control Box.
LED ON = UV Lamp is GOOD; LED OFF = Replace UV Lamp Assembly
Replacement Lamp Assembly include the entire plastic housing
(refer to Fig.5) (9 Watt- AA09W-UVC; 24 Watt - AA24W-UVC)
CAUTION:
DON'T attempt to expose UV light directly to the eyes or skin as an unshielded UV lamp
may cause injury!
1. Unplug the power adaptor & connectors before maintenance.
2. Remove UV Lamp Assembly and filter pump from your aquarium.
3. Disconnect plastic elbow and filter pump from UV Lamp Assembly
4. Install new UV Lamp Assembly reversing above sequence.
AA09W-UVC connects to AAUV9W Control Box only.
AA24W-UVC connects to AAUV24W Control Box only.
Note: Do not try to disassemble the UV Lamp Assembly, it is sealed and not serviceable.
ONLY REPLACE AS AN ASSEMBLY.
AAUV9W PUMP
MAINTENANCE
AAUV24W PUMP
MAINTENANCE
Please look for our YouTube video:
AAUV9W PUMP MAINTANENCE / AAUV24W PUMP MAINTANENCE
Cleaning Filter Pump and filtration sponge
1. Remove Lamp Assembly from your aquarium.
2. Remove and rinse filtration sponge under tap water.
3. Remove filter pump from plastic elbow.
4. Take out the impeller and rinse under tap water. (See Tips below)
5. Remove any foreign materials from impeller cavity.
6. To reassemble reverse above steps.
Be sure NOT to lose the 2 rubber tips at each end of the impeller assembly.
Impeller Removal Tips:
- For 24W version, remove the suction cup plate first.
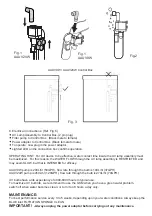
- Connect the plastic elbow to the impeller housing (Ref. Fig. 4)
- Use the plastic elbow as a tool and pry off pump cover.
- Remove pump cover and elbow, and then remove impeller.
#AA09W-UVC
#AA24W-UVC
Summary of Contents for AAUV24W
Page 1: ...AAUV9W AAUV24W ...
Page 2: ...ENGLISH ...
Page 3: ......
Page 9: ...FRANÇAIS ...
Page 10: ......


