16
VIDEO WALL CONTROL SOFTWARE
1. UNIT INFORMATION AND DETAILS:
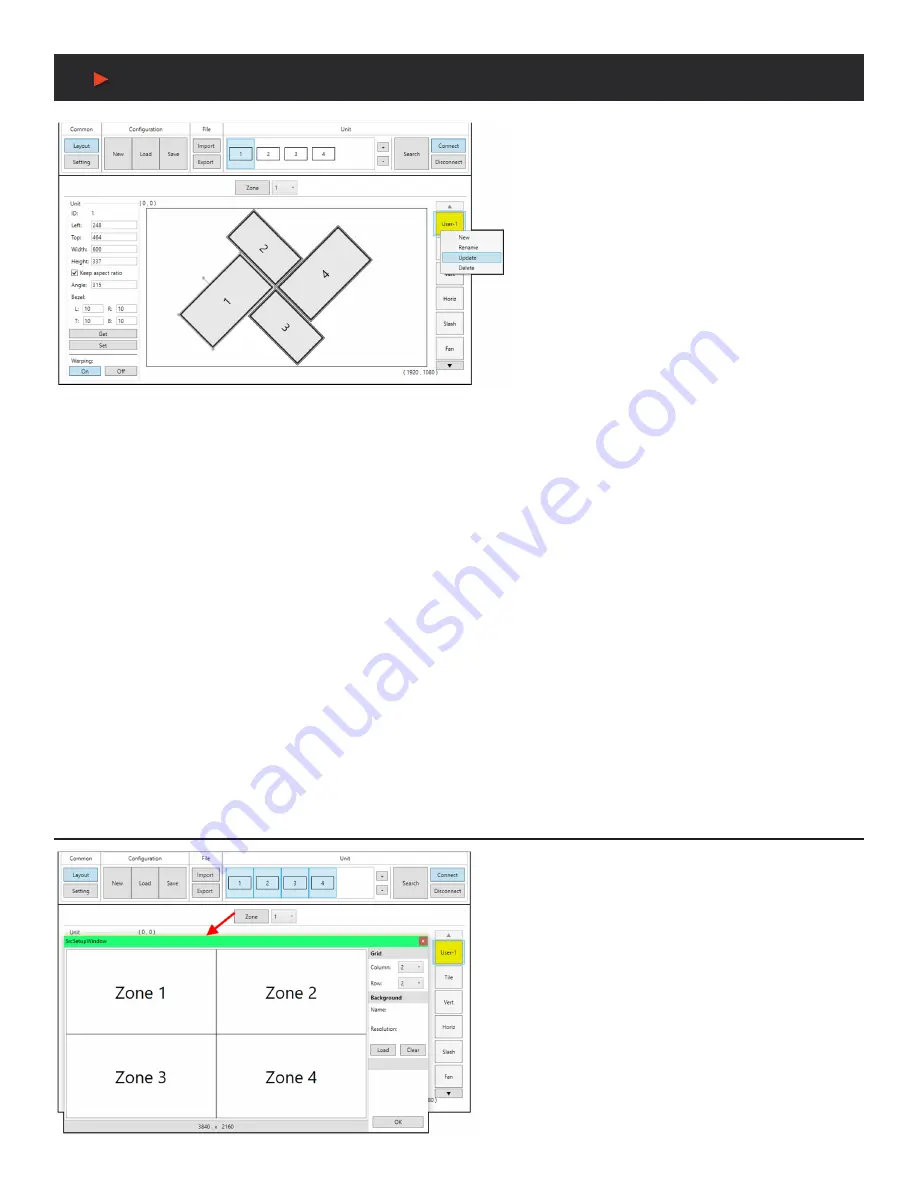
This section
displays all of the relevant position, dimension, and
orientation details of the selected unit/ display.
Note:
Only one unit’s details will be displayed if multiple
units are currently selected.
■
ID:
The ID number of the currently selected unit/display.
■
DIMENSIONS:
Displays the current values for the pixel
position of the top/left corner of the un-rotated display
as well as the current width and height in pixels. After
changing any of these values, press the enter key to
commit the change to the layout.
Note:
If the bezel values are set to 0, the height and width
values should only be the measurement of the video panel
within the display. However, if bezel values are being used,
these dimensions represent the size of the entire physical
display (including the bezel).
■
KEEP ASPECT RATIO:
Enabled or disables forcing the current aspect ratio to be maintained when the display is resized either by
typing a new value, or by mouse-dragging a corner of the display in the layout.
■
ANGLE:
Displays the current rotation angle of the selected display in degrees. After changing this value, press the enter key to
commit the change to the layout.
■
BEZEL:
Displays the current bezel measurements, in pixels, for the selected display and allows for their modification. The bezel
is represented in the layout by a darkened rectangle around the viewable portion of the display. After changing this value, press the
enter key to commit the change to the layout.
Note:
Bezel measurements are optional. Bezel values subtract from the entered horizontal and vertical measurements of the display
and reduce the size of the viewable portion of the display in the layout window.
2. GET BUTTON:
Downloads the current layout settings from all selected unit(s) into the software.
3. SET BUTTON:
Uploads the current layout to all selected unit(s).
4. WARPING ON/OFF BUTTONS:
Enables or disables warping on the currently selected unit(s). When warping is disabled, the complete
source video will display normally, filling the display.
5. CUSTOM LAYOUT SELECTION RIGHT-CLICK MENU:
Right clicking on any custom layout button brings up a menu of functions that
can be performed on that layout.
■ NEW:
Opens the
“New Layout”
window and allows for the creation of a new custom layout based on the current layout.
■ RENAME:
Brings up a window allowing for the selected layout to be renamed.
■ UPDATE:
Updates the selected layout with the data in the currently live layout.
■ DELETE:
Deletes the selected layout.
Multi-Zone Video Wall Layouts
Though this unit’s input is limited to a maximum resolution of
1080p, it is possible to generate large, flexible, video walls
from 4K, or larger, sources by using a traditional 4K+ capable
video wall splitter product with each output of the video wall
splitter generating a 1080p block of video which is then further
distributed to each group of Video Wall Rotation Processors.
Note:
It is not possible for a display to be used in more than one
zone at a time, or cross zone borders.
The Zone feature makes managing, and visualizing, this special
arrangement of displays easier. Simply click on the
“Zone”
button to launch the Zone Source Setup window. Select the
number of horizontal and vertical zones needed. The total
effective resolution of all zones together is displayed at the
bottom of the window. For example, a 2x2 zone arrangement
would be used if
A
NEU
VIDEO


