


15
Operation of the Software
Additional Function Settings
Settings in the Auxiliary Function Area
FIRST AUXILIARY FUNCTION AREA:
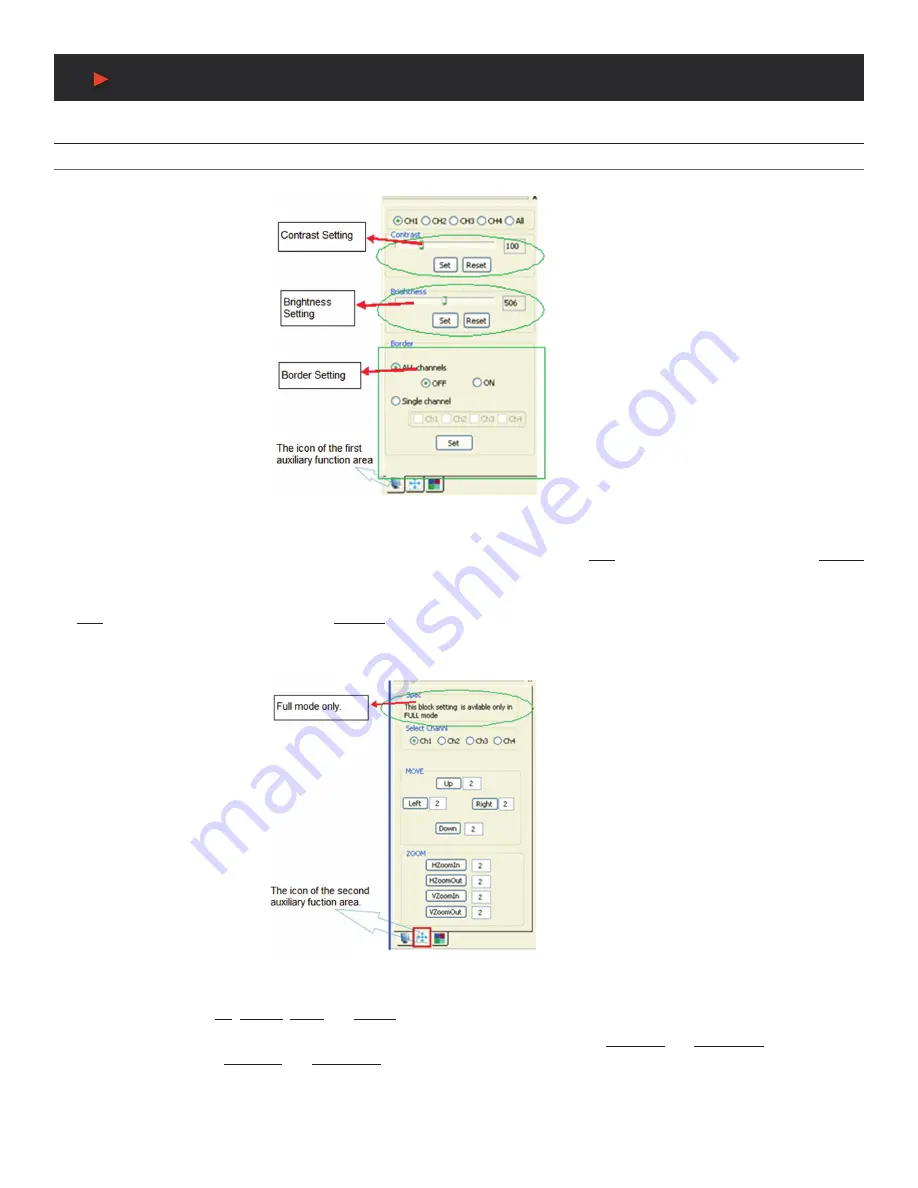
In this area users can set the contrast, brightness and add or remove the border for the output
images. As shown in
Figure 23.
Figure 23: First Auxiliary Function Area
CONTRAST/BRIGHTNESS SETTING:
To change settings to the images contrast/brightness for a single channel or all channels, select
the corresponding radio button and drag the bar to an appropriate position. Then press the
SET
button to confirm. In this area, the
RESET
button is used to set the value of contrast/brightness back to the factory default (Default value of image Contrast: 100, Brightness: 512).
BORDER SETTING:
To set the border of an image for a single channel or all channels, select the corresponding check box and press
the
SET
button to confirm your operation. The
OFF/ON
button is used to enable or disable the display border of the input images for all
channels.
SECOND AUXILIARY FUNCTION AREA:
In this area, users can set the image position and zoom. As shown in
Figure 24.
Figure 24: Second Auxiliary Function Area
IMAGE POSITION SETTING:
To move the position of the output image for any single channel, select the corresponding radio button and
use the directional buttons
UP, DOWN, LEFT
and
RIGHT
to the appropriate position.
IMAGE ZOOM IN/OUT:
To zoom in/out in both horizontal and vertical directions. The buttons
HZoomIn
and
HZoomOut
are for adjusting
the horizontal direction. And
VZoomIn
and
VZoomOut
are for adjusting the vertical direction.
Note:
1. The image begins to zoom in/out from the top left corner, and extends to a fixed maximum size, whenever you drag the mouse or set the values.
2. Image zoom setting is available only in Full Displaying mode.
A
NEU
VIDEO


