3 |
Congratulations on becoming an 8x8 Virtual Office Subscriber!
You will need to configure your new hosted PBX and activate your extensions. Below is a step-by-step overview of this
process, alternatively call a Technical Installation Lead (TIL) at 1.866.879.8647 to assist you with set-up.
How do I get started?
Pick out a calling plan and sign up
1.
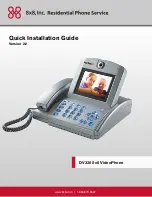
Order your 8x8 VideoPhone
2.
Install your 8x8 VideoPhone
3.
Activate your service
4.
And begin enjoying the power of video calls!
How do I install 8x8 VideoPhone?
8x8 equipment is shipped to you with a default configuration that allows it to be automatically configured with the required
network settings using a protocol called DHCP. (Note: As with any computer or network device, not every environment is the
same and may require procedures that differ from the default procedures.)
Standard Installation:
The standard installation procedure assumes:
You have a high-speed Internet connection (cable/DSL/other)
•
You have a home router or gateway to share your Internet connection
•
You have DHCP running on your network (most home routers do this, static IP addresses require manual configuration
•
of settings)
1. Install your 8x8 VideoPhone
Plug the VideoPhone into your network using a standard Ethernet cable (included)
a.
Plug in the power supply (included)
b.
Turn on your VideoPhone
c.
2. Activate your 8x8 Account
After completing step 1, you are ready to activate your 8x8 account. You will need a 10-digit activation code which is emailed
to you along with the shipping confirmation information.
Pick up your telephone handset and dial any phone number
a.
Follow the voice instructions and enter your 10-digit code
b.
If you have entered a valid code, your account will be activated and your 8x8 phone number will be read back to you.
c.
This number can also be found on your account web page.


