FINISH
P9
Page 6 of 6
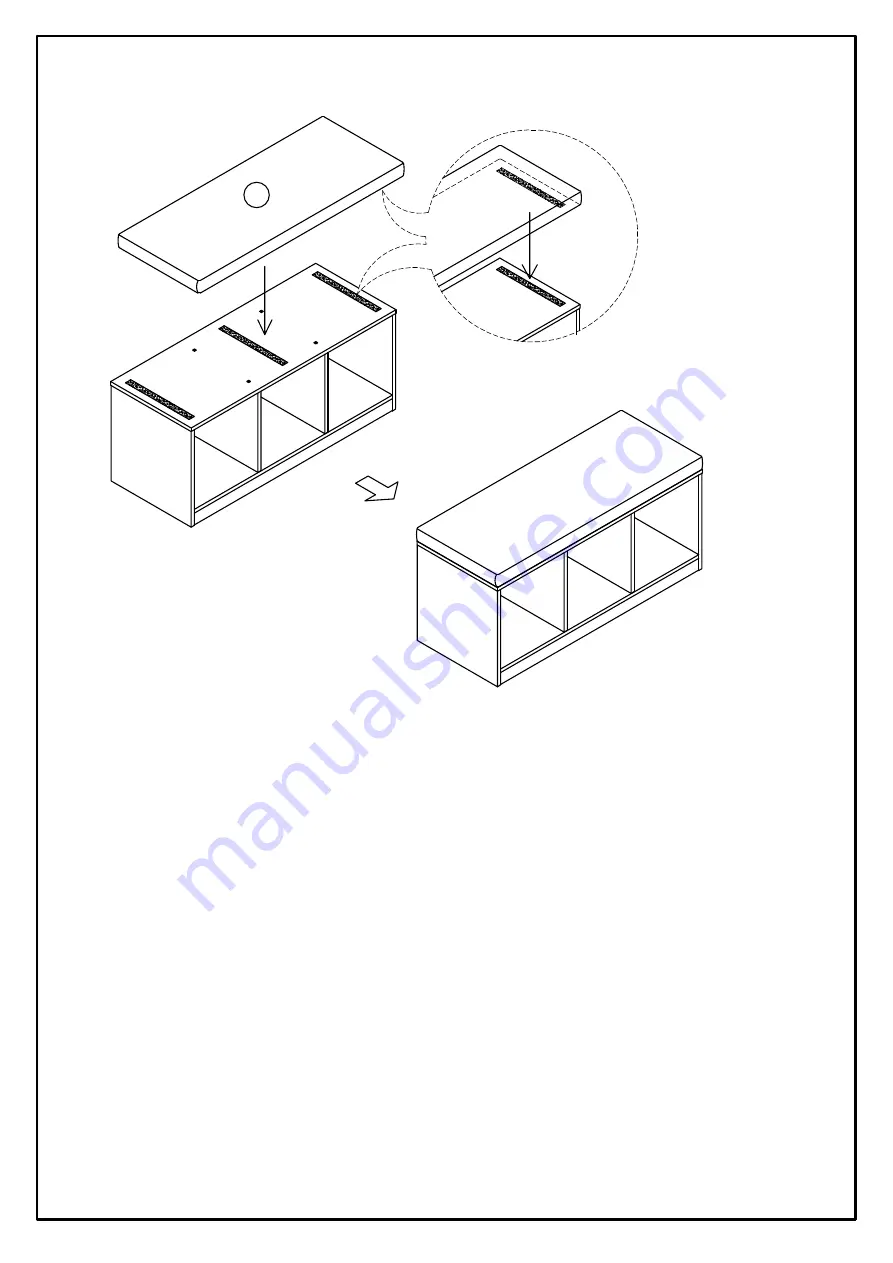
Step 11: Fix the cushion (P9) to the previous assembly as shown.
Page 1: ...assembly is complete to avoid accidentally discarding small parts or hardware Important safety instructions Please read carefully all instructions before assembly For your safety and ease assembly by...
Page 2: ...NY DAMAGES RESULTING FROM ITEM BEING IMPROPERLY ASSEMBLED AFTER PURCHASE Step 1 Assemble the unit on a flat soft surface such as a carpet or cloth to prevent scratching the finish Unpack the unit and...
Page 3: ...2 H5 H2 H5 Page 3 of 6 Step 3 Attach the vertical panel P5 to the bottom panel P4 with screw H2 as shown Step 4 Attach the back panel P7 to the previous assembly witrh screw H2 H2 x 4 H5 x 1 H2 x 4 H5...
Page 4: ...evious assembly as shown Step 6 Attach the base panel P6 to the privious assembly as shown Step 7 Align and attach the left side panel P1 to the privious assembly with screw H2 Repeat the same procedu...
Page 5: ...assembled unit upright Attach the top panel P3 to the previous assembly with screw H2 Step 9 Turn the assembled unit lay down Tap in the nail leg H4 to the previous assembly by hammer as shown Step 10...
Page 6: ...FINISH P9 Page 6 of 6 Step 11 Fix the cushion P9 to the previous assembly as shown...