

10385 Westmoor Drive, Suite 210, Westminster, CO 80021 | www.3xlogic.com | (877) 3xLOGIC
© 2017 3xLOGIC, Inc. All rights reserved. Information in this document is subject to change without notice. 3xLOGIC and the 3xLOGIC logo are trademarks of 3xLOGIC, Inc.
All other trademarks are the property of their respective owners. Revised: December 6, 2016
QUICK INSTALL GUIDE | V-Series Solution |
VX-2S-CPIR-W
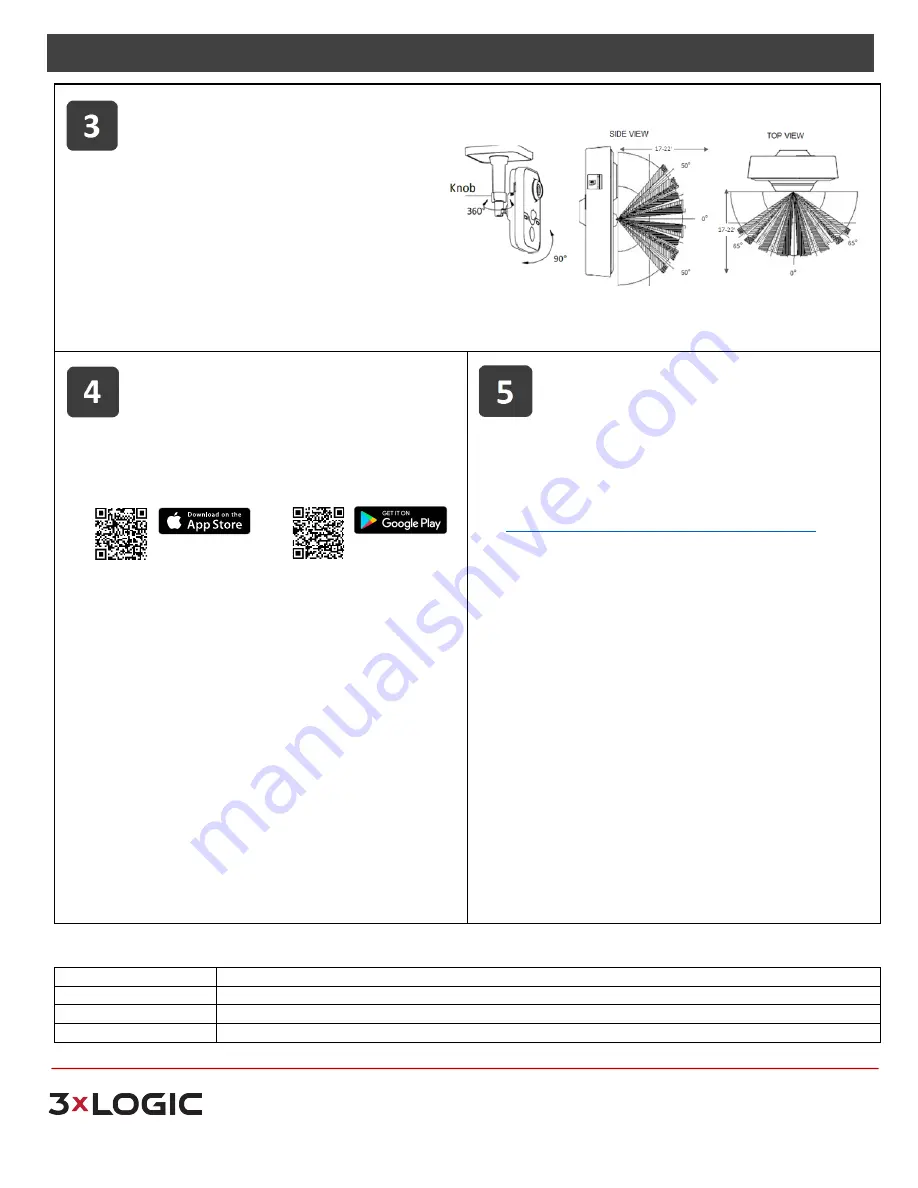
Adjust the position of the camera and tighten
the knob.
Note
: The position of the device will need to work for both
the camera and the PIR.
PIR Detection:
The PIR sensor can detect motion up to 17-
22’ and at 100° range vertically or 130° range horizontally.
Precaution
: Do not position in areas of strong light,
unstable lighting conditions or aim at sources of heat.
*Camera diagrams are not to scale. Diagrams provided as viewing angle reference only.
Remote Viewing & Monitoring
Ensure the connected network provides a DHCP
address and allows outbound access to the internet.
For installations where DHCP is not available or where the
camera is being used with an appliance see Step 5.
a)
Download VSX Setup app from your devices’ app store.
b)
Follow prompts in the VSX Setup app, and scan the
camera’s QR to complete configuration and enrollment.
c)
DEFAULT User and Password is admin/12345.
d)
The cameras live view will be displayed in the app for final
positioning.
e)
Ensure that the camera is configured with the proper time
zone, auto daylight savings update and set for NTP (auto
time sync).
f)
Setup results can be emailed upon completion for easy
monitoring configuration.
Note:
The Multi-Sensor will automatically check for updates and format
the SD card. Please allow 15 minutes before power cycling the camera.
If an email address was set up in the app, the camera will email a status
update when all updates and formatting are complete.
Non-DHCP Applications
A laptop connected to the same network as the
camera will be required to discover the camera and
assign a valid IP address.
a)
Download and install the All-in-One PC Setup Utility for
Windows from:
http://www.3xlogic.com/support-center/software
b)
The utility will automatically detect cameras on the
network (click Refresh to refresh the list).
c)
Select the desired device from the list of available cameras.
d)
Click IP Setup and assign the desired IP.
e)
Re-select the desired device and click Next to begin setup
f)
Fill out installer and company information.
g)
Login with the default credentials, then reset the default
username and password.
h)
Confirm the camera Live View preview is as desired and
click Continue.
i)
Adjust any/all camera settings including the camera name
and Connect alias.
j)
Fill out remaining information and complete steps in the
setup tool to receive an installation summary e-mail.
Note:
The Multi-Sensor will automatically check for updates and format
the SD card. Please allow 15 minutes before power cycling the camera. If
an email address was set up in the app, the camera will email a status
update when all updates and formatting are complete.
Out of the Box Configuration
Digital Alarm Input
Enabled - Normally Closed
PIR Alarm
Enabled
Video Motion Detection
Enabled
Video Recording
Record to SD card on event w/ optional SD card