DIGITAL WHITEBOARD
WA L L D I S P L AY W I T H I D E A B O A R D Q U I C K S TA R T G U I D E
I
D
E
A
B
O
A
R
D
Q
U
I
C
K
S
T
A
R
T
G
U
I
D
E
Note:
For more information on
how to use eBeam Software,
please consult the Wall Display
Operator’s Guide.
1
Make sure the Wall Display is plugged in and that the Master Power Switch is on.
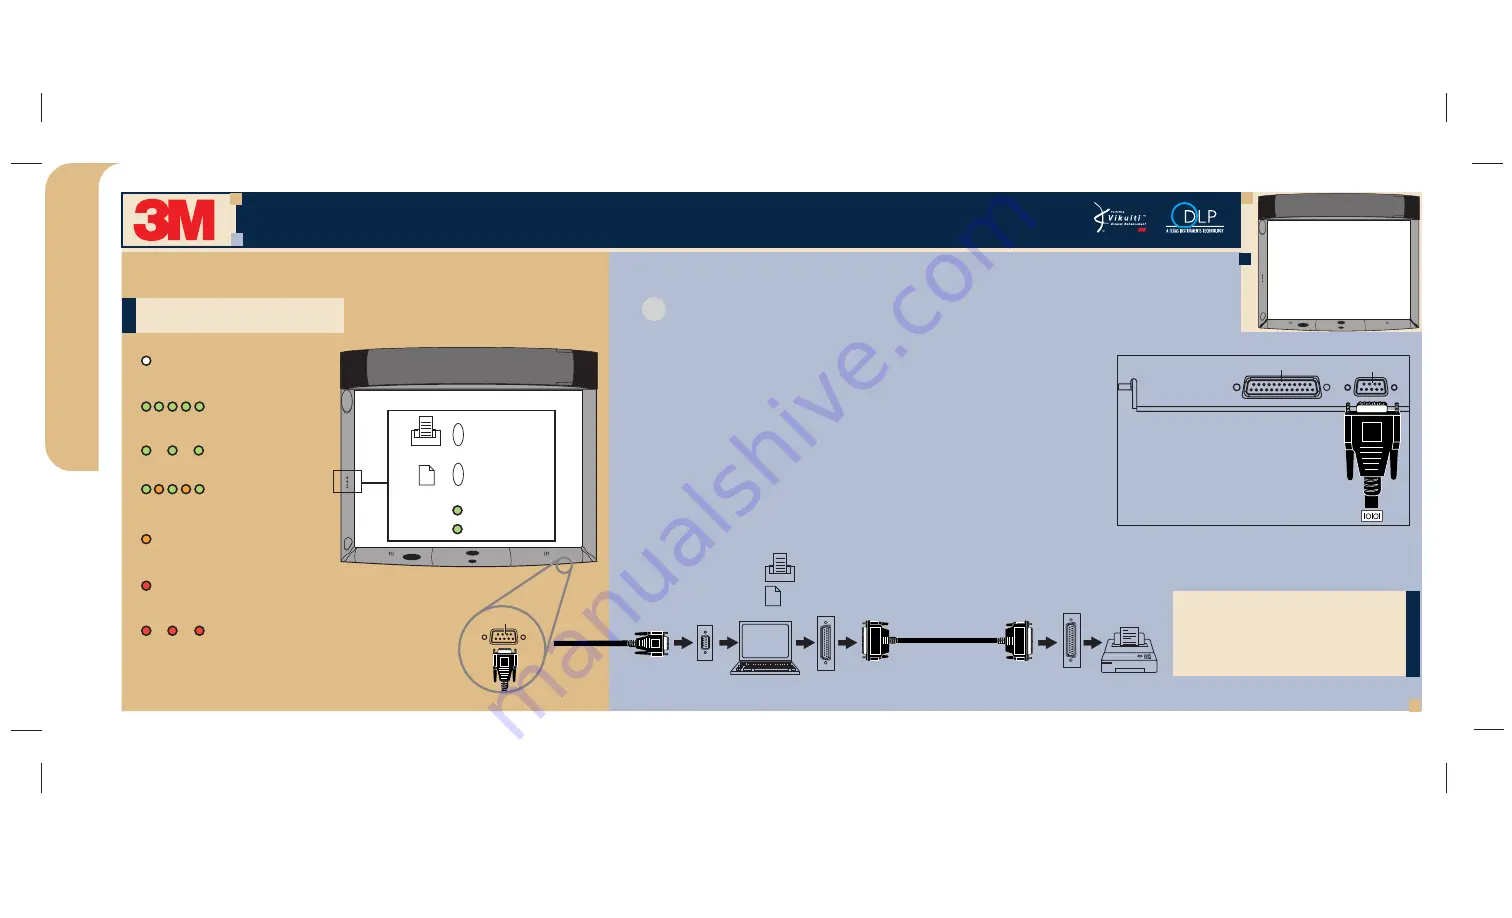
Computer must be connected to system. A standard serial cable must be used to
connect the computer’s serial port to the Wall Display’s “Computer” port.
• When the power is turned on, the bottom LED light on the
side bezel will be green.
This means that the power is on for the Digital Whiteboard.
• Activate the video port on your PC to display images.
• Install the eBeam Software on your PC.
• Start the eBeam Software by double-clicking the eBeam icon
on your PC.
• Use the digital markers to write on the board. Use the digital
eraser to erase any markings.
• Press the top button to print through your computer.
• Press the bottom button to clear the buffer and begin a new page.
Printer
(This row for Digital
Whiteboard option only)
Computer
TOP LIGHT Legend
NO DATA IN MEMORY
(No light)
COMMUNICATING WITH A PC
(Solid amber)
CONNECTION ERROR
(Solid red)
PRINTING ERROR
(Slowly blinking red)
DATA IS PRINTING
(Blinking with alternating
green and amber)
MEMORY CONTAINS DATA
(Slowly blinking green)
BOARD IS RECEIVING DATA
(Quickly blinking green)
TOP LIGHT Legend
© 2001 3M IPC 78-6970-9117-7
PRINTER
button
NEW PAGE
button
TOP LIGHT
BOTTOM LIGHT
Computer
( P A G E 2 O F 2 )
WA L L D I S P L AY W I T H I D E A B O A R D - - H A R D W A R E


