background image

UNJAMMING A CUBEPRO EXTRUDER 


Tools required:  

o


2.5 mm Hex screwdriver 

o


T10 Torx driver 

o


Pliers 

o


Side cutters 


First, switch the power off. Turn machine 180 degrees, so the back panel faces you. 


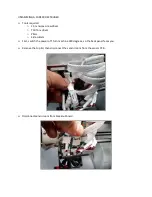
Remove the top lid, then disconnect the sensor loom from the sensor PCB 


Disconnect sensor loom from breakout board 


Summary of Contents for CubePro

Page 1: ...Hex screwdriver o T10 Torx driver o Pliers o Side cutters First switch the power off Turn machine 180 degrees so the back panel faces you Remove the top lid then disconnect the sensor loom from the s...

Page 2: ...Disconnect jet from sensor PCB Disconnect extruder loom from sensor PCB...

Page 3: ...Use 2 5mm Hex screwdriver provided in the toolbox to remove sensor PCB Undo 2 M3x5 screws shown Remove sensor PCB from extruder drive body being careful not to damage the filament sensor if equipped...

Page 4: ...Carefully pull the feeding tube from tube block to access the filament Carefully pull the filament from extruder in one smooth move without applying excessive Force...

Page 5: ...The section of filament will look like that shown in the picture below Cut the filament above the section removed from extruder...

Page 6: ...e idler wheel assembly from extruder drive assembly Pull very carefully pinching on the end of idler wheel being careful not to touch or damage the sensor disk or sensor sticker Loosen both bolts hold...

Page 7: ...Using T10 driver provided with the toolbox loosen the clamp holding the jet Do not remove the screw...

Page 8: ...opening You will feel some resistance this is normal as you will need to break the filament buckled in the extruder After removing the jet will look like shown below Using side cutters provided with t...

Page 9: ...sensor board is equipped with a filament sensor make sure the filament sensor is properly installed and aligned in the connectors Make sure the filament sensor installed in the recess inside the bloc...

Page 10: ...er guide Disconnect head loom from the breakout board to avoid damaging the components while levelling the jets There will be a warning message on the screen This can be ignored for now Replace the he...

Page 11: ...Using the Control Jets function purge the filament using 260 degrees C and 1 RPM The speed needs to be slow to allow the filament left in the jet to soak heat to be able to move inside the jet END...

Reviews: