


3D
Perception C
OMPACT
V
IEW
C
LAN
Revision
3
User
Manual
19
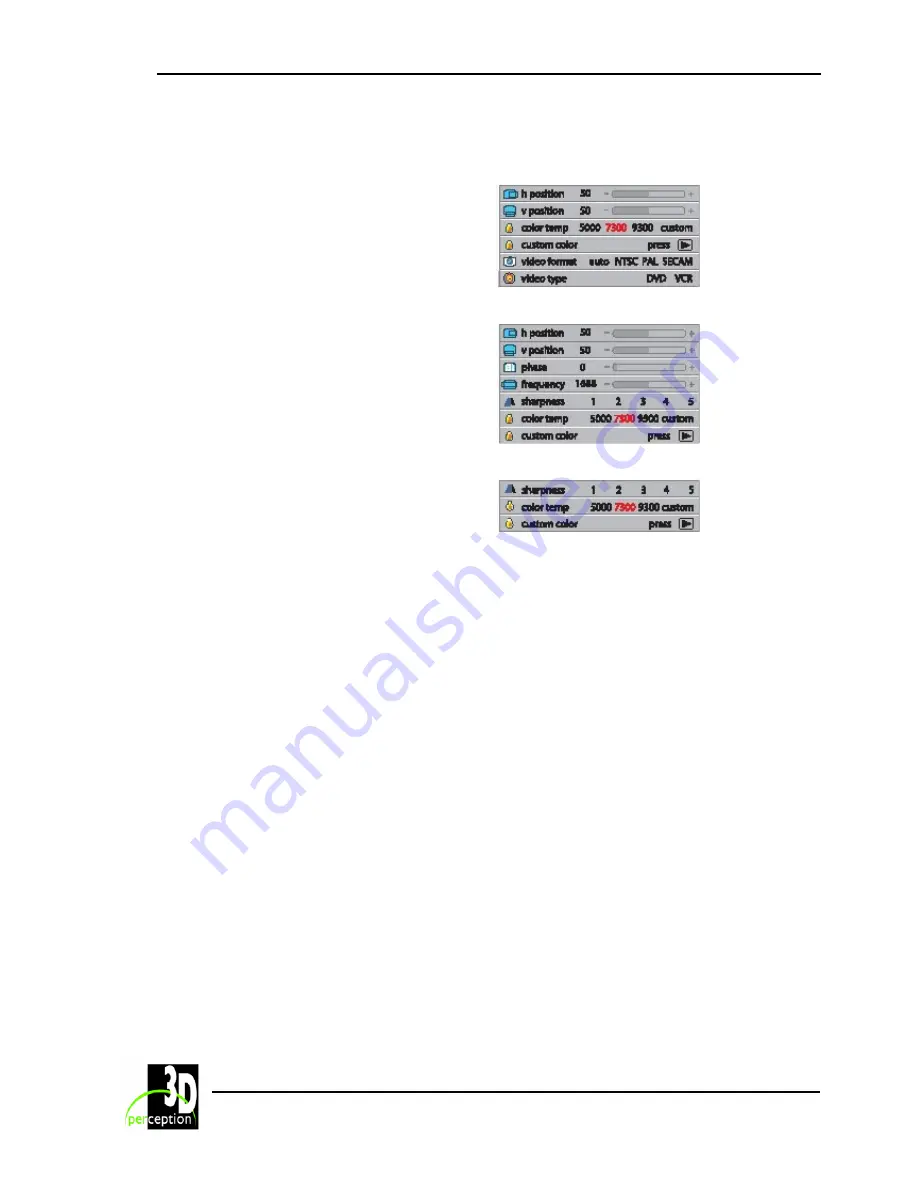
15.2 Advanced
Sub-menu
Video
VGA
h position:
Moves the image sideways
v position:
Moves the image up and down
color temp:
Changes the colour temperature
custom colour:
Defines the custom colour temperature
video format:
Select between manual or auto (video only)
video type:
Select between video types; DVD and VCR
(video only)
phase:
Adjust for a stable image (computer only)
frequency:
Adjust the image width (computer only)
sharpness:
Adjust the sharpness of images
DVI


