Networks with a DHCP Server
If your network has a DHCP server, an IP address is automatically assigned to the Bridge. It takes about
one to two minutes for the Bridge to determine if there is a DHCP server on the network. Use the 3Com
Wireless Infrastructure Device Manager (Widman) included on the 3Com Installation CD to locate the
Bridge on the network and view its IP address.
After you determine the Bridge’s IP address, you can enter that IP address into a web browser on a computer
on the same subnet to view the Bridge’s system status or change its configuration.
Networks without a DHCP Server
If your network does not have a DHCP server, the Bridge uses a default IP address (169.254.2.2) that is
assigned at the factory. You can use that IP address to configure the Bridge, or you can assign a new
IP address to the Bridge.
To verify that the Bridge is using the default IP address assigned at the factory:
1
Connect a computer directly to the Bridge using the supplied standard Category 5
UTP Ethernet cable.
2
Enter the Bridge’s default IP address (169.254.2.2) into the computer’s web browser.
If the Configuration Management System starts, the Bridge is using the factory assigned
IP address. You can configure the Bridge with the following login information:
■
Login name: admin
■
Password: none (blank)
If the Configuration Management System does not start, the Bridge is on a different subnet
than the computer. Install and start the 3Com Wireless Infrastructure Device Manager to
discover the Bridge’s IP address.
Bridge Default Settings
The table below shows the Bridge configuration factory defaults.
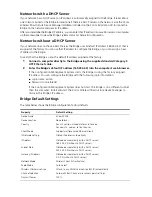
Property
Default Setting
Device Name
3Com WWB
Device Location
None (blank)
Country
For U.S. version, United States and Canada
For non-U.S. version, set by the user
Client Mode
Support multiple wired Ethernet clients
IP Network Setting
Obtain IP address automatically
IP Address
Obtained automatically (with a DHCP server)
169.254.2.2 (without a DHCP server)
Subnet Mask
Obtained automatically (with a DHCP server)
255.255.0.0 (without a DHCP server)
Gateway IP Address
Obtained automatically (with a DHCP server)
0.0.0.0 (without a DHCP server)
Network Mode
Wireless Client (Infrastructure)
Radio Mode
Auto Select
Wireless LAN Service Area
Attach to any WLAN Service Area (ESSID) automatically
Channel Selection
Automatic Best Channel (uses access point setting)
Transmit Power
100%

