


16
C
HAPTER
4: I
NTERNET
S
HARING
S
ETUP
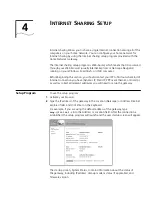
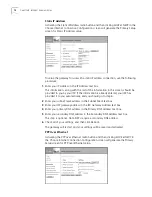
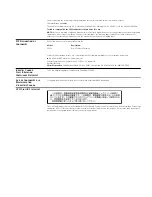
Client Privileges
Select
CLIENT PRIVILEGES to
generate the Client Privileges screen.
Client Privileges allows you to assign different access rights for different computers
on your home network.
To use access control:
1
Click in the
Enable
check box.
2
Assign the computer to a group.
Computers are identified by their IP addresses. You can assign computers to Group
1, 2, or 3. Computers not assigned to Groups 1, 2, or 3 are automatically assigned
to the Default Group. List the group members (by their IP addresses) in the
member text box.
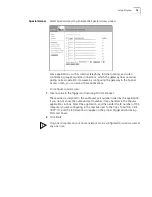
3
Assign the access rights of each group.
Access rights allow or deny users access to specified TCP and UDP ports. TCP and
UDP ports correspond to specific Internet services, such as browsing the Internet
or accessing newsgroups. There are two steps in assigning access rights.
a
Activate the
Allow
or
Block
radio buttons.
Activating Allow will give the members of the particular group access to the
service(s) you indicate in step 2b (see below). Activating Block denies access to
the services chosen in step 2b.
b
Select the service(s) to allow or block by clicking in the appropriate check
box(es).
For example, if you wish to deny access to all services for a particular group, you
can do it one of two ways: click
Block
and select all services; or, click
Allow
and
select no services.
4
Click
SAVE
.


