background image

22

C

HAPTER

 1: S

WITCH

 7750 C

OMPONENTS

24-port 100BASE-FX 

MMF FE Module

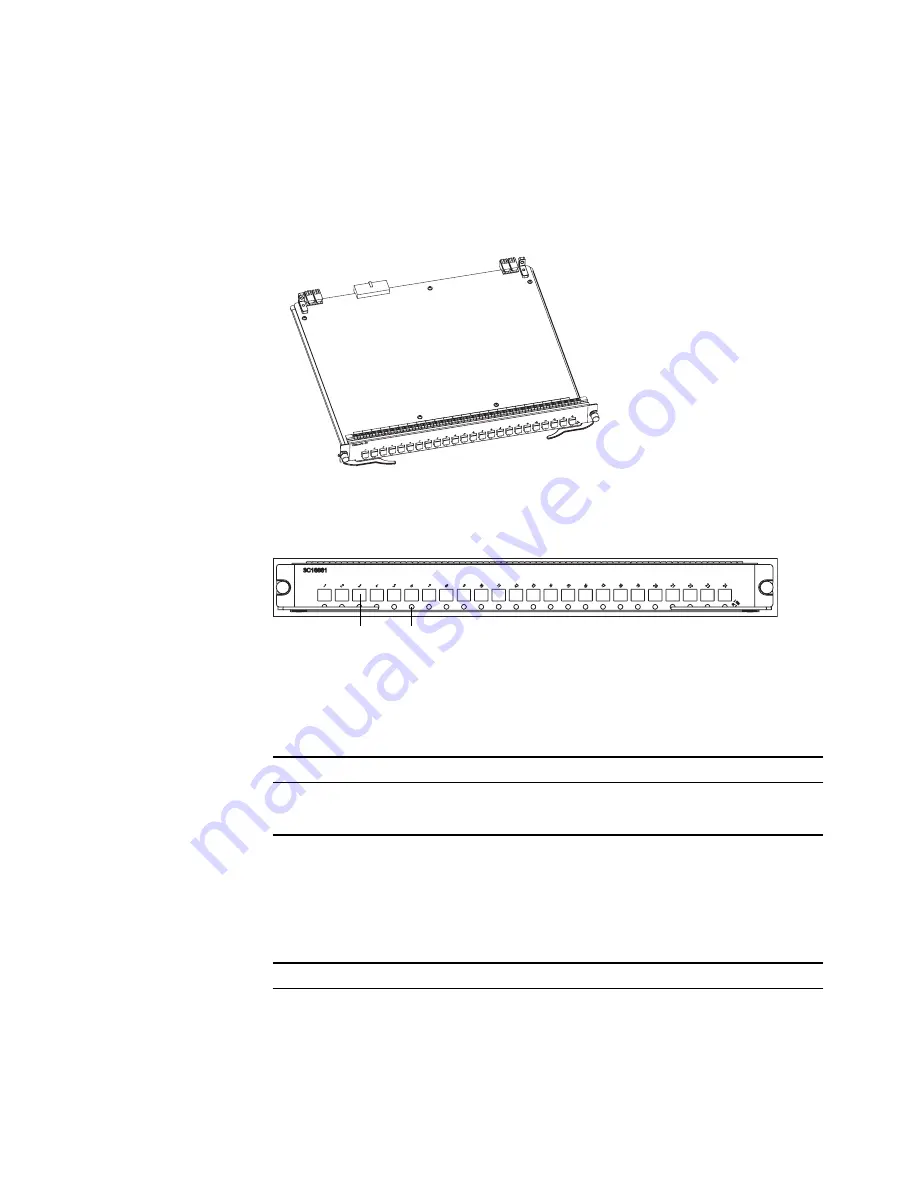
The 24-port 100BASE-FX MMF FE module provides 24 100 Mbps multi-mode 
Ethernet optical port service channels.

Figure 14 illustrates the 24-port 100BASE-FX MMF FE module.

Figure 14   

24-Port 100BASE-FX MMF FE Module

Each 100 Mbps optical port has a green LED, as shown in Figure 15. 

Figure 15   

Front Panel of the 

24-Port 100BASE-FX MMF FE Module


1

 Ethernet port

2

 Ethernet port LED

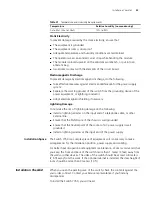
Table 25 describes the status of the 24-port 100BASE-FX MMF FE module LEDs.

The 24-port 100BASE-FX MMF FE module requires a 62.5/125 µm multi-mode 
optical fiber cable with an MT-RJ connector and a central wavelength of 1300 nm.

Table 26 describes the specifications of the 24-port 100BASE-FX MMF FE module.

Table 25   

24-Port 100BASE-FX MMF FE Module

 LEDs 

LED 

Description

LINK/ACT

Green — The port is connected.


Off — The port is not connected.


Green flashing — Data is being transmitted or received.

Table 26   

Specifications for the 24-Port 100BASE-FX MMF FE Module 

Specification

Description

CPU

MPC850

BootROM

512 KB

SDRAM

64 MB

Dimensions (L x W) 

366.7 x 340 mm (14.5 x 13.4 in)

Maximum power 
consumption

55 W

1

2

Summary of Contents for 3C16895

Page 1: ...http www 3com com Switch 7750 Installation Guide 3C16895 7 slot Chassis 3C16894 4 slot Chassis and associated modules Part No 10014824 Published June 2005...

Page 2: ...er is applicable You agree not to remove or deface any portion of any legend provided on any licensed program or documentation contained in or delivered to you in conjunction with this User Guide Unle...

Page 3: ...0BASE T FE PoE Module 17 48 port 10 100 1000BASE T PoE Module 18 48 port 10 100BASE T Auto sensing FE Module 19 48 port 10 100 1000BASE T Module 20 24 port 100BASE FX MMF FE Module 22 20 Port 10 100 1...

Page 4: ...s 40 Connecting the Console Cable 40 Connecting the AUX Cable 40 Connecting Module Cables 41 Installing Cabling 42 Bench Mounted Switch 42 Rack Mounted Switch 42 Cable Binding 42 Post installation Che...

Page 5: ...isplay characters are illegible 65 Troubleshooting Power 65 Troubleshooting the Fan 66 Troubleshooting the Modules 66 SWITCH 7750 CABLES Console Cable 67 AUX Cable 67 Electrical Port Connector 68 Opti...

Page 6: ......

Page 7: ...lists icon conventions that are used throughout this guide Table 2 lists text conventions that are used throughout this guide Table 1 Notice Icons Icon Notice Type Description Information note Informa...

Page 8: ...nformation in this guide differs from information in the release notes use the information in the Release Notes These documents are available in Adobe Acrobat Reader Portable Document Format PDF on th...

Page 9: ...ackplane The Switch 7750 backplane is part of the integrated chassis and delivers high speed data transfer between the Fabric and I O modules The backplane bandwidth capacity is 96 Gbps The backplane...

Page 10: ...ctions Connects the I O modules through the backplane and forwards Layer 2 and Layer 3 data Manages and calculates routing Performs the switch s software upgrade and system reset functions Monitors sy...

Page 11: ...ions Item PoE Fabric 96 3C16886 Fabric 64 3C16857 or 3C16857R Fabric 32 3C16872 Bandwidth 96 Gbps 64 Gbps 32 Gbps CPU MPC8245 MPC8260 200 Mhz BootROM 512 KB 1 MB SDRAM 256 M 256 MB Flash 32 MB 16 MB S...

Page 12: ...e 1000BASE X SFP Ports The PoE Fabric 96 provides four 1000 Mbps full duplex SFP ports Table 5 describes the SFP cables for these ports Table 9 describes the LEDs of the SFP ports Table 5 Cables for 1...

Page 13: ...pecifications See Electrical Port Connector on page 68 for an illustration of the RJ 45 connector and MDI MDI X pinout details Table 9 describes the LEDs of the Ethernet port Table 7 Console Port Spec...

Page 14: ...Green No data is being transmitted Green flashing Data is being transmitted Table 9 Ethernet Port LEDs continued LED Description Table 10 I O Module LEDs LED Status description RUN Green or off The mo...

Page 15: ...1 Ethernet port 2 Ethernet port LEDs Table 13 4 Port 1000BASE X GBIC Submodule LEDs LED Description LINK ACT Green The link is operating normally Off The link is not operating Green flashing Data is b...

Page 16: ...IC Module 3C16858 8 port 10 100 1000BASE T GE Module 3C16859 1 Port 10GBASE R XENPAK Module 3C16875 Consider the following when selecting I O modules You can configure several I O modules of the same...

Page 17: ...D Table 23 describes the 48 port 10 100BASE T FE PoE Module LEDs Table 24 describes the specifications for the 48 port 10 100BASE T FE PoE module Table 17 module LED LED Description LINK ACT Green The...

Page 18: ...9 Front Panel of the 48 port 10 100 1000BASE T PoE Module 1 Ethernet port 2 Ethernet port LED Table 23 describes the 48 port 10 100 1000BASE T PoE module LEDs Maximum power each port provides 15 4 W...

Page 19: ...LEDs of the 48 port 10 100BASE T Auto sensing FE module Table 20 Specifications for the 48 port 10 100 1000BASE T PoE Module Specification Description CPU MPC8241 BootROM 512 KB SDRAM 128 M Dimension...

Page 20: ...Mbps auto sensing Ethernet electrical ports Figure 12 illustrates the 48 port 10 100 1000BASE T module Table 21 48 Port 10 100BASE T Auto sensing FE module LED LED Description LINK ACT Green The port...

Page 21: ...onnected Off The port is not connected Green flashing Data is being transmitted Table 24 Specifications for the 48 port 10 100 1000BASE T Module Specification Description CPU MPC8241 BootROM 512 KB SD...

Page 22: ...us of the 24 port 100BASE FX MMF FE module LEDs The 24 port 100BASE FX MMF FE module requires a 62 5 125 m multi mode optical fiber cable with an MT RJ connector and a central wavelength of 1300 nm Ta...

Page 23: ...ernet port LED Table 27 describes the 20 port 10 100 1000BASE T module LEDs Connector type MT RJ Number of ports 24 Port transmission speed 100 Mbps full duplex Cables and maximum transmission distanc...

Page 24: ...ASE X SFP module Figure 19 Front Panel of the 20 Port 1000BASE X SFP Module Table 28 Specifications for the 20 Port 10 100 1000BASE T Module Specification Description CPU MPC8241LZU200 BootROM 512 KB...

Page 25: ...not operating On The port is operating Green flashing The port is transmitting data Table 30 Specifications for the 20 Port 1000BASE X SFP Module Specification Description CPU MPC8241LZU200 BootROM 51...

Page 26: ...d inTable 32 Table 33 describes the specifications of the 8 port 1000BASE X GBIC module Table 31 8 Port 1000BASE X GBIC Module LEDs LED Description LINK Off The link is not connected Green The link is...

Page 27: ...T GE module has 2 LEDs as shown in Figure 23 Figure 23 Front Panel of the 8 Port 10 100 1000BASE T GE Module 1 Ethernet port 2 Ethernet port LEDs BootROM 512 KB SDRAM 64 MB Dimensions L x W 366 7 x 3...

Page 28: ...T GE Module LEDs LED Description LINK Off The link is not connected Green The link is connected ACT Off No data is being transmitted Green flashing Data is being transmitted or received Table 35 Spec...

Page 29: ...systems Table 36 1 Port 10GBASE R XENPAK Module LEDs LED Description LINK On The port is operating Off The port is not operating ACT Off No data is being transmitted Green flashing Data is being tran...

Page 30: ...display alarm information for the power module that is not working The power distribution box for the 7 slot chassis has two inputs and two ON OFF switches One input can support the normal operation o...

Page 31: ...ly consists of two to four individual fans and is located on the right side of the chassis 4 slot chassis 3C16871 7 slot chassis 3C16856 The fans are directly connected to the backplane through connec...

Page 32: ...ns 48 port 10 100BASE T FE PoE Module 48 port 10 100 1000BASE T PoE Module 48 port 10 100BASE T Auto sensing FE Module 48 port 10 100 1000BASE T Module 24 port 100BASE FX MMF FE Module 20 Port 10 100...

Page 33: ...aring your site and switch for installation General Safety Recommendations Before installing your switch note the following safety recommendations Switch off the power supply before connecting the cab...

Page 34: ...r move suddenly or twist your body Always disconnect all external cables including power cord before lifting or moving the chassis Do not hold the power handles when carrying the switch Do not put fin...

Page 35: ...phone cable or other external line Ensure that the PGND wire of the chassis is well grounded Ensure that the neutral point of the socket of AC power supply is well grounded Install a lightning arreste...

Page 36: ...nstall the Switch 7750 in the cabinet 1 Carry the switch to the front of the cabinet At least two people are required to move the switch 2 Put the switch on the tray or the guides and push it into the...

Page 37: ...ic 32 you need the following tools Phillips head screwdriver 2 Small pliers Do the following 1 Wear an antistatic wrist strap 2 Unfasten the screws on the Fabric 32 printed circuit board at locations...

Page 38: ...und should be less than 1 ohm Connecting and Configuring Power The Switch 7750 requires power connection from the AC power source and from the PoE power rack Connecting AC Power Cords To connect AC po...

Page 39: ...oE external power input NEG 2 PoE external power input NEG 3 COM port external power monitor 3 Insert the GND OT terminal of the DC power cord to the RTN terminal of the switch and fasten the mounting...

Page 40: ...d has both a DB 9 hole connector and a DB 25 hole connector for connection to a 9 hole or 25 hole serial port at the configuration terminal See Console Cable on page 67 for cable illustration and pino...

Page 41: ...BIC submodule When connecting optical fiber cables use the fiber connectors that are appropriate for the optical port type of the peer equipment that is connected to the local network port module See...

Page 42: ...m on the floor of the chassis Power cords run out of the rear left of the chassis and on a cable rack or under a raised floor Cable Binding Keep the following precautions in mind as you bind cables Do...

Page 43: ...have turned off the power before checking your installation Improper connections can injure people or damage components of the switch Table 42 Cable Binding Parameters Cable Bundle Diameter Space Bet...

Page 44: ...44 CHAPTER 2 INSTALLING THE SWITCH 7750...

Page 45: ...nected to the switch console port using a console cable Figure 31 Connecting the Switch 7750 to a PC 1 Plug the DB 9 or DB 25 female plug of the console cable into the serial port of the PC or the ter...

Page 46: ...dialog box shown in Figure 33 displays Select the serial port to be used from the Connect using dropdown menu Figure 33 Properties Dialog Box 3 After selecting serial ports click OK The port shown in...

Page 47: ...og Box 4 Click OK The HyperTerminal dialogue box displays as shown in Figure 35 Figure 35 HyperTerminal Window 5 Select Properties 6 In the Properties dialog box select the Settings tab shown in Figur...

Page 48: ...ore powering on the Switch 7750 verify that Power cords have been properly connected The voltage of power supply can meet the requirements on the switch The console cable has been connected properly T...

Page 49: ...es Selftest OK 60X_SDRAM fast selftest OK Please check LEDs LEDs selftest finished Switch chip selftest OK CPLD selftest OK The switch Mac address is 00E0 FC00 7505 Press Ctrl B to enter Boot Menu 5 T...

Page 50: ...ONFIGURING THE SWITCH 7750 The display of these messages indicates the completion of the switch auto booting Press Enter and the terminal screen displays 3Com You can now begin the configuration for t...

Page 51: ...g Software with FTP on page 51 Upgrading Software Using The BOOT Menu page 52 Upgrading Software Using Xmodem page 56 Upgrading Software Using TFTP page 58 Upgrading Software with FTP Use the followin...

Page 52: ...file will be booted next time SW7750 reboot This will reboot Switch Continue Y N y For more detailed descriptions of the setup and procedures for upgrading software see the remaining sections in this...

Page 53: ...ep in mind the modified BOOTROM password Boot Menu 1 Download application file to flash 2 Select application file to boot 3 Display all files in flash 4 Delete file from flash 5 Modify bootrom passwor...

Page 54: ...txt 5 228308 s t 6 1975 sw7750 cfg 7 631736 Btm400 btm 8 462848 SW7750 V300R app 9 228376 S3com400 app 10 199696 8241btm app 11 2427 vrpcfg txt 12 203460 lpcom400 app 13 228308 snec400 app The current...

Page 55: ...mage Fails If the backup image fails and another backup image configuration does not exist the Switch 7750 will try to find any valid image on the flash This image is not the primary or backup image A...

Page 56: ...isplayed The secondary boot image name cannot be displayed when there is an image error Upgrading Software Using Xmodem The Xmodem protocol transmits files through serial ports and supports both 128 b...

Page 57: ...e download speed For example enter 5 to select a download speed of 115200bps 5 Press Enter The terminal displays the following information Download baudrate is 115200 bps Please change the terminal s...

Page 58: ...n 2 then select the newly downloaded file Upgrading Software Using TFTP TFTP Trivial File Transfer Protocol is a simple file transfer protocol that is used without complex interaction between clients...

Page 59: ...from using the following command boot boot loader primary filename 4 Reboot the system The following example illustrates this procedure SW7750 tftp 10 10 110 1 get sw7750003 app Transfer file in binar...

Page 60: ...B immediately the system displays the Boot Menu If you do not press Ctrl B the system initiates the program decompression process At this time if you want to access the BOOT Menu you must reboot the...

Page 61: ...the AC power socket 3 Loosen the retaining screw that secures the power supply on the lower right front of the power supply 4 Remove the power supplies approximately 2 inches 5 cm from the chassis to...

Page 62: ...and and hold the handle with another hand Align the supply with the guides in the chassis and slide the supply gently into the slot CAUTION As you are inserting the power supply if the pin terminal sp...

Page 63: ...the chassis 3 Press the ejector levers inward and seat the pin on the handle bar into the positioning hole in the chassis 4 Fasten the captive screws to fix the module Replacing the Fan Assembly You...

Page 64: ...64 CHAPTER 5 MAINTAINING HARDWARE WARNING If the fan fails replace it with a new one without delay before operating the Switch 7750 Failure to do so will cause the switch to overheat...

Page 65: ...information displayed on the terminal after the Switch 7750 is powered on check that The power system is working normally The Fabric is working normally The console cable has been connected to the con...

Page 66: ...the ALM LED remains on After normal booting it is off When resetting the module if the ALM LED remains off the module may not be connected to the power source Verify that the module has been properly...

Page 67: ...nnectors Figure 39 The Console cable Table 47 lists console cable pin outs AUX Cable Figure 40 illustrates the AUX cable Table 47 Console Cable Pin outs RJ 45 Signal Direction DB 25 DB 9 1 RTS 4 7 2 D...

Page 68: ...irection DB 25 DB 9 1 RTS 4 7 2 DTR 20 4 3 TXD 2 3 4 CD 8 1 5 GND 7 5 6 RXD 3 2 7 DSR 6 6 8 CTS 5 8 Enlarged B side Enlarged B side Enlarged A side Enlarged A side Enlarged C side Enlarged C side DB25...

Page 69: ...Reserved BIDD Send data to direction D 8 Reserved BIDD Receive data from direction D Table 50 RJ 45 MDI X Port Pinouts Pinout 10BASE T 100 BASE TX 1000BASE T Signal Function Signal Function 1 Rx Rece...

Page 70: ...70 APPENDIX A SWITCH 7750 CABLES Figure 43 illustrates the MT RJ fiber optic cable connector Figure 43 The MT RJ Fiber Connector Figure 44 illustrates the LC connector Figure 44 LC Connector...

Page 71: ...3Com Extended Warranty and Professional Services is available at http www 3com com Contact your authorized 3Com reseller or 3Com for additional product and support information Troubleshoot Online You...

Page 72: ...ct directly to 3Com for repair you must first obtain a return authorization number RMA Products sent to 3Com without authorization numbers clearly marked on the outside of the package will be returned...

Page 73: ...o Ecuador Dominican Republic 1 800 988 2112 0 810 444 3COM 1 800 998 2112 1 800 998 2112 1 800 998 2112 52 5 201 0010 1 800 998 2112 1 800 998 2112 0800 13 3COM 1 800 998 2112 AT T 800 998 2112 AT T 8...

Page 74: ...74 APPENDIX B OBTAINING SUPPORT FOR YOUR SWITCH...

Reviews: