Inserting the
Hub 10 Module
2-3
DUA1663-0BAA03
Removing the Blanking Plate from the
Hub 10 Unit
1
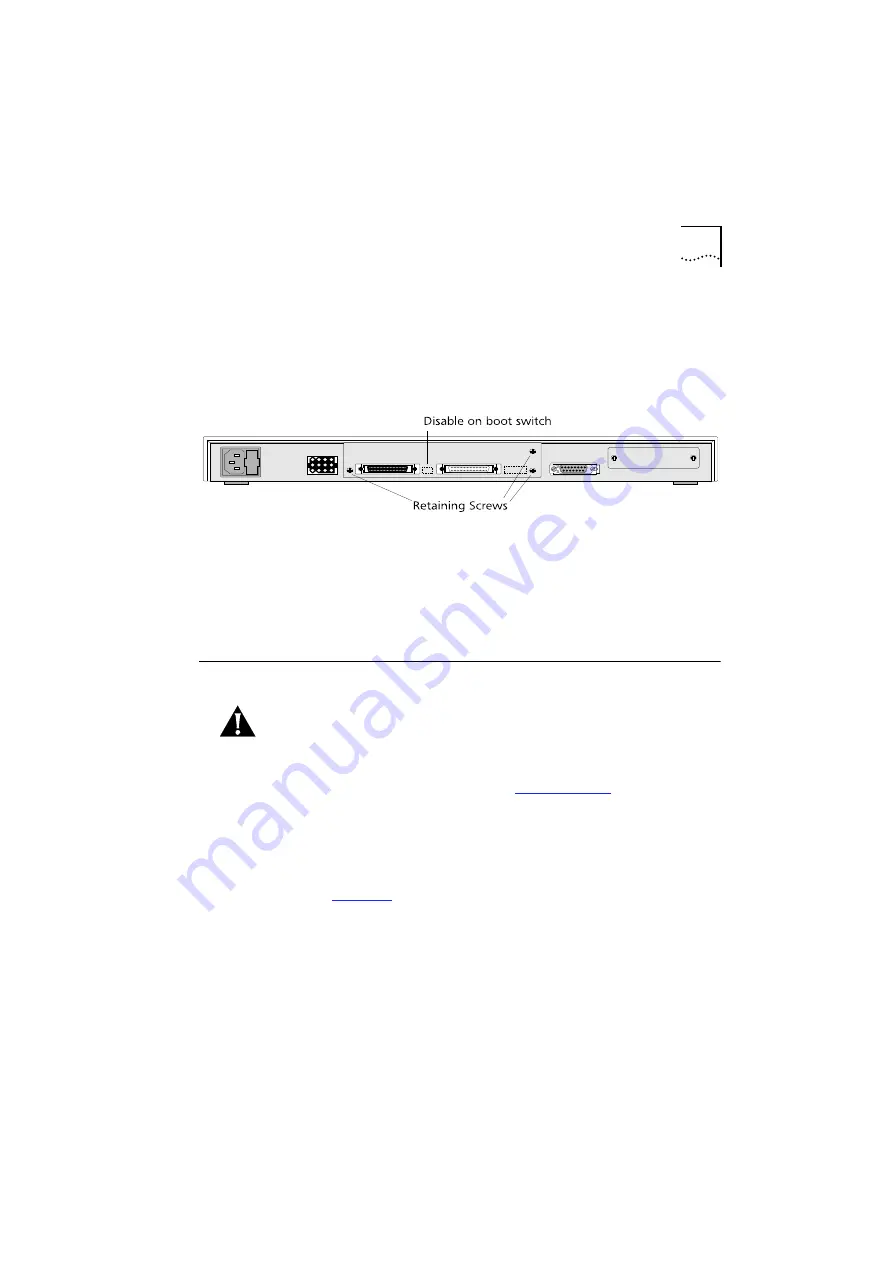
Remove the Management Module blanking plate from the rear panel
of the unit by unscrewing the three retaining screws (see Figure 2-1).
Keep two of the screws for use with the
M
odule. Do not remove any of
the screws around the connector ports.
Figure 2-1
Hub 10
Rear View
2
Keep the blanking plate and the remaining original screw in a safe
place. If you remove the
Module,
you must replace the original
blanking plate to aid the circulation of cooling air and prevent the
entry of dust and debris into the unit.
Inserting the
Hub 10 Module
CAUTION:
Before you install the Module,
set the position of the
Disable-on-Boot switch on the
Hub 10
unit. If you want to set up
resilient links, change the position from the factory default ‘E’ (enable all
ports) to ‘D’ (disable all ports’). See the user guide for the
Hub 10
unit for
details. To manage Resilient Links, see
1
With the components facing downwards, locate the
M
odule in the
guide rails near the top of the unit. Slide the module half way into the
unit.
2
Refer to
. Using the insert/remove tab attached to the
connector (A), push the connector into the socket (B) on the card
below the
M
odule. The connector has a lip on the upper face. Ensure
that the lip is facing upwards, and that the pins in the socket align
correctly with the connector. Push the connector in fully.
Summary of Contents for 3C16371 - LinkBuilder FMS - Hub
Page 80: ...3 52 CHAPTER 3 USING THE VT100 MANAGEMENT INTERFACE DUA1663 0BAA03 ...
Page 88: ...A 8 APPENDIX A TECHNICAL INFORMATION CABLE PIN OUTS AND PROTOCOLS DUA1663 0BAA03 ...
Page 94: ...B 6 APPENDIX B TECHNICAL SUPPORT DUA1663 0BAA03 ...
Page 98: ...C 4 APPENDIX C TROUBLESHOOTING DUA1663 0BAA03 ...
Page 122: ...F 8 APPENDIX F INDEX OF MANAGEMENT ACTIONS AND DATA DUA1663 0BAA03 ...
Page 128: ...6 ...
Page 130: ...ELECTRO MAGNETIC COMPATABILITY STATEMENT DUA1663 0BAA03alpha ...


