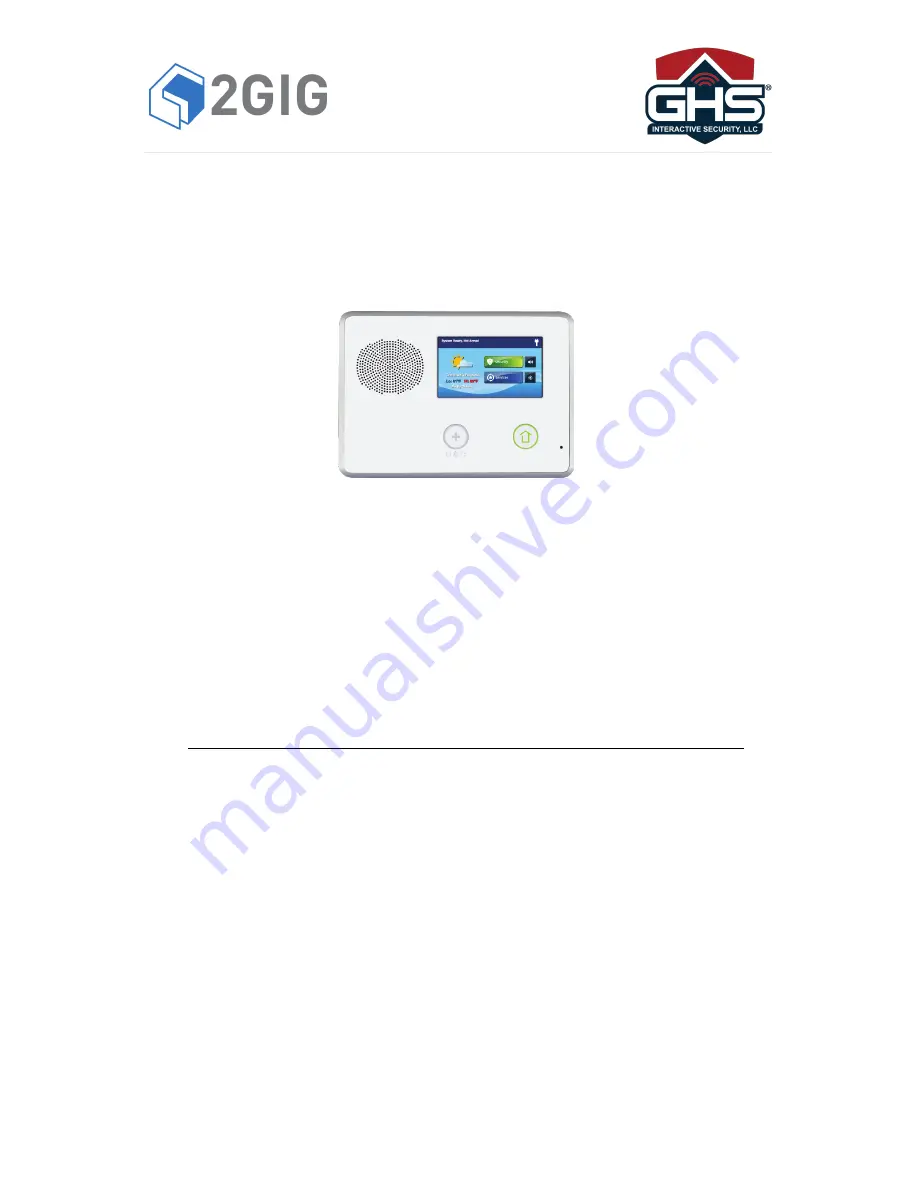
background image

GC2 Panel


Battery Replacement

 Guide

How to Replace the Main Battery in a 2Gig GO! Control Panel

The majority of GHS alarm systems include a 24-hour backup battery; this means 
that the alarm system will still operate if the power goes out.  Follow below steps to 
replace the 

main

 battery in a GHS 2GIG home alarm system.

Tools Needed

: A small to medium flathead screwdriver

Items Needed

: A new 2Gig Go Control panel battery (can be purchased online, 

here: 

https://www.amazon.com/2gig-BATT2X-Console-Rechargeable-Battery/dp/B00JZZILRK  

1.Disarm or turn off  home alarm system
2.Locate and remove the screw on top of the keypad
3.Gently pull down the front cover down (don’t let go)
4.Locate the third hand (a plastic piece that looks like an upside down V)
5.Place the third hand over the notch in the center of the cover
6.Locate the green battery pack
7.Remove the clip that connects the battery red and black wire to the circuit board.
8.Remove the battery
9.Insert the new battery and plug in the clip
10.Unhook the third hand
11.Guide the third hand and the large red wire into the keypad
12.Close the cover and press until it snaps into place
13.Replace the screw on top of the keypad
14.Let it charge for 24 hours

Summary of Contents for GC2

Page 1: ...Battery dp B00JZZILRK 1 Disarm or turn off home alarm system 2 Locate and remove the screw on top of the keypad 3 Gently pull down the front cover down don t let go 4 Locate the third hand a plastic piece that looks like an upside down V 5 Place the third hand over the notch in the center of the cover 6 Locate the green battery pack 7 Remove the clip that connects the battery red and black wire to...

Page 2: ...WARNING OWNER S I NSTRUCTION NOTICE Not to be removed by anyone except occupant GC2 Panel User Guide ENGLISH International WIRELESS SECURITY SYSTEM ...

Page 3: ...THIS PAGE INTENTIONALLY LEFT BLANK ...

Page 4: ...ntrol in Stay Mode 14 Arming to Stay Mode 14 Away mode 15 Exit and Entry Delays in Away mode 15 Exit Delay Restart 15 Silent Control in Away Mode 15 Quick Exit in Away Mode 16 Auto Stay Mode 16 Arming to Away Mode 16 Disarming the System 17 Disarming from Stay Mode 17 Disarming from Away Mode 18 If a Burglary Alarm Occurs 18 Burglary Alarm Siren 18 Alarm Memory 18 Optional 2 Way Voice Communicatio...

Page 5: ... 29 Calling the System 29 Controlling the System Remotely 29 Bypassing Sensors Remotely 29 System Toolbox 30 User Management 30 User Code Setup 30 Adding a User Code 30 User Code Access Schedules 30 User Codes 32 Duress User Code Setup 32 Secret Duress Button 33 System History 33 System Test 34 Sensor Test 34 Panel Test 34 Telephone Test 35 Chime Setup 36 Adjusting the Brightness Volume 37 Adjusti...

Page 6: ...cel Display 42 Cancel Time 42 Dialer Delay 43 2 Way Voice 43 Telephone Remote Control Answer 43 Installer Specific Information 44 Service Information 46 Alarm Dialing Equipment 47 Regulatory Information 48 Wireless Product Notice 48 FCC Notice 48 FCC Telephone Rules and Regulations 48 Industry Canada Notices 48 Important Notice 50 Alarm System Limitations 50 Limited Warranty 52 ...

Page 7: ...GC2 Wireless Security System User Guide 4 Copyright 2016 Nortek Security Control ...

Page 8: ... user codes One of the 60 user codes functions as a duress code Controlling the system with this code gives the appearance of normal operation but using it sends a silent duress report to the Central Station to initiate a silent alarm call for help Voice announcements from the Control Panel The system has a vocabulary of descriptive words that can be assigned to sensors so each has a unique announ...

Page 9: ...und a chime and or a voice announcement when they are triggered This lets you monitor your doors and windows while the system is disarmed For more details see Burglary Protection on page 9 User Codes The system installer has already programmed a master user code for your system This code can be used to control the system as well as assign and change the other user codes The master user code can al...

Page 10: ...oice communication with the Central Station D Emergency Button Indicator Lights WHITE when enabled for emergency alarms Flashes WHITE during emergency alarms E Home Button Indicator Sensor Status Lights GREEN when all sensors are closed ready to arm Not lit when any sensor is open not ready to arm Arming Status Lights RED when system is armed Flashes RED during the Entry Delay Alarm Memory Flashes...

Page 11: ...is button will not appear Tap the Home button on the panel to reveal the Home screen Security Screen Use the Security screen to access the Arm Menu and Status screens This screen also shows the current time and date If messages alarms or trouble alerts are pending square buttons indicate the number of pending alarms or messages Ready to Arm Screen Use the Ready to Arm screen to arm the security sy...

Page 12: ...ng the System The burglary protection part of the system can be armed in two modes Stay mode or Away mode SAMPLE FLOOR PLAN Refer to the floor plan below It shows a typical residential installation and the various types of wireless sensors and their functions IMPORTANT Security systems installed in a commercial location are for use only as a burglar alarm system and not for fire protection This se...

Page 13: ...ypass all doors and windows with sensors CHECKING FOR CLOSED SENSORS In most cases you will be arming the security system with all of the sensor protected doors and windows closed The Control Panel provides easy ways to verify that all the sensor protected doors and windows are closed before arming the system The Home button lights green when all perimeter sensors are closed The Home button is not...

Page 14: ...6 B The Arm button on the Security and Menu screens lights green when all perimeter sensors are closed The Arm button lights orange if any perimeter sensor is open C The Home button lights green when all perimeter sensors are closed The Home button is not lit if any perimeter sensor is open D The icon displayed shows that an interior sensor is open Other icons can appear here as well See System St...

Page 15: ...iced the sensor can be manually bypassed so the rest of the system can be armed Depending on programming manual bypasses can remain in place until they are manually removed NOTE Bypassed sensors offer no protection and cannot cause an alarm Use bypass if you want to arm your system with one or more sensors open and intentionally unprotected Force Bypass All Sensors If any sensors are open when the...

Page 16: ...de Certain sensors such as a door can be configured by your installer to use a delay timer before triggering an alarm This provides a way for an authorized person returning to enter using a predetermined door and disarm the system before an alarm is triggered To arm the system using an Entry Delay 1 At the Security or Menu screen tap the Arm button 2 At the Ready to Arm screen place a checkmark in...

Page 17: ... GREEN when all sensors are closed NOTE If you want to arm the system quietly without sounding any announcements tap before performing these steps At Ready to Arm screen check the Silent Exit box Or During exit delay tap Silence 3 At the Security or Menu screen tap Arm NOTE If any perimeter door or window sensors are open the Bypass screen appears Close all the sensors displayed or tap Bypass All ...

Page 18: ...en arming the system in Away mode an Entry Delay check box is shown on the Arming screen By default this option is checked so the programmed delay doors allow time for disarming the system after the door is opened If you clear the Entry Delay box the delayed alarm trigger is removed from all sensor protected doors programmed for delay Those entrances instantly trigger an alarm if they are opened i...

Page 19: ...try Delay so someone with a user code can re enter without causing an alarm Interior and perimeter sensors are armed in the Away mode 1 Close all sensor protected doors and windows before arming 2 Verify that the button on the Control Panel is lit green indicating that the system is ready to arm The Security button and Arm button on the display will also be green when all perimeter sensors are clo...

Page 20: ...red when disarming with a wireless key fob An important feature of the Control Panel is its ability to warn you if an alarm has occurred while you were away If an alarm was triggered while the system was armed the alarm siren runs for a preset length of time then stops When you enter to disarm the system instead of sounding the normal Entry Delay beeps the Control Panel sounds repeated fast beeps ...

Page 21: ...larm without sounding the siren Burglary Alarm Siren If a burglary alarm is tripped while the system is armed the Control Panel sounds the alarm siren for a preset time see Installer Programmed Options on page 40 After the time expires the siren will stop sounding The system limits the number of times a sensor can re trigger an alarm while the system is armed The setting is one to six times per se...

Page 22: ...ob options can be set by the installer See Installer Programmed Options on page 40 Arm with a Key Fob Stay Mode To arm the system to Stay mode using a key fob tap the Stay button NOTE Depending on setup options if any perimeter doors or windows are open the system may not allow arming to Stay mode with a wireless key fob See Installer Programmed Options on page 40 Away Mode To arm the system to Aw...

Page 23: ...dow sensors are open the system does not allow arming to Stay mode with a wireless keypad All open sensors must be bypassed at the Control Panel first Away Mode To arm the system to Away mode using a wireless keypad 1 At the Home screen tap Security 2 At the Security screen tap Arm 3 Enter a valid user code 4 Tap the Away button 5 If Quick Arming has been programmed by your installer just tap the ...

Page 24: ...ing down the Fire button 3 Get out and stay out of the dwelling Never go back inside for people or pets 4 Call your local Fire Department from a safe location outside the dwelling If the Fire Alarm Sounds Automatically If the fire alarm sirens are sounding 1 If flames and smoke are present yell Fire to alert everyone else 2 Evacuate all occupants from the premises and call your local Fire Departme...

Page 25: ...ces and unfinished attics Also install smoke detectors in the living room dining room bedrooms kitchen hallway s finished attics furnace room utility and storage rooms and attached garages DINING KITCHEN BEDROOM BEDROOM BEDROOM LIVING ROOM SMOKE ALARM A smoke alarm should be located between the sleeping area and the rest of the family living unit BEDROOM BEDROOM BEDROOM TV ROOM DINING KITCHEN SMOK...

Page 26: ...de protection to the residence if smoke actually reaches the alarm The Smoke Heat Alarm is not a substitute for an insurance policy Home owners and renters should have adequate insurance to protect their properties Emergency Action Plan Establish and regularly practice a plan of escape with all members of your household in the event of fire The National Fire Protection Association recommends the f...

Page 27: ...vent of an emergency press and hold the emergency button for at least two 2 seconds to activate the alarm Panic The Panic or police button sends an immediate panic report to the Central Station During installation the installer either set the system to sound the siren when the button is pressed or to not sound the siren but to trigger a silent alarm Fire The Fire button sends an immediate fire rep...

Page 28: ...trouble condition The trouble alert icon displays a number in the upper right corner that shows the number of current trouble alerts The trouble alert icon flashes until the trouble alerts are acknowledged then it remains constantly lit until all the troubles are corrected When all troubles are corrected the icon disappears completely VIEW THE CURRENT TROUBLE ALERTS 1 To display all current troubl...

Page 29: ...re icon appears SOUNDER DISABLED If the system s internal sounder has been lowered and external sounder has been disabled by the installer for testing the sounder disabled icon appears It also flashes to indicate silent arming LOW BACKUP BATTERY If the Control Panel s backup battery tests low the low backup battery icon appears TEST MODE This icon displays when the system is in Walk Test mode TOUC...

Page 30: ...on displays on the Security screen Standard messages display a blue message icon with a number of unread messages in the upper right corner Urgent messages display a yellow message icon with an attention symbol in the upper right corner Emergency messages display a red message icon with the bell symbol in the upper right corner READING MESSAGES When a message icon appears on your Home screen 1 Tap...

Page 31: ... the message list use the Message Filter screen 1 To display the Message Filter screen tap Filters 2 Check or clear the boxes of the types of messages to display To check all types of messages tap All To return to the message list tap Back The filters will reset when the following occurs You select All Types Your message reviewing is over The system displays the Security screen SORTING MESSAGES To...

Page 32: ...s asks for your user code You have 15 seconds to enter your user code using the telephone keys If you don t enter a valid user code in 15 seconds the system disconnects the call If 2 attempts using 2 telephone calls to enter a user code within a five 5 minute time frame fail to enter a valid code the system disconnects and does not respond to telephone commands for 30 minutes 2 After the system ha...

Page 33: ...dd User buttons 2 Enter a unique four 4 digit code for the new user code Then tap Ok 3 Enter the code again to confirm it Then tap Ok 4 At the Confirmation screen tap OK to return to the User Management screen User Code Validity After the Confirmation screen appears and you click Ok the user codes Access Option screen appears Select one of the three options to validate the user code Select Always ...

Page 34: ...er Access Schedule screen tap the calendar button 3 To set the only month day and year that this user code is valid tap the date button 4 Tap the left and right time buttons to set the start and end times that this user code is valid on that date 5 Tap Ok to accept the schedule or Cancel to return to the Schedule Type screen Date Range User Access Schedule 1 For Schedule type select Date Range 2 T...

Page 35: ... to return to the user codes Access Option screen 4 A confirmation screen appears displaying the user code that was deleted Tap Ok TIP You can change the master user code but you cannot delete it Duress User Code Setup The Duress Code User Code 8 initiates a silent alarm for help by secretly sending a Duress report to the Central Station Use the duress code when someone is forcing you to operate y...

Page 36: ...dealer or Central Station SYSTEM HISTORY The Control Panel keeps a log of system events in the order in which they occur Each event is marked with the date and time that the event occurred To make reading the log easier the system history display can be filtered to show selected events only The events that can be filtered for the system history log display are Arm or disarm of the system Bypasses ...

Page 37: ...by the sensor name Displays green signal bars to show the strength of that sensor s wireless signal NOTE Start and stop test reports are sent to the Central Station 1 At the System Test Console screen a list of sensors appears Use the and arrows to scroll through the list 2 Go to each sensor listed and trigger it For door or window sensors open and close the door or window For motion detectors sta...

Page 38: ...lephone Test Status screen The top part of the screen shows each function that is being tested 8 Use the and arrows to scroll through the status messages The bottom part of the screen shows the results of each test 9 If any tests fail note what messages were displayed and contact your alarm installer to troubleshoot your system 10 After the testing is complete tap Ok to return to the Toolbox Cell ...

Page 39: ...the chime options for each sensor to further customize the system as desired TIP As a global system option the chimes for all the system s sensors can be turned on or off using the Chime check box on the Menu screen To setup the chime options individually for each sensor 1 At the Home screen tap Security 2 At the Security screen tap Menu NOTE Select or clear the Chime and Voice check boxes to turn...

Page 40: ...T TIMEOUT The backlight timeout sets the length of time that the display stays lit after use You can adjust the backlight to 30 seconds 1 2 5 or 10 minutes or to always to light the display at all times NOTE To conserve the Control Panel s backup battery during an AC power failure the display goes dark after 30 seconds regardless of this setting To set the display backlight time 1 At the Home scre...

Page 41: ...the cross Repeat with the next 2 crosses that appear 7 When calibration has been successful a completion screen appears To finish and return to the Toolbox screen tap Ok SET DATE AND TIME The Control Panel has a built in clock and calendar The Home screen displays the time and date The time and date are also used for the system history and event logs that store data on system events NOTE During in...

Page 42: ...lay contact information for your 2GIG Alarm Dealer or the Central Station Accessing the Dealer Info Screen To access the Dealer Info screen 1 At the Home screen tap the system logo 2 At the Enter Your Code screen enter the four 4 digit master user code 3 The left side of the Enter Your Code screen reveals contact information for your 2GIG Alarm Dealer or the Central Station Requesting a Service Ca...

Page 43: ...orn will stop sounding 4 Minutes is the default or the following 8 Minutes 12 Minutes 16 Minutes Unlimited Exit Delay The Exit Delay begins immediately after arming the system The delay gives you time to leave through the designated exit entry door without setting off the alarm During the Exit Delay beeps sound and faster beeps sound during the last 10 seconds NOTE Arming remotely does not start a...

Page 44: ...n a Quick Exit button will display on the Security screen Tap the button to start the Exit Delay After Quick Exit the system will fully re arm in the mode that it was in before Stay or Away mode Off On Auto Un bypass Normally sensors manually bypassed with the User Toolbox will automatically have their bypasses removed when the system is disarmed The system can be set so sensors that have been man...

Page 45: ...l Display A cancel message will be sent to the Central Station if the system is disarmed within a preset period of time after an alarm is triggered The system can be set to display that a cancel report was sent or for higher security the system can be set not to display the cancel message On Off Cancel Time To limit responses to false alarms a cancel message will be sent to the Central Station if ...

Page 46: ... Cancel Display on page 42 30 Seconds is the default or ______ Seconds 2 Way Voice The system can connect with a Central Station operator so they can converse with people on the premises after an alarm The 2 way voice option allows communication to and from the Control Panel and the Central Station 2 way voice communications will occur after the system has made its alarm report Your installer sets...

Page 47: ...User 7 User 8 Duress User 9 User 10 User 11 User 12 User 13 User 14 User 15 User 16 User 17 User 18 User 19 User 20 User 21 User 22 User 23 User 24 User 25 User 26 User 27 User 28 User 29 User 30 User 31 User 32 User 33 User 34 User 35 User 36 User 37 User 38 User 39 User 40 User 41 User 42 User 43 User 44 User 45 User 46 User 47 User 48 User 49 User 50 User 51 User 52 User 53 User 54 User 55 User...

Page 48: ... 13 Zone 14 Zone 15 Zone 16 Zone 17 Zone 18 Zone 19 Zone 20 Zone 21 Zone 22 Zone 23 Zone 24 Zone 25 Zone 26 Zone 27 Zone 28 Zone 29 Zone 30 Zone 31 Zone 32 Zone 33 Zone 34 Zone 35 Zone 36 Zone 37 Zone 38 Zone 39 Zone 40 Zone 41 Zone 42 Zone 43 Zone 44 Zone 45 Zone 46 Zone 47 Zone 48 Zone 49 Zone 50 Zone 51 Zone 52 Zone 53 Zone 54 Zone 55 Zone 56 Zone 57 Zone 58 Zone 59 Zone 60 ...

Page 49: ...ght 2016 Nortek Security Control SERVICE INFORMATION Your local Alarm dealer is the person best qualified to service your alarm system Be sure to set up a routine service schedule with your local Alarm installer ...

Page 50: ... place a call in an emergency situation It must be able to do this even if other equipment telephone s answering system computer modem etc already has the telephone line in use To do so alarm dialing equipment must be connected to a properly installed RJ31X that is electrically in series with and ahead of all other equipment attached to the same telephone line Proper installation is depicted in th...

Page 51: ...reception which can be determined by turning the equipment off and on the user is encouraged to try to correct the interference by one or more of the following measures Relocate the Console away from the TV radio receiver Plug the Console into a different wall outlet so that the Console is on a different branch circuit Re orient the TV radio antenna If necessary the user should consult the dealer ...

Page 52: ...an authorized Canadian maintenance facility designated by the supplier Any repairs or alterations made by the user to this equipment or equipment malfunctions may give the telecommunications company cause to request the user to disconnect the equipment Users should ensure for their own protection that the electrical ground connections of the power utility telephone lines and internal metallic wate...

Page 53: ...bedrooms then they are less likely to waken or alert people inside the bedrooms Even persons who are awake may not hear the warning if the alarm is muffled from a stereo radio air conditioner or other appliance or by passing traffic Finally alarm warning devices however loud may not warn hearing impaired people or awaken deep sleepers While smoke detectors have played a key role in reducing reside...

Page 54: ...ers eligible for lower insurance rates an alarm system is not a substitute for insurance Homeowners property owners and renters should continue to act prudently in protecting themselves and continue to insure their lives and property Panel Operating Conditions For optimal performance the Control Panel should be operated under the following conditions Operating Temperature 0 C to 49 C 32 F to 120 F...

Page 55: ...ere are no obligations or liabilities on the part of Nortek Security Control LLC for consequential damages arising out of or in connection with use or performance of this product or other indirect damages with respect to loss of property revenue or profit or cost of removal installation or reinstallation All implied warranties for functionality are valid only until the warranty expires This Nortek...

Page 56: ...1950 Camino Vida Roble Suite 150 Carlsbad CA 92008 6517 USA 800 2GIG TECH 10003982B www nortekcontrol com Copyright 2016 Nortek Security Control YOUR LOCAL ALARM AND SERVICE PROFESSIONAL ...

Reviews: