


Network Video Recorder | Installation Manual
6
Copyright
© 2015 Nortek Security & Contro
l
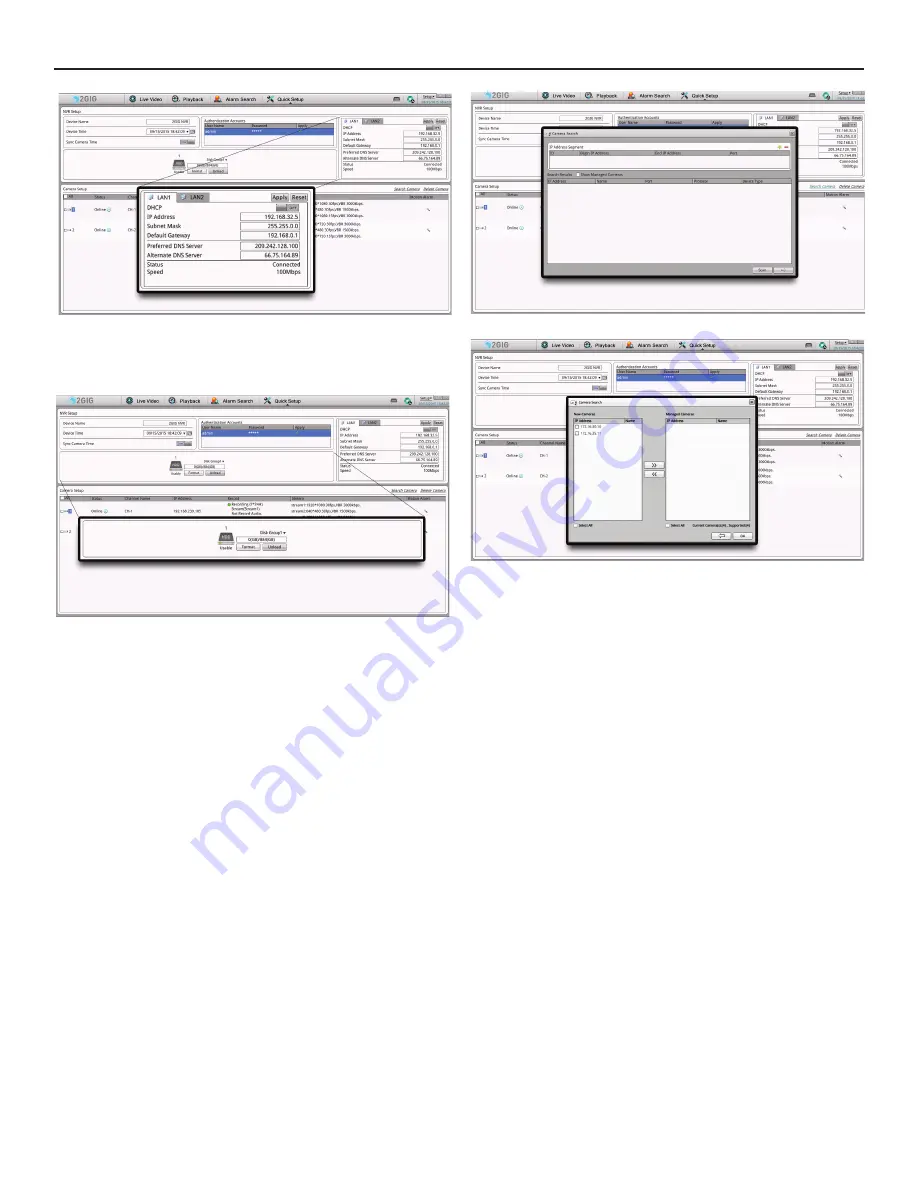
Figure 23.
Network Setup
Use the Networks sec on to set up Local Area Networks (LAN1 & LAN2).
To ensure recording of the IP Cameras to the NVR, verify network connec vity.
LAN1 should be connected to your exis ng LAN network.
LAN2 is a private network for your IP cameras.
Figure 24.
Storage Setup
The 2GIG NVR supports up to one (1) internal Hard Disk Drive (HDD). Prior
to turning the NVR on, the HDD should be installed per Sec on I. If the HDD
is recognized, a green light next to the storage icon will appear and the word
“USABLE” beneath it. If this is a new HDD, you will need to format it.
To FORMAT hard drive, click FORMAT. This will take a few minutes.
WARNING:
Any informa on previously stored on the HDD will be erased.
The size of the hard drive is shown in the window next to the hard drive icon. It will
display how many GB’s have been used and how much is le available.
If the HDD is shown as “NOT USABLE”, the HDD is either unrecognized, not
installed properly or it needs to be forma ed.
To remove the HDD from the NVR, click the UNLOAD bu on. Power o
ff
NVR and
remove the hard drive.
The NVR has four (4) PoE ports which is part of a private network which can be
connected to IP cameras. IP cameras can also be connected through LAN. The
number of IP cameras supported is four (4).
Figure 25.
Adding Cameras
Figure 26.
Adding Cameras (Con nued)
Use the Camera Search dialog to connect IP Cameras to the NVR for recording.
1.
To add IP Cameras, click on the SEARCH CAMERA tle as indicated above.
2.
A Camera Search window will appear. Click SCAN to discover IP cameras on
the network, or by Network Range.
3.
There should be a list of several cameras in the window.
4. The
valida on results should indicate a successful connec on to the camera.
5.
Click the ARROW at the bo om of the window to con nue.
6.
Select the cameras that are desired to be managed by the NVR. Click the
arrows in the middle of the window to add them to the right pane (Managed
Cameras).
7.
Click OK when
fi
nished.
g
g


