24online SMS 500iX Quick Start Manual Download Page 3

3

CONFIGURING 24ONLINE

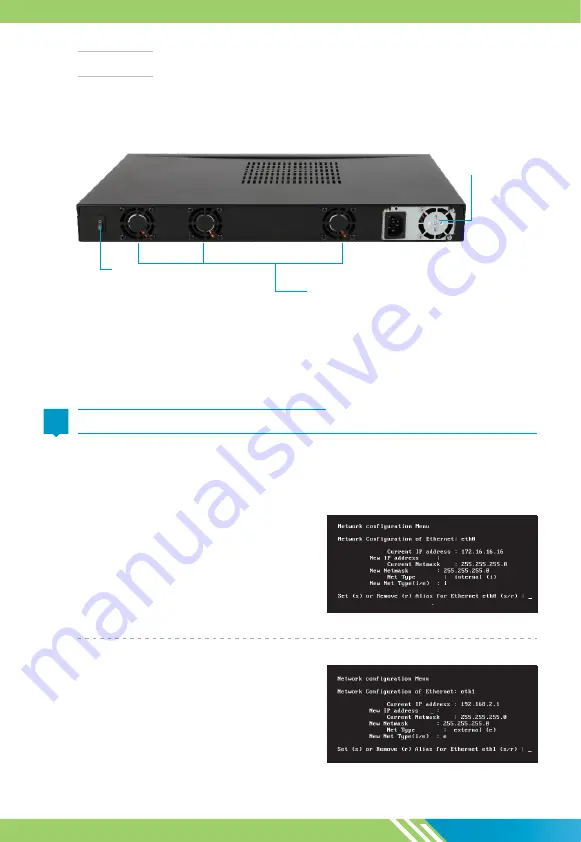
Back Panel

Usage of ports depends on how the physical connection is required or planned, it is not necessary 

to use any particular port for WAN/LAN.

Once the system is booted, connect the console cable to the appliance. The console screen will 

prompt  for  the  password.  Enter  the  default  password  'admin',  and  proceed  with  network 

configuration and GUI operations.

Step 1

Process  automatically  detects  and  displays 

the current Ethernet configuration of Internal 

interface. Change the IP address, Net Mask 

and Net Type as required.

Process automatically detects and displays the 

current  Ethernet  configuration  of  external 

interface.  Change  IP  address,  subnet  mask 

and  net  type  as  required.  To  set  aliases  for 

external interface i.e. eth5, enter 'y'.

Step 2


  Straight-through Ethernet cable connects to LAN through hub or switch

System Fans

Supply Fan

Power Switch

Power Outlet

Summary of Contents for SMS 500iX

Page 1: ...www 24onlinebilling com QUICK START GUIDE SMS 500iX Appliance TM ...

Page 2: ...THE APPLIANCE Default Port and IP Address eth1 172 16 16 16 255 255 255 0 LAN 1 eth4 10 10 3 1 255 255 255 0 LAN 4 eth5 10 10 4 1 255 255 255 0 LAN 5 eth6 10 10 5 1 255 255 255 0 LAN 6 eth2 192 168 2 1 255 255 240 0 LAN 2 eth3 10 10 2 1 255 255 255 0 LAN 3 Interface IP Address Port Default Username Password Password administrator Username administrator Web Admin Console Note Username and password ...

Page 3: ...network configuration and GUI operations Step 1 Process automatically detects and displays the current Ethernet configuration of Internal interface Change the IP address Net Mask and Net Type as required Process automatically detects and displays the current Ethernet configuration of external interface Change IP address subnet mask and net type as required To set aliases for external interface i e...

Page 4: ...f the administrator which will be used to send all 24online system alerts Step 5 On successful configuration the system will display all the details as configured Press Enter to confirm and proceed with registration of 24online Step 6 Step 4 Update time zone and current date if not properly set ...

Page 5: ...ministrator and password administrator to login Note For external connectivity you can configure DNS and Gateway information using System Configuration Network View Interface Details LAN 6 eth6 10 10 5 1 255 255 255 0 Internal Interface LAN 5 eth5 10 10 4 1 255 255 255 0 Internal Interface LAN 2 eth2 192 168 2 1 255 255 240 0 External Interface LAN 1 eth1 172 16 16 16 255 255 255 0 Internal Interf...

Page 6: ...tact person Specify the email address of the company Specify the fax number of the company Select the button to register 24online appliance Select the button to cancel the current operation Specify name of the company under which the appliance is to be registered Specify complete company address and zip details Public Key Product ID Unique ID Contact Person Email ID Fax Register Cancel Company Nam...

Page 7: ...is properly defined or system won t be able to connect Internet 5 In order to enhance basic 24online setup with additional features and modules go to Help Register 24online Module License Click on the module name and specify the necessary information for registration 5 WHAT NEXT After successful registration 24online will display the About page with the registration details Congratulations This fi...

Page 8: ...otice to make changes in product design or specifications Information is subject to change without notice IMPORTANT NOTICE DISCLAIMER OF WARRANTY RESTRICTED RIGHTS Except as specified in this warranty all expressed or implied conditions representations and warranties including without limitation any implied warranty or merchantability fitness for a particular purpose non infringement or arising fr...

Reviews: