background image


5. DVRViewer APPLICATION AND CAMERA AIMING 


GETTING STARTED 

Insert the 247Security Inc. CD-ROM into your on-site laptop and install the DVRViewer application. Owners of our 
previous generation of digital surveillance systems (400Series DVR) will have our old DVR application installed, 
called DVR Client. Please ensure that the old DVR Client application is successfully uninstalled from the computer 
before proceeding to install the new DVRViewer.  

While DVRViewer is fully backwards-compatible with all 400Series and 500Series DVR systems, this universal 
compatibility does not extend from the old DVR Client. Having two unique instances of our applications installed, or, 
attempting to service your mDVR500 systems using the mDVR400-specific DVR Client, may cause a software 
conflict and interfere with accessing your DVRs for service. 

After the installation is completed, turn on your DVR and connect it to your laptop using the bundled Crossover 
Cable. When your DVR has completed its boot-up sequence, start your newly-installed DVRViewer application on 
your laptop.  


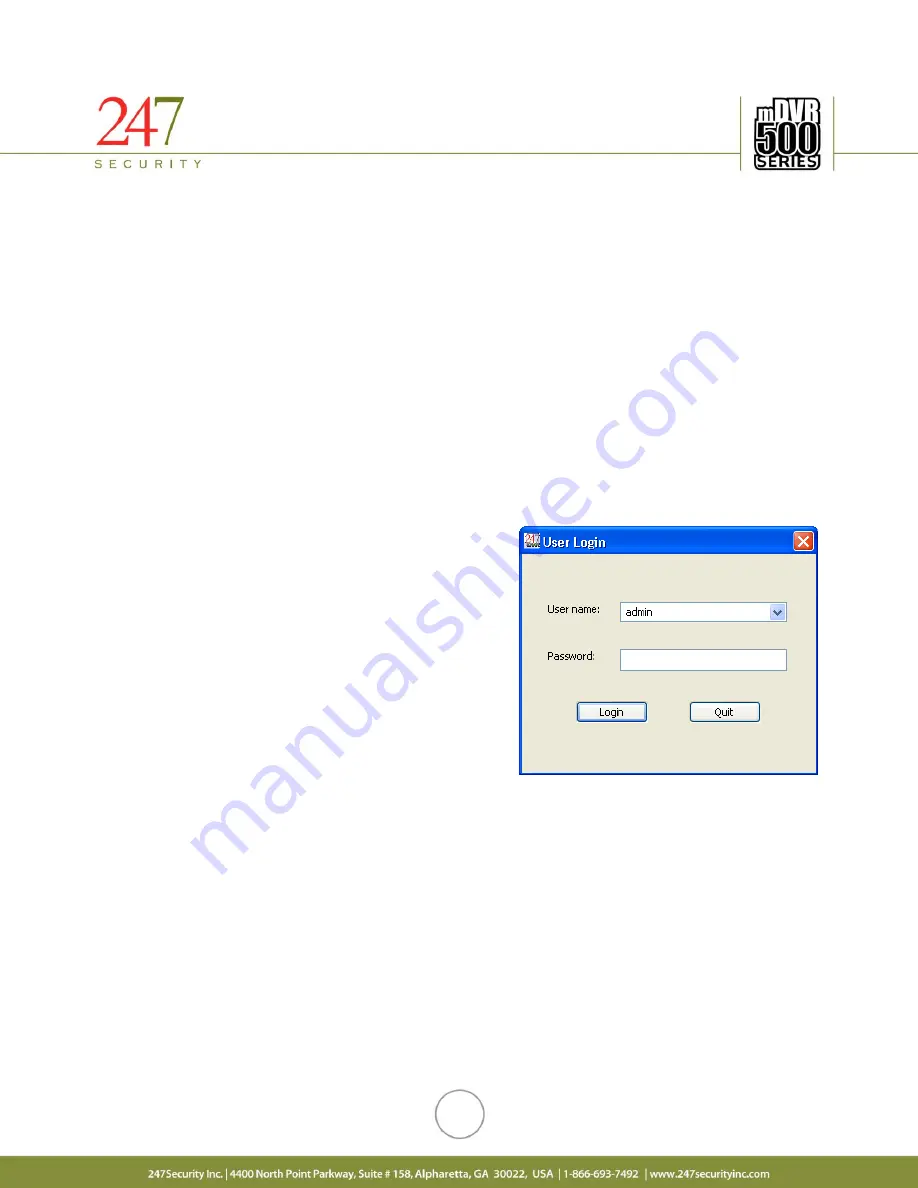
TO LOG INTO DVRViewer


You will be presented with the user login screen for DVRViewer. 
For the first time the application is started, it will use the 
proceeding de facto credentials: 

 
Username: 

admin


Password: 

247SECURITYINC 

 
Note: The User Name and Password fields are case-sensitive. If 
you lose or forget your password, please contact 247Security Inc. 
Technical Support at 1-866-693-7492 for assistance. 

Summary of Contents for mDVR 500 Series

Page 1: ...as depending on your order 3 One Camera Cable per Camera 4 Power cable 5 Digital I O cable 6 Event Marker 7 USB A to MiniB Cable 8 Ethernet Network Cable 9 RCA Adapter Optional equipment 1 GPS module...

Page 2: ...driver s mirror or other locations where moisture and possible tampering will be at a minimum CAMERAS When mounting the front camera ensure the camera is centered on the ceiling of the bus nearest to...

Page 3: ...lost POWER CABLE A three wire 12 feet long Power Cable is used for connecting the DVR directly to the battery power in the vehicle s electrical box The cable uses a large molded 2x2 Molex connector th...

Page 4: ...WIFI antenna NOTE AVAILABLE ON W MODEL ONLY FOR INTERNAL GPI O1 Supports three extra digital inputs 6 8 Requires additional GPIO cable not included C D C Communications Display Controller for future u...

Page 5: ...r Tasks on the left side and left mouse click 4 Right click mouse on Local Area Connection 5 Go to properties and left click mouse Screen will go blank for a few seconds 6 At this point a window appea...

Page 6: ...R is idling in Stand By mode It is not online or recording 2 0 15 The PWR power indicator will turn on while the IGN ignition indicator will flash repeatedly The DVR is now undergoing its boot sequenc...

Page 7: ...ances of our applications installed or attempting to service your mDVR500 systems using the mDVR400 specific DVR Client may cause a software conflict and interfere with accessing your DVRs for service...

Page 8: ...CAMERAS When connected DVRViewer will display a live video feed from the DVR allowing for the technician to adjust the cameras as necessary The number of simultaneous live camera feeds will depend on...

Page 9: ...of 150 seconds The DVR s shut down delay after the vehicle s ignition has been turned off adjusted to the default delay of 300 seconds 5 minutes The above parameters as well as additional options can...

Page 10: ...screen and the CONTINUE button to accept the requested changes Each individual camera channel can also be given a unique name to help identify cameras and their locations when multiple cameras are ins...

Page 11: ...to the DVR 5 Attach your portable television set to the RCA Adapter using a composite RCA video cable and adjust the camera as needed from the screen 6 Reverse the above steps to remove the RCA Adapt...

Reviews: