Chapter 4 Web Configurator
XGS4600 Series User’s Guide
57
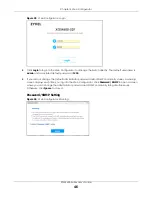
4.4.1 Change Your Password
After you log in for the first time, it is recommended you change the default administrator password.
Click
Management
>
Access Control
>
Logins
to display the next screen.
DHCP
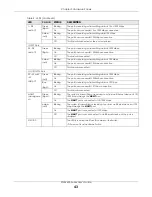
This link takes you to screens where you can configure the DHCP settings.
VRRP
This link takes you to screens where you can configure redundant virtual router for your
network.
Router Setup
This link takes you to a screen where you can enable Equal-Cost MultiPath (ECMP) routing
and set the criteria the Switch uses to determine the routing path for a packet.
ARP Setup
This link takes you to a screen where you can configure ARP learning mode on a per-port
basis and create static ARP entries which do not age out.
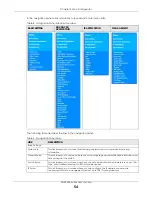
Management
Maintenance
This link takes you to screens where you can perform firmware and configuration file
maintenance as well as reboot the system.
Access Control
This link takes you to screens where you can change the system login password and configure
SNMP and remote management.
Diagnostic
This link takes you to screens where you can ping IP addresses, run traceroute, test ports.
System Log
This link takes you to a screen where you can view system logs.
Syslog Setup
This link takes you to a screen where you can setup system logs and a system log server.
Cluster
Management
This link takes you to a screen where you can configure clustering management and view its
status.
MAC Table
This link takes you to a screen where you can view the MAC address and VLAN ID of a device
attach to a port. You can also view what kind of MAC address it is.
IP Table
This link takes you to a screen where you can view the IP addresses and VLAN ID of a device
attached to a port.You can also view what kind of device it is.
ARP Table
This link takes you to a screen where you can view the MAC address – IP address resolution
table.
Routing Table
This link takes you to a screen where you can view the routing table.
Path MTU Table
This link takes you to a screen where you can view the IPv6 path MTU table.
Configure Clone
This link takes you to a screen where you can copy attributes of one port to other ports.
IPv6 Neighbor
Table
This link takes you to a screen where you can view the Switch’s IPv6 neighbor table.
Port Status
This link takes you to a screen where you can view the port statistics.
Service Register
This link takes you to a screen where you can view the status of your service registrations and
upgrade licenses.
Table 9 Navigation Panel Links (continued)
LINK
DESCRIPTION
Содержание XGS4600 Series
Страница 24: ...24 PART I User s Guide ...
Страница 44: ...44 PART II Technical Reference ...
Страница 180: ...Chapter 13 Spanning Tree Protocol XGS4600 Series User s Guide 180 Figure 145 MSTP and Legacy RSTP Network Example ...
Страница 189: ...Chapter 16 Mirroring XGS4600 Series User s Guide 189 Figure 150 Advanced Application Mirroring Standalone Mode ...
Страница 244: ...Chapter 22 Policy Rule XGS4600 Series User s Guide 244 Figure 189 Policy Example EXAMPLE ...
Страница 277: ...Chapter 25 Multicast XGS4600 Series User s Guide 277 Figure 215 Advanced Application Multicast MVR Standalone Mode ...
Страница 559: ...Chapter 59 Access Control XGS4600 Series User s Guide 559 Figure 460 Example Lock Denoting a Secure Connection EXAMPLE ...
Страница 586: ...Chapter 69 Configure Clone XGS4600 Series User s Guide 586 Figure 479 Management Configure Clone Standalone Mode ...
Страница 587: ...Chapter 69 Configure Clone XGS4600 Series User s Guide 587 Figure 480 Management Configure Clone Stacking Mode ...
Страница 594: ...Chapter 71 Port Status XGS4600 Series User s Guide 594 Figure 485 Management Port Status Port Details Standalone Mode ...
Страница 604: ...604 PART III Troubleshooting and Appendices ...

