Chapter 11 Trunks
UAG5100 User’s Guide
164
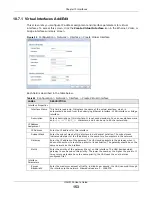
11.2.2 Configuring the System Default Trunk
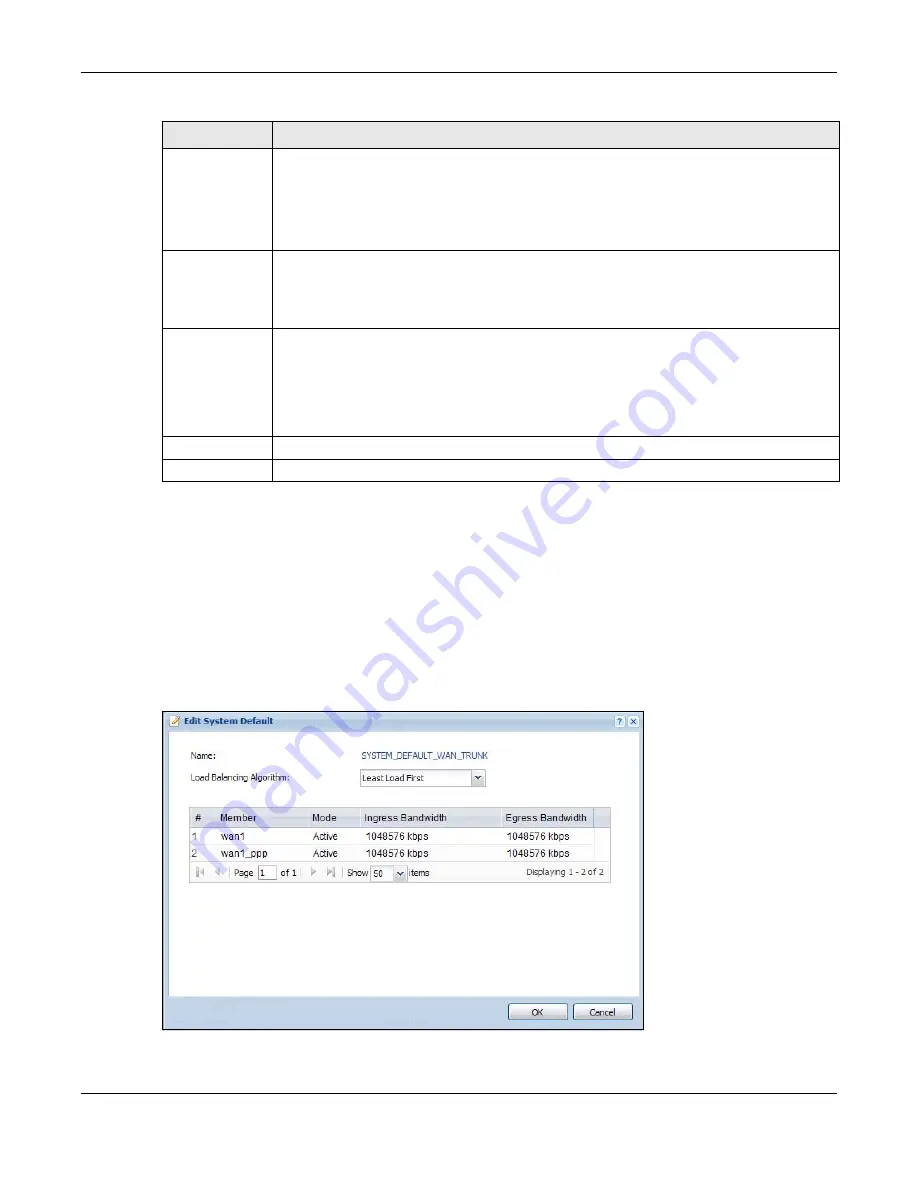
In the Configuration > Network > Interface > Trunk screen and the System Default section,
select the default trunk entry and click Edit to open the Edit System Default screen. Use this
screen to change the load balancing algorithm and view the bandwidth allocations for each member
interface.
Note: The available bandwidth is allocated to each member interface equally and is not
allowed to be changed for the default trunk.
Figure 102
Configuration > Network > Interface > Trunk > Edit (System Default)
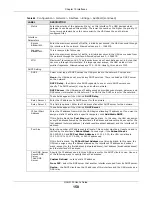
Egress
Bandwidth
This field displays with the least load first or spillover load balancing algorithm. It displays
the maximum number of kilobits of data the UAG is to send out through the interface per
second.
Note: You can configure the bandwidth of an interface in the corresponding interface edit
screen.
Total Bandwidth This field displays with the spillover load balancing algorithm. It displays the maximum
number of kilobits of data the UAG is to send out and allow to come in through the interface
per second.
You can configure the bandwidth of an interface in the corresponding interface edit screen.
Spillover
This field displays with the spillover load balancing algorithm. Specify the maximum
bandwidth of traffic in kilobits per second (1~1048576) to send out through the interface
before using another interface. When this spillover bandwidth limit is exceeded, the UAG
sends new session traffic through the next interface. The traffic of existing sessions still
goes through the interface on which they started.
The UAG uses the group member interfaces in the order that they are listed.
OK
Click OK to save your changes back to the UAG.
Cancel
Click Cancel to exit this screen without saving.
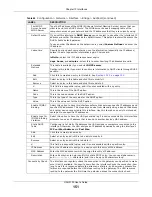
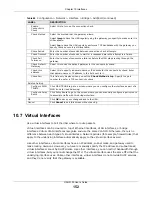
Table 71
Configuration > Network > Interface > Trunk > Add/Edit (continued)
LABEL
DESCRIPTION
Содержание UAG5100
Страница 42: ...Chapter 3 Printer Deployment UAG5100 User s Guide 42 ...
Страница 124: ...Chapter 10 Interfaces UAG5100 User s Guide 124 Figure 82 Configuration Network Interface Ethernet Edit External Type ...
Страница 125: ...Chapter 10 Interfaces UAG5100 User s Guide 125 Figure 83 Configuration Network Interface Ethernet Edit Internal Type ...
Страница 135: ...Chapter 10 Interfaces UAG5100 User s Guide 135 Figure 88 Configuration Network Interface PPP Add ...
Страница 213: ...Chapter 20 UPnP UAG5100 User s Guide 213 Figure 139 Network Connections My Network Places Properties Example ...
Страница 227: ...Chapter 24 Web Authentication UAG5100 User s Guide 227 Figure 152 Configuration Web Authentication Web Portal ...
Страница 228: ...Chapter 24 Web Authentication UAG5100 User s Guide 228 Figure 153 Configuration Web Authentication User Agreement ...
Страница 273: ...Chapter 26 Billing UAG5100 User s Guide 273 Figure 190 Configuration Billing Payment Service Custom Service ...
Страница 292: ...Chapter 30 IPSec VPN UAG5100 User s Guide 292 Figure 201 Configuration VPN IPSec VPN VPN Connection Add Edit ...
Страница 298: ...Chapter 30 IPSec VPN UAG5100 User s Guide 298 Figure 203 Configuration VPN IPSec VPN VPN Gateway Add Edit ...
Страница 314: ...Chapter 30 IPSec VPN UAG5100 User s Guide 314 ...
Страница 387: ...Chapter 39 Certificates UAG5100 User s Guide 387 Figure 256 Configuration Object Certificate Trusted Certificates Edit ...
Страница 436: ...Chapter 42 Log and Report UAG5100 User s Guide 436 Figure 302 Configuration Log Report Email Daily Report ...
Страница 440: ...Chapter 42 Log and Report UAG5100 User s Guide 440 Figure 304 Configuration Log Report Log Settings Edit System Log ...
Страница 445: ...Chapter 42 Log and Report UAG5100 User s Guide 445 Figure 306 Configuration Log Report Log Settings Edit Remote Server ...
Страница 491: ...Appendix A Legal Information UAG5100 User s Guide 491 Environmental Product Declaration ...

