Chapter 15 The Certificates Screens
User’s Guide
185
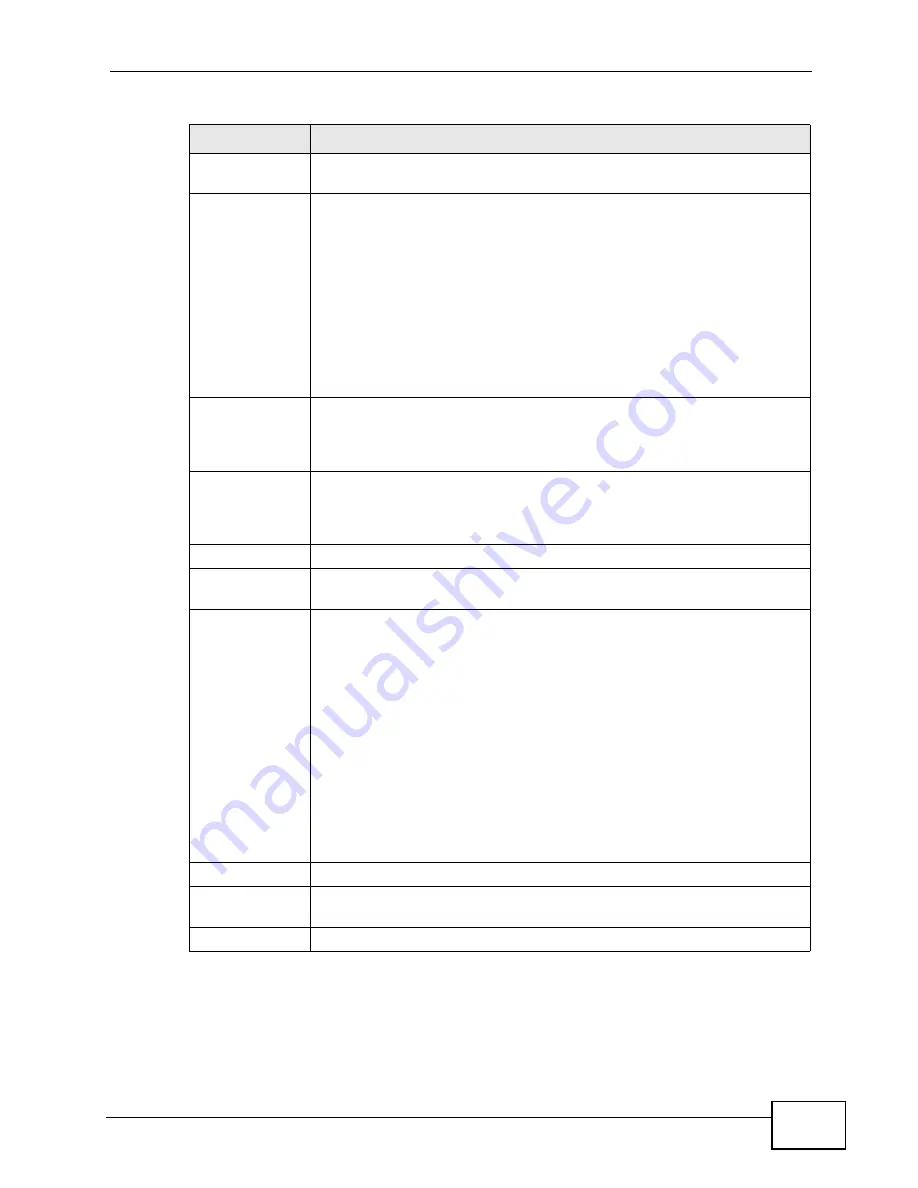
Name
This field displays the name used to identify this certificate. It is
recommended that you give each certificate a unique name.
Type
This field displays what kind of certificate this is.
REQ represents a certification request and is not yet a valid certificate.
Send a certification request to a certification authority, which then
issues a certificate. Use the My Certificate Import screen to import
the certificate and replace the request.
SELF represents a self-signed certificate.
*SELF represents the default self-signed certificate which signs the
imported remote host certificates.
CERT represents a certificate issued by a certification authority.
Subject
This field displays identifying information about the certificate’s owner,
such as CN (Common Name), OU (Organizational Unit or department),
O (Organization or company) and C (Country). It is recommended that
each certificate have unique subject information.
Issuer
This field displays identifying information about the certificate’s issuing
certification authority, such as a common name, organizational unit or
department, organization or company and country. With self-signed
certificates, this is the same information as in the Subject field.
Valid From
This field displays the date that the certificate becomes applicable.
Valid To
This field displays the date that the certificate expires. The text displays
in red and includes an Expired! message if the certificate has expired.
Action
Click the Edit icon to open a screen with an in-depth list of information
about the certificate.
Click the Export icon to save a copy of the certificate without its private
key. Browse to the location you want to use and click Save.
Click the Delete icon to remove a certificate. A window displays asking
you to confirm that you want to delete the certificate. Subsequent
certificates move up by one when you take this action.
The WiMAX Device keeps all of your certificates unless you specifically
delete them. Uploading new firmware or default configuration file does
not delete your certificates.
You cannot delete certificates that any of the WiMAX Device’s features
are configured to use.
Import
Click to a certificate into the WiMAX Device.
Create
Click to go to the screen where you can have the WiMAX Device
generate a certificate or a certification request.
Refresh
Click to display the current validity status of the certificates.
Table 71
TOOLS > Certificates > My Certificates (continued)
LABEL
DESCRIPTION
Содержание MAX-306
Страница 2: ......
Страница 8: ...Safety Warnings User s Guide 8...
Страница 10: ...Contents Overview User s Guide 10...
Страница 30: ...30...
Страница 36: ...Chapter 1 Getting Started User s Guide 36...
Страница 46: ...Chapter 2 Introducing the Web Configurator User s Guide 46...
Страница 64: ...Chapter 4 VoIP Connection Wizard User s Guide 64...
Страница 65: ...65 PART II Basic Screens The Main Screen 40 The Setup Screens 67...
Страница 66: ...66...
Страница 74: ...74...
Страница 88: ...Chapter 6 The LAN Configuration Screens User s Guide 88...
Страница 112: ...Chapter 8 The Wi Fi Configuration Screens User s Guide 112...
Страница 134: ...Chapter 10 The NAT Configuration Screens User s Guide 134...
Страница 145: ...145 PART IV Voice Screens The Service Configuration Screens 147 The Phone Screens 165 The Phone Book Screens 175...
Страница 146: ...146...
Страница 164: ...Chapter 12 The Service Configuration Screens User s Guide 164...
Страница 180: ...Chapter 14 The Phone Book Screens User s Guide 180...
Страница 182: ...182...
Страница 202: ...Chapter 15 The Certificates Screens User s Guide 202...
Страница 212: ...Chapter 16 The Firewall Screens User s Guide 212...
Страница 226: ...Chapter 18 The Remote Management Screens User s Guide 226...
Страница 242: ...Chapter 19 The Logs Screens User s Guide 242...
Страница 252: ...Chapter 20 The UPnP Screen User s Guide 252...
Страница 265: ...265 PART VI Troubleshooting and Specifications Troubleshooting 267 Product Specifications 275...
Страница 266: ...266...
Страница 274: ...Chapter 22 Troubleshooting User s Guide 274...
Страница 278: ...278...
Страница 310: ...Appendix B Setting Up Your Computer s IP Address User s Guide 310...
Страница 336: ...Appendix D Pop up Windows JavaScripts and Java Permissions User s Guide 336...
Страница 380: ...Appendix F Importing Certificates User s Guide 380...
Страница 382: ...Appendix G SIP Passthrough User s Guide 382...
Страница 398: ...Appendix J Customer Support User s Guide 398...
Страница 405: ...Index User s Guide 405...


