Chapter 4 The Web Configurator
GS2210 Series User’s Guide
40
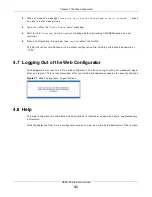
Click t he Sa v e link in t he upper r ight hand cor ner of t he w eb configurat or t o save your
configurat ion t o nonvolat ile m em or y. Nonvolat ile m em or y r efer s t o t he Swit ch’s st orage t hat
r em ains even if t he Sw it ch’s pow er is t ur ned off.
Not e: Use t he Sa v e link w hen you ar e done w it h a configurat ion session.
4.5 Switch Lockout
You could block your self ( and all ot her s) fr om m anaging t he Swit ch if you do one of t he following:
1
Delet e t he m anagem ent VLAN ( default is VLAN 1) .
2
Delet e all por t - based VLANs w it h t he CPU por t as a m em ber. The “ CPU por t ” is t he m anagem ent
por t of t he Sw it ch.
3
Filt er all t raffic t o t he CPU port .
4
Disable all por t s.
5
Misconfigur e t he t ext configurat ion file.
6
For get t he passwor d and/ or I P addr ess.
7
Pr event all ser vices fr om accessing t he Swit ch.
8
Change a ser vice por t num ber but for get it .
Not e: Be car eful not t o lock your self and ot her s out of t he Sw it ch.
4.6 Resetting the Switch
I f you lock your self ( and ot her s) fr om t he Sw it ch or forget t he adm inist rat or passw or d, you w ill
need t o r eload t he fact or y- default configurat ion file or r eset t he Swit ch back t o t he fact or y default s.
4.6.1 Reload the Configuration File
Uploading t he fact or y- default configurat ion file r eplaces t he cur r ent configurat ion file w it h t he
fact or y- default configurat ion file. This m eans t hat you w ill lose all pr evious configurat ions and t he
speed of t he console por t w ill be reset t o t he default of 9600 bps w it h 8 dat a bit s, no par it y, one
st op bit and flow cont r ol set t o none. The passw or d w ill also be r eset t o “ 1234” and t he I P address
t o 192.168.1.1.
To upload t he configurat ion file, do t he follow ing:
1
Connect t o t he console por t using a com put er wit h t er m inal em ulat ion soft war e.
2
Disconnect and r econnect t he Swit ch’s pow er t o begin a session. When you r econnect t he Swit ch’s
pow er, you w ill see t he init ial scr een.
Содержание GS2210-24
Страница 18: ...18 PART I User s Guide ...
Страница 33: ...33 PART II Technical Reference ...
Страница 110: ...Chapter 9 VLAN GS2210 Series User s Guide 110 Figure 83 Advanced Application VLAN Port Based VLAN Setup All Connected ...
Страница 111: ...Chapter 9 VLAN GS2210 Series User s Guide 111 Figure 84 Advanced Application VLAN Port Based VLAN Setup Port Isolation ...
Страница 178: ...Chapter 21 Classifier GS2210 Series User s Guide 178 Figure 127 Classifier Example ...
Страница 405: ...Chapter 51 Configure Clone GS2210 Series User s Guide 405 Figure 286 Management Configure Clone ...
Страница 433: ...Appendix D Legal Information GS2210 Series User s Guide 433 Environmental Product Declaration ...


