AAM1212 User’s Guide
36
Chapter 2 Removing and Installing the AAM
2.2 Installing the AAM
1
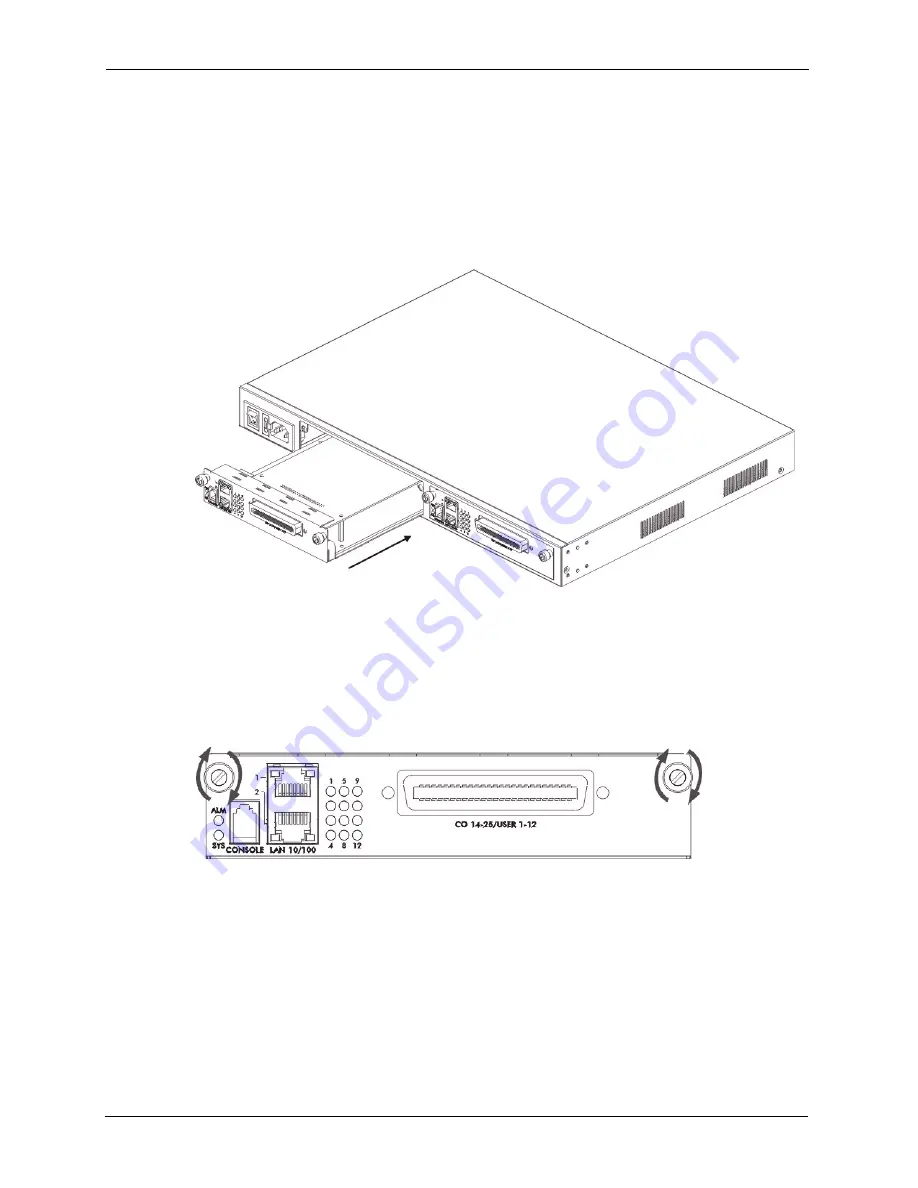
Hold the AAM with the network ports facing you and insert it into an empty slot located
on the front of the IES-1000 as shown next.
2
Push the AAM in the IES-1000 until the front of the AAM is flush with the IES-1000
chassis.
Figure 5
Installing the AAM in the IES-1000 Chassis
Note:
The front of the AAM must be flush with the front of the IES-1000 after you
install a AAM or it will not work!
3
Secure the AAM to the chassis by turning the two screws on the front of the AAM
clockwise as shown next.
Figure 6
Tighten Module Screws
Содержание AAM1212
Страница 1: ...AAM1212 ADSL2 Module over POTS in the IP DSLAM User s Guide Version 3 50 9 2005 ...
Страница 23: ...AAM1212 User s Guide 22 ...
Страница 27: ...AAM1212 User s Guide 26 ...
Страница 35: ...AAM1212 User s Guide 34 Chapter 1 Getting to Know Your AAM1212 ...
Страница 49: ...AAM1212 User s Guide 48 Chapter 3 Hardware Connections ...
Страница 55: ...AAM1212 User s Guide 54 Chapter 4 Web Configurator Introduction ...
Страница 63: ...AAM1212 User s Guide 62 Chapter 5 Initial Configuration ...
Страница 71: ...AAM1212 User s Guide 70 Chapter 6 Home and Port Statistics Screens ...
Страница 83: ...AAM1212 User s Guide 82 Chapter 7 Basic Setting Screens ...
Страница 111: ...AAM1212 User s Guide 110 Chapter 8 ADSL Port Setup ...
Страница 143: ...AAM1212 User s Guide 142 Chapter 18 Syslog ...
Страница 151: ...AAM1212 User s Guide 150 Chapter 19 Access Control ...
Страница 163: ...AAM1212 User s Guide 162 Chapter 22 Diagnostic ...
Страница 181: ...AAM1212 User s Guide 180 Chapter 25 Commands Overview ...
Страница 249: ...AAM1212 User s Guide 248 Chapter 29 IP Commands ...
Страница 261: ...AAM1212 User s Guide 260 Chapter 30 Statistics Commands ...
Страница 277: ...AAM1212 User s Guide 276 Chapter 33 Troubleshooting ...
Страница 283: ...AAM1212 User s Guide 282 Virtual Circuit Topology ...


