Zte BLADE A602, Руководство пользователя
Скачайте бесплатно руководство пользователя для смартфона ZTE BLADE A602 с нашего сайта. Получите доступ ко всей необходимой информации для эффективного использования устройства. Посетите manualshive.com, чтобы загрузить руководство с инструкциями по эксплуатации. Наслаждайтесь удобством и функциональностью смартфона ZTE BLADE A602!
Поделиться
Скачать


Отзывы:
Нет отзывов
Похожие инструкции для BLADE A602

KX-TDA50
Бренд: Panasonic Страницы: 48

6755i
Бренд: Aastra Страницы: 2

6755i
Бренд: Aastra Страницы: 2

IS330.1
Бренд: i.safe MOBILE Страницы: 21

OBi1062
Бренд: Obihai Страницы: 12

OBi1062
Бренд: Obihai Страницы: 220

Yealink SIP-T48G
Бренд: Yealink Страницы: 2

Yealink SIP-T48G
Бренд: Yealink Страницы: 4

Yealink SIP-T46G
Бренд: Yealink Страницы: 38
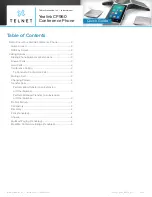
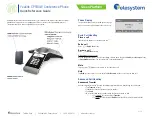
One Talk CP960
Бренд: Yealink Страницы: 4
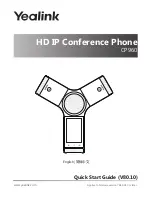
One Talk CP960
Бренд: Yealink Страницы: 20

One Talk CP960
Бренд: Yealink Страницы: 255

Yealink SIP-T48G
Бренд: Yealink Страницы: 105

T48G
Бренд: Yealink Страницы: 13

CP860 SERIES
Бренд: Yealink Страницы: 77
CP860 SERIES
Бренд: Yealink Страницы: 5
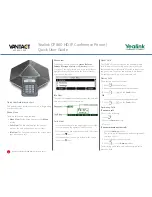
CP930W Telesystem
Бренд: Yealink Страницы: 2

T57W
Бренд: Yealink Страницы: 6


