background image

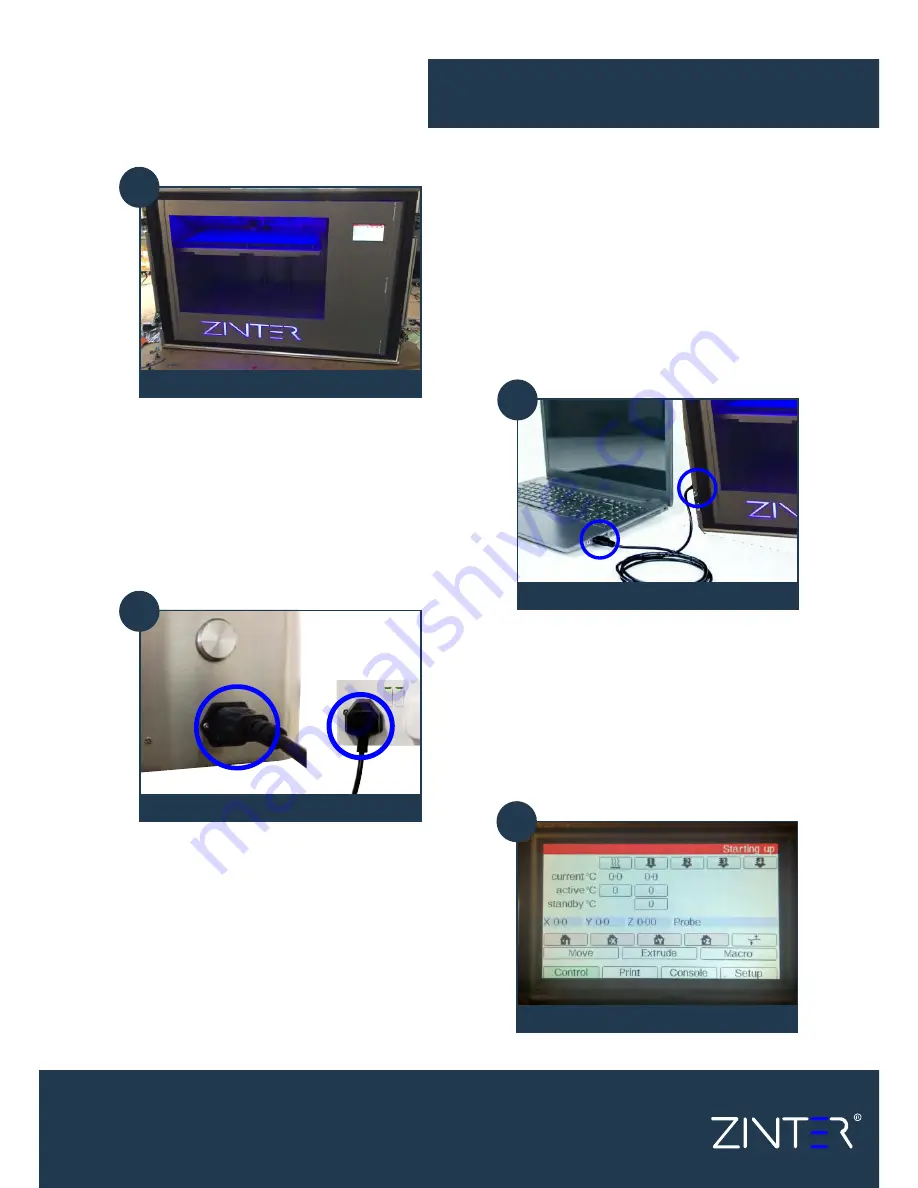
Place on Zinter

®

 on a firm surface

Connect the Power Cord

Connect USB or Network Cable

Power On

4

3

1

2

get connected

Page 17

Excellence in Additive Manufacture

Содержание Freedom

Страница 1: ...Zinter Freedom Instruction Manual V1 01 October 2016 Zinter Special Pro jects ...

Страница 2: ...Page 20 Your First Print Page 21 Pause or stop a print Page 22 Removing the print from the bed Page 23 Filament Reference Guide Page 24 FAQ s Page 26 Touchscreen Menu s Page 27 Web Portal Menu s Page 28 Looking after your Zinter Freedom Page 29 Certificate of Conformity Page 30 Thank you for choosing Zinter Special Projects and welcome to the Zinter family This quick start guide is intended to get...

Страница 3: ...cations firmware and associated guides software and manuals without notice Images used are for guidance only and may differ from your machine This document is protected by copyright All rights reserved Its use disclosure and possession are restricted by an agreement with Zinter Ltd per software copyright No part of this document may be photocopied re produced or translated into another language wi...

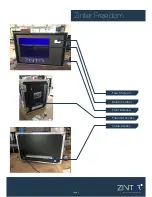
Страница 4: ...Zinter Freedom Build Chamber Filament Access Front Release Touch Screen Cable Access Page 3 Excellence in Additive Manufacture ...

Страница 5: ...se clothing Keep fingers away from moving parts Tools and parts should be stored at a suitable height away from small children Tools should be used in conjunction with safety gloves and glasses The printer must not be exposed to water or rain or damage may occur Do not shut down the Zinter Freedom or pull out the USB cable when loading a digital model or the model data may be lost Your Zinter Free...

Страница 6: ...eople care should be taken when lifting or moving i i Unbox your Zinter Freedom and retain all packaging for future use Ensure all foam inserts locking screws and transport cableties are removed from inside the printer Ensure you have all of the following parts before proceeding 1 x Zinter Freedom Printer 1 x USB lead 1 x Power Lead 1 x Glass Plate 1 x Simplify3D Download Pack 1 x Instruction Manu...

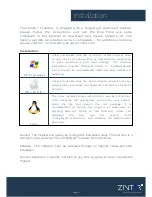
Страница 7: ...roduct Unzip and double click the exe file to install You may need to right click and choose Run as Administrator depending on your permissions and trust settings The windows installation requires Microsoft Visual C Redistributable which should be automatically detected and installed if necessary Unzip and double click the app bundle to install Enter your administrator username and password and fo...

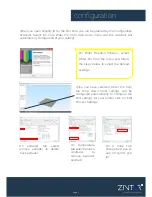
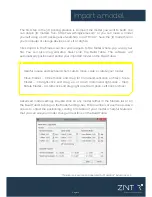
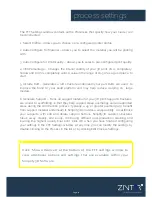
Страница 8: ... the menu and follow the steps below to adjust the default settings i Page 7 Excellence in Additive Manufacture Once you have selected Zinter Pro from the drop down most settings will be configured automatically to configure the final settings for your printer click on Edit Process Settings On extruder tab select remove extruder to delete back extruder On temperature tab select remove controller t...

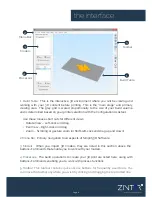
Страница 9: ...ck and drag Pan View Right click and drag Zoom Scrolling or gesture zoom or Shift left click and drag up and down 2 Menu Bar Primary navigation to all aspects of Simplify3D Software 3 Models When you import 3D models they are listed in this section above the buttons commands that enable you to work with your models 4 Processes The build operations to create your 3D print are listed here along with...

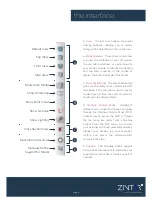
Страница 10: ... of the model C Cross Section Tool The Cross Section tool gives you the ability to cut a model in half to look inside it The tool allows you to cut your model from all three axes and can also be accessed in the Preview Mode D Machine Control Panel Simplify3D Software can connect to virtually any printer through the Machine Control Panel MCP Another way to access the MCP is through the top menu bar...

Страница 11: ...ll automatically position and centre your imported model on the Build Table i Advanced model settings Double click on any model either in the Models list or on the Build Table to bring up the Model Settings box Enter numbers or use the up down arrows to adjust the positioning scaling or rotation of your model A helpful feature is that you can see your model change in real time on the Build Table H...

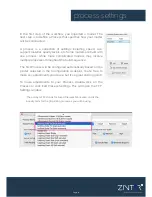
Страница 12: ...tiple processes throughout the build sequence The first Process will be configured automatically based on the printer selected in the Configuration Assistant You re free to make any adjustments you desire but it s a great starting point To make adjustments to your Process double click on the Process or click Edit Process Settings This will open the FFF Settings window The acronym FFF stands for Fu...

Страница 13: ...urns on support material for your 3D print Support structures are similar to scaffolding in that they help support steep overhangs and unsupported areas during the construction process Typically a 45 or greater overhang will benefit from support material underneath it Simplify3D provides a unique ability to customize your supports with add and delete support buttons Simplify3D support structures b...

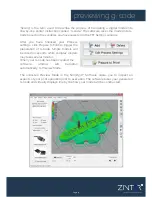
Страница 14: ...are to Print to trigger the preparation of G Code Simple models will be sliced in seconds while complex models may take several minutes When your G Code has been created the software window will transition automatically to Preview Mode The animated Preview Mode in the Simpify3D Software allows you to inspect all aspects of your print operation prior to execution The software takes your generated G...

Страница 15: ... Single Layer Only Together these selections will allow you to view a single layer at a time Build Statistics are located in the top left corner of the Preview window and include three estimates 1 Build Time how long it would take for your print to finish 2 Filament Length how much filament it will take to build your model 3 Material Cost an approximation of how much it will cost to make your part...

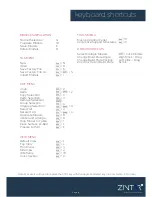
Страница 16: ...iew Top View Front View Side View Wireframe Cross Section MODEL MANIPULATION FILE MENU EDIT MENU VIEW MENU TOOLS MENU Machine Control Panel Customize Support Structures OTHER SHORTCUTS Select Multiple Models Change Build Plate Angle Change Build Plate Position Zoom In Out on Build Plate N O S S I Z Z C V G G A A D R T L E 1 2 3 4 W K P U Click Models Right Click Drag Left Click Drag Scroll Note Ma...

Страница 17: ...Excellence in Additive Manufacture ...

Страница 18: ...Place on Zinter on a firm surface Connect the Power Cord Connect USB or Network Cable Power On 4 3 1 2 get connected Page 17 Excellence in Additive Manufacture ...

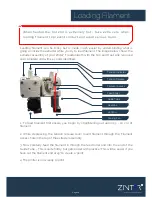
Страница 19: ...with key parts identified 1 To load filament first ensure you begin by straightening out approx 5 10 cm of filament 2 While depressing the tension release lever insert filament through the Filament Access hole in the top of the extruder assembly 3 Now carefully feed the filament in through the feed roller and into the end of the Guide Tube This is quite fiddly but gets easier with practice This wi...

Страница 20: ... the cover plate You can now remove the tension release arm by sliding it towards you taking care not to loose the nut bolt and spring that set your feed roller tension With the tension arm removed you can now remove the heatsink guide tube and hot end from the extruder assembly by sliding carefully towards you Be extremely careful if the hot end is still warm Take note of the orientation of the g...

Страница 21: ...s these allow the bed to be tilted in any angle to level the bed Bed levelling is crucial to great prints and is worth spending a little time getting right Begin by turning the 1 Begin by pressing the home all or home z buttons on the touch screen 2 Once the printer has homed the axis press the bed levelling button 3 The printer will automatically take a number of readings 4 Bed levelling compensa...

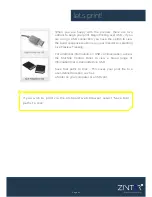
Страница 22: ...lecting Live Preview Tracking For additional information on USB communication access the Machine Control Panel to view a broad range of information that is transmitted via USB Save Tool paths to Disk This saves your print file to a user defined location such as a folder on your computer or an SD card If you wish to print via the on board web browser select Save tool paths to disk i Excellence in A...

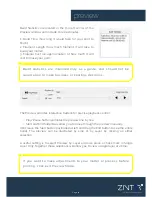
Страница 23: ...the print The Extruder will remain at heat and the bed will move away from the nozzle You can the restart the print by clicking the print button again One the print is paused a cancel print option appears to stop the print if needed Printing via Touch Screen Standalone During the Print you can click the pause button within the Print Status tab at any time to pause the print he Extruder will remain...

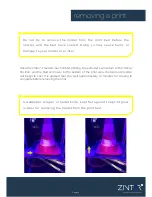
Страница 24: ...the bed have cooled Doing so may cause burns or damage to your model or printer i Once the Zinter Freedom has finished printing the extruder s will return to the Home Position and the Bed will lower to the bottom of the print area the bed and nozzles will begin to cool It is advised that you wait approximately 10 minutes for cooling to complete before removing the print Page 23 Excellence in Addit...

Страница 25: ...s carry a guide temperature on the box you can adjust the print temperature within your slicing software More abrasive filaments such as XT CF20 Carbon Fibre and some metallic filaments Brassfill for example will wear your print nozzle much quicker that plastic filaments This will become apparent through reduced quality prints particularly where fine detail is needed Hardened steel nozzles can be ...

Страница 26: ...ly adding new colours to our range and the full list is available through the online store at www zinter com Excellence in Additive Manufacture Not all filaments are currently available in 3mm diameter check our online store for availability Page 25 ...

Страница 27: ...lies You do not have to purchase your supplies from us though we would love it if you did however the results of using cheap imported filament in any 3D printer are well documented on line We would recommend only sourcing quality filament through a reputable supplier we cannot accept any warranty claims arising from the use of filament not approved for use in our machines What colours of filament ...

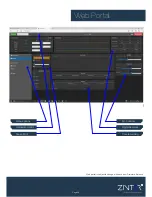
Страница 28: ...to change with each new Firmware Release Excellence in Additive Manufacture Heatsink Heater Controls Hot End Autobed level Macros Heatsink Home Axis Heatsink Print speed File Browser Heatsink Fan speed control Keyboard Setup options Page 27 ...

Страница 29: ... is subject to change with each new Firmware Release Excellence in Additive Manufacture Page 28 Heatsink Fan Controls Autobed level Heatsink Home Axis Time remaining Digital Readout Pause Print Menu options Upload and print ...

Страница 30: ...reedom More abrasive filaments such as XT CF20 Carbon Fibre and some metallic filaments Brassfill for example will wear your print nozzle much quicker that plastic filaments This will become apparent through reduced quality prints particularly where fine detail is needed Print Bed Your Zinter Freedom has a removable glass print surface always check this plate for chips cracks or damage at the star...

Страница 31: ...mpliance with the essential requirements of the following EU directives Machinery Directive 2006 42 EC Electromagnetic Compatibilty Directive 2004 108 EC Low Voltage directive 2006 95 EC RoHS 2 Directive 2011 65 EU and further conform with the following EU Harmonised standards EN 953 1997 A1 2009 EN 60204 1 2006 A1 2009 EN 61000 6 3 2007 A1 2011 EN 61000 6 1 2007 The technical documentation is kep...

Страница 32: ...ww zinter com P 0844 409 7976 E sales zinter com http www zinter com P 0844 409 7976 E support zinter com https ioncore zendesk com Spares and Accessories Warranty Support Excellence in Additive Manufacture Copyright 2016 Zinter Limited All rights reserved ...

Отзывы: