Installation & Operation • 7
INSTALLATION & OPERATION
After setting the first case, the next case is slid into position and bolted to the first case using four 3/8" bolts that are provided. Begin tightening
the bolts at the top rear, working down the back of the case and up the front, making sure that the front seams are flush. Cases are not
designed to be pulled together using the joining bolts.
Alignment holes are located in the lower steel end frames. These are located 7" in from the joining holes.
Once the cases have been caulked and slid together, start the joining bolts, but do not tighten them. Slide the center extrusion (T-strip) between
the end mullions
. Begin tightening the bolts at the top rear, working down the back of the case and up the front,
making sure that the front seams are flush. Cases are not designed to be pulled together using the joining bolts.
Drain Line
The drain is located at the center of the case in the floor pan. The drain can be reached by removing the coil covers and then tipping the fan
plenum towards the doors. The 1" PVC drain outlet is located at the center front of the case behind the kick plate.
The drain exits the case in the center. The bases are designed for lateral runs of drain pipe to pass through and the drain pipe must be installed
in this area.
. There is no room in front of the base for drain pipe because the kick plate installs directly to the front
of the bases.
Install the tee to the outlet pipe and a drain trap to the tee. Plug the open end of the tee using the clean-out plug supplied with the drain trap
kit. The tee, drain trap and plug are supplied with the case. The drain trap must be level. The drain trap should be primed with water after
installation. The drain line must be pitched away from the case enough to insure proper drainage. Consult your local codes for minimum
requirements.
Condensate Evaporation System
Zero Zone remote cases can be equipped with an automatic condensate evaporation system. The system uses a pump and drain pan located
behind the kick plate and a condensate evaporator pan mounted on the top of the case.
Condensate water and any liquid spilled in the case drains out into the drain pan. The pump is equipped with a float that turns the pump on
when there is a sufficient liquid level. Liquid is pumped through a plastic hose through a check valve and into the condensate evaporation
pan. The evaporation pan is equipped with a heater and a float switch to turn on when the heater is submerged in liquid. When the heater is
energized, the pan will be extremely hot and should not be touched. The pump and condensate pan should be cleaned regularly. Any spilled
product should be cleaned to prevent odors.
Trim
The cases are supplied with a 3" protective bumper. Each case has its own bumper assembly including end caps. The case was shipped with
the bumper support and snap track installed on the front of the case. The bumper may need trimming before snapping it onto the snap track.
Full height (top) trim is provided to hide the door hardware located on the top exterior of the case. The top trim is factory-installed. Joint splices
are shipped loose to be installed on-site at the upper case joints.
Kick Plates
Each case is shipped with a front kick plate. Cases with end panels receive 1 side kick plate per end. Cases that join together get a kick plate
splice.
Front and side kick plates are attached to the case bases using Tinnerman clips. The flange on the front kick plate faces forward and is at the
top. The screw (supplied) goes through the kick plate and into the Tinnerman clip.
There is a natural gap between the top of the kick plate and the underside of the case that allows 50 CFM of air return per door. If more return
air is required, contact the factory to order optional louvered kick plates.
Содержание CRYSTAL MERCHANDISER
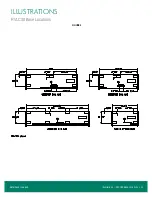
Страница 23: ...Illustrations RVLC30 Base Locations 21 Illustrations Figure 4 RVLC30 Base Locations Refer back to page 5...
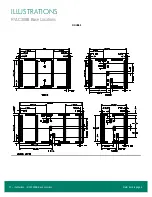
Страница 24: ...22 Illustrations RVLC30BB Base Locations Illustrations Figure 5 RVLC30BB Base Locations Refer back to page 5...
Страница 25: ...Illustrations Case Squareness 23 Illustrations Figure 6 Case Squareness Refer back to page 5...
Страница 26: ...24 Illustrations Shim Placement Illustrations Figure 7 Shim Placement Refer back to page 5...
Страница 27: ...Illustrations Shim Orientation 25 Illustrations Figure 8 Shim Orientation Refer back to page 5...
Страница 29: ...Illustrations Spacer Block 27 Illustrations Figure 10 Spacer Block Refer back to page 6...
Страница 34: ...32 Illustrations Drain Line Illustrations Figure 15 Drain Line Refer back to page 7...
Страница 38: ...36 Illustrations Electrical Box Illustrations Figure 19 Electrical Box Refer back to page 11...


